Making a Beer Caddy with a Laser Cutter

Tools & Materials
Beer Caddy Digital Design FIle
Project Description
How can we create a beer caddy using a laser cutter and finger joints?
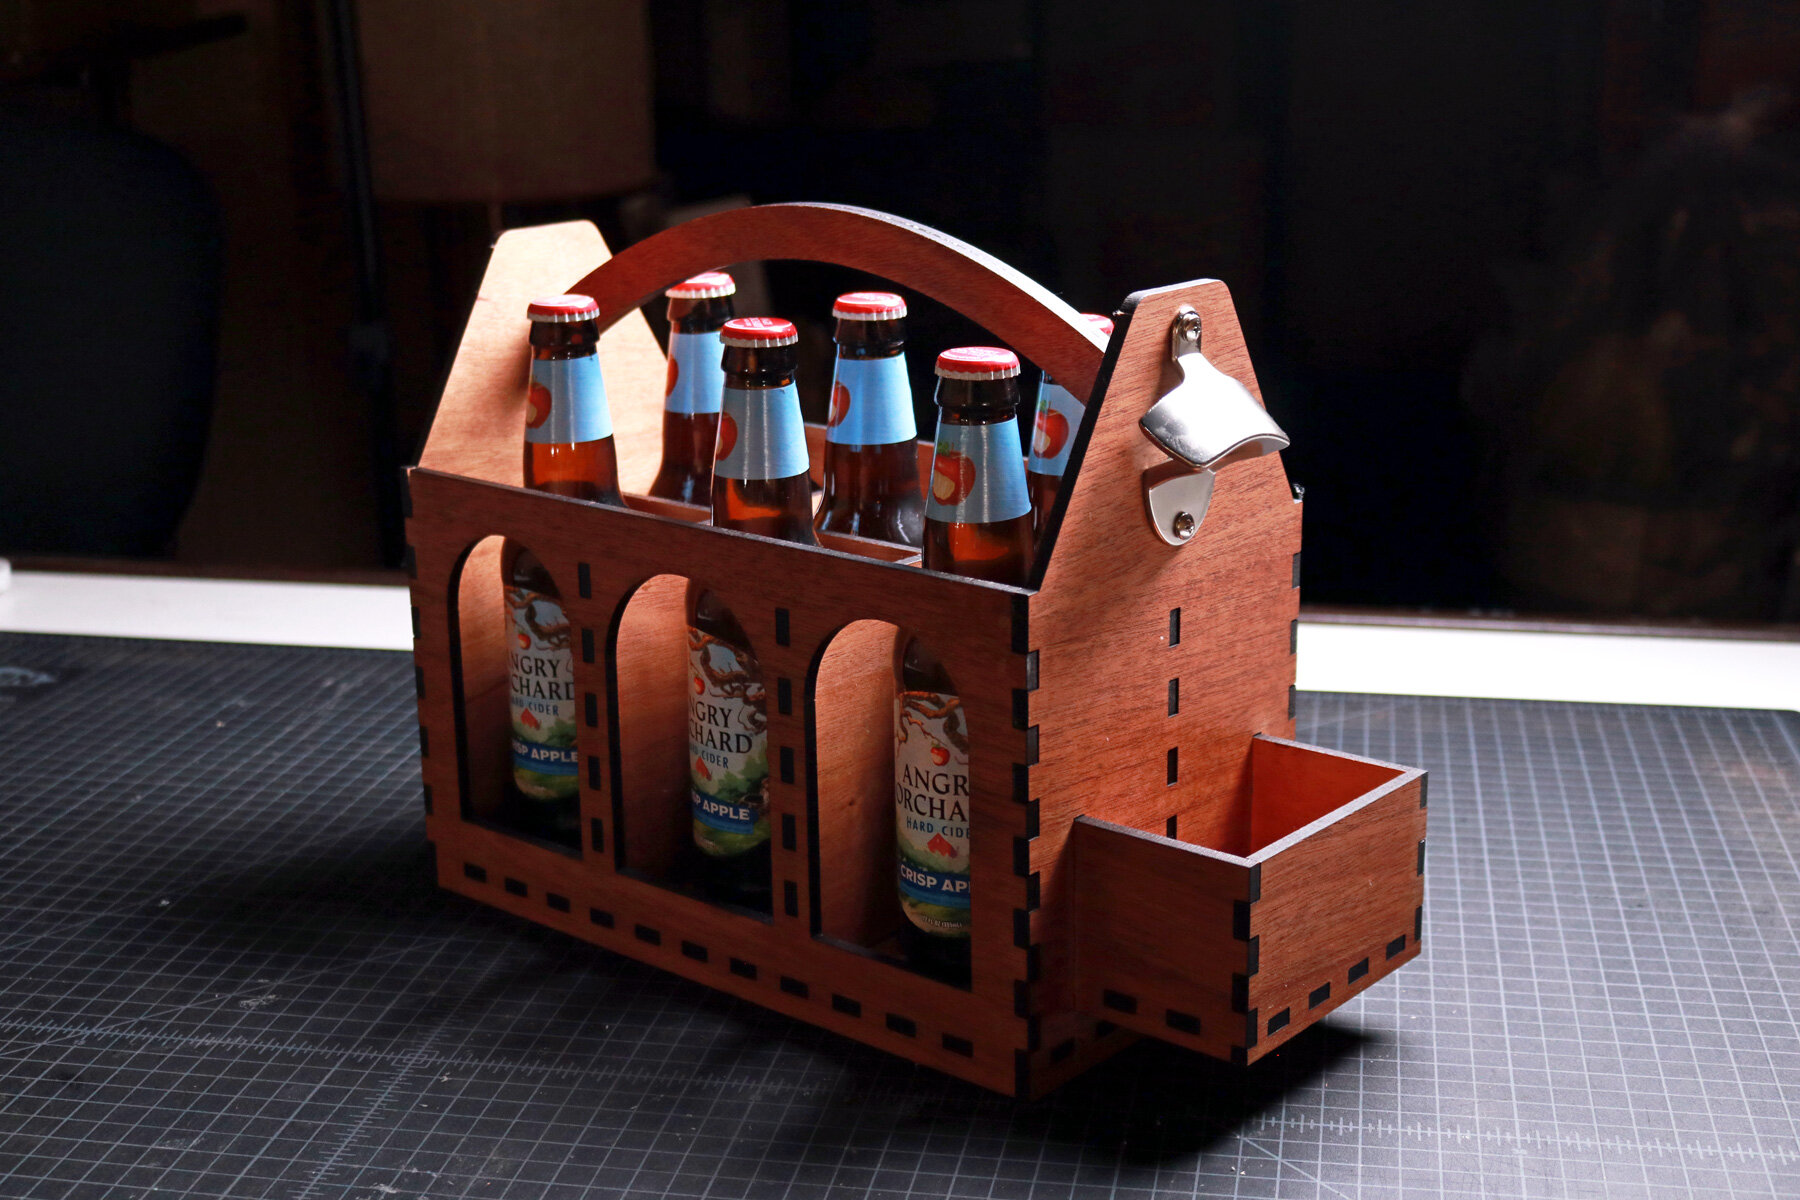
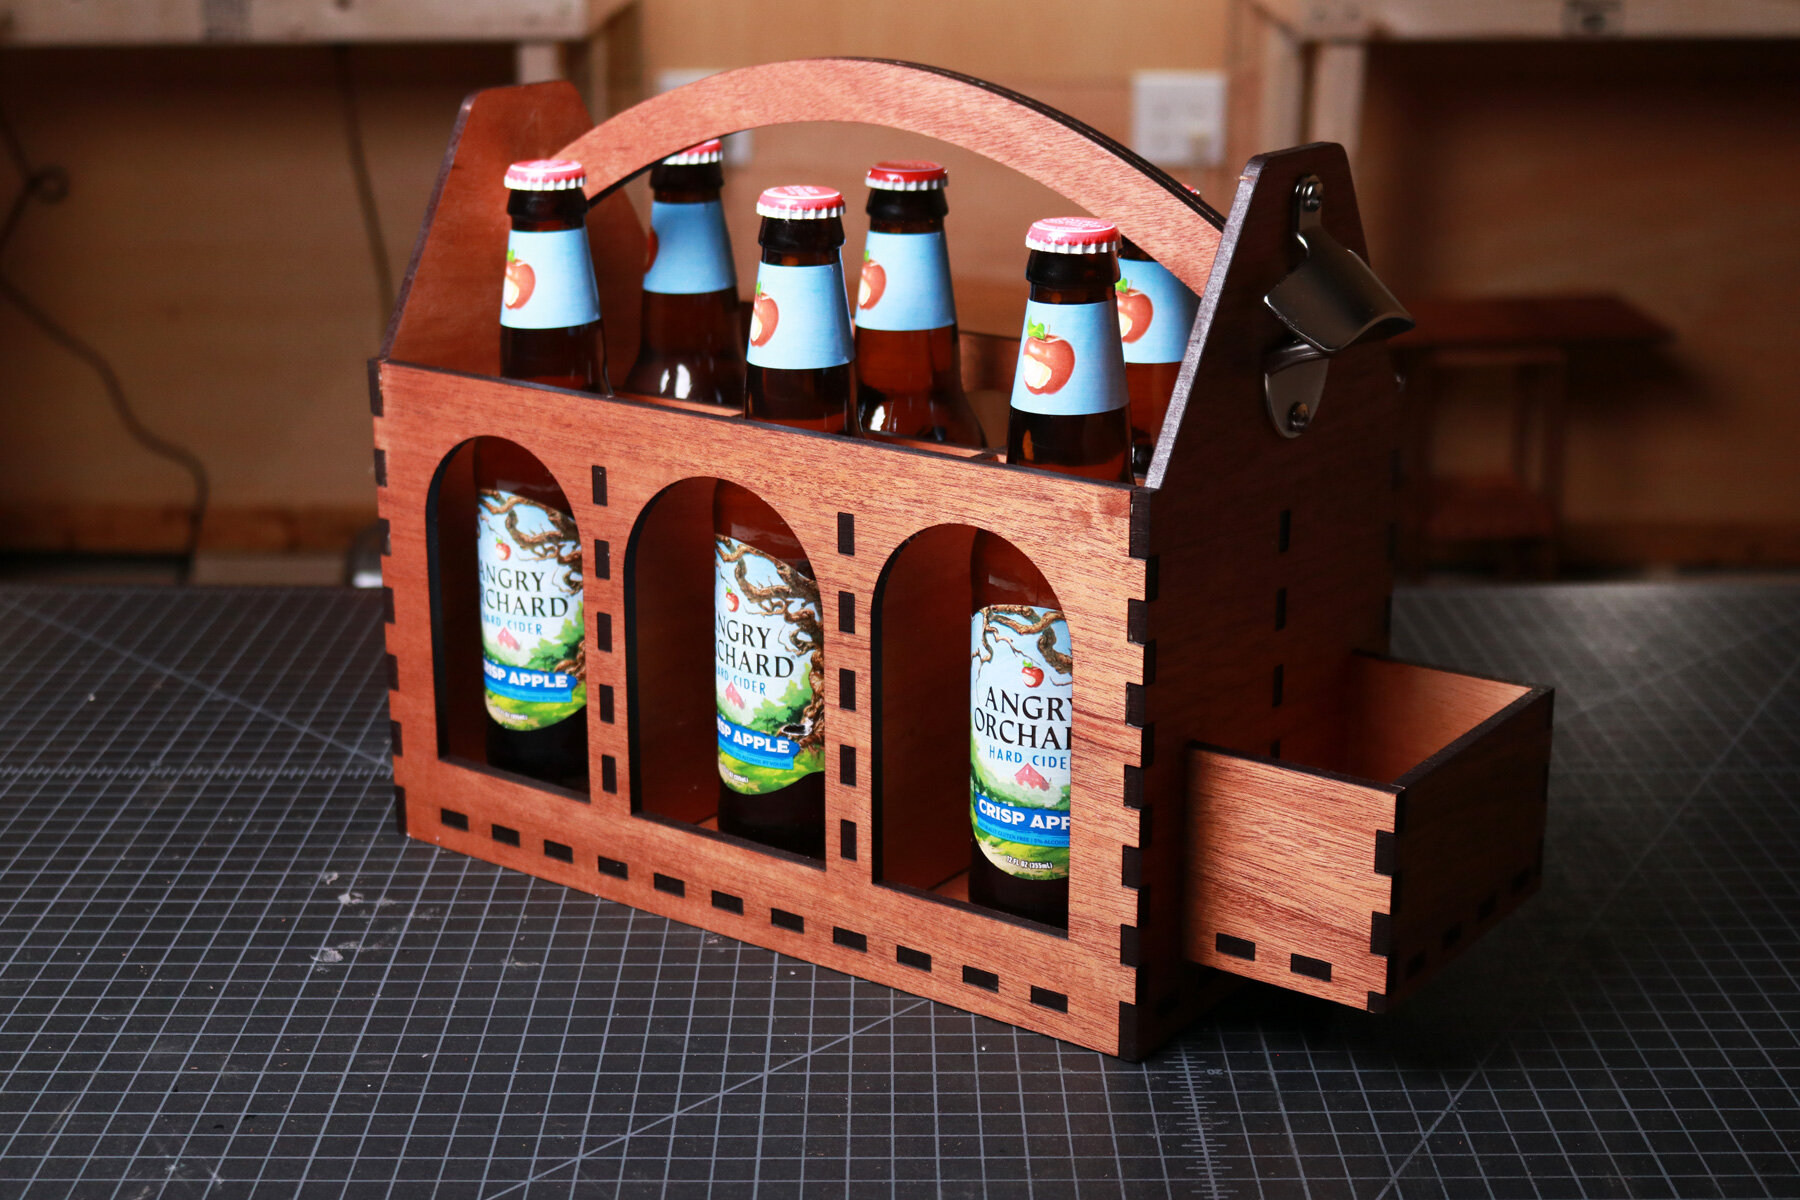
A popular gift idea that beer lovers would enjoy is a custom beer caddy with a bottle opener and cap catcher. Designing and making one using only a laser cutter and finger joints is like creating a custom 3D puzzle because every piece needs to perfectly slot into one another to create the proper rigidity for the final product to hold a 6 pack of beer bottles.
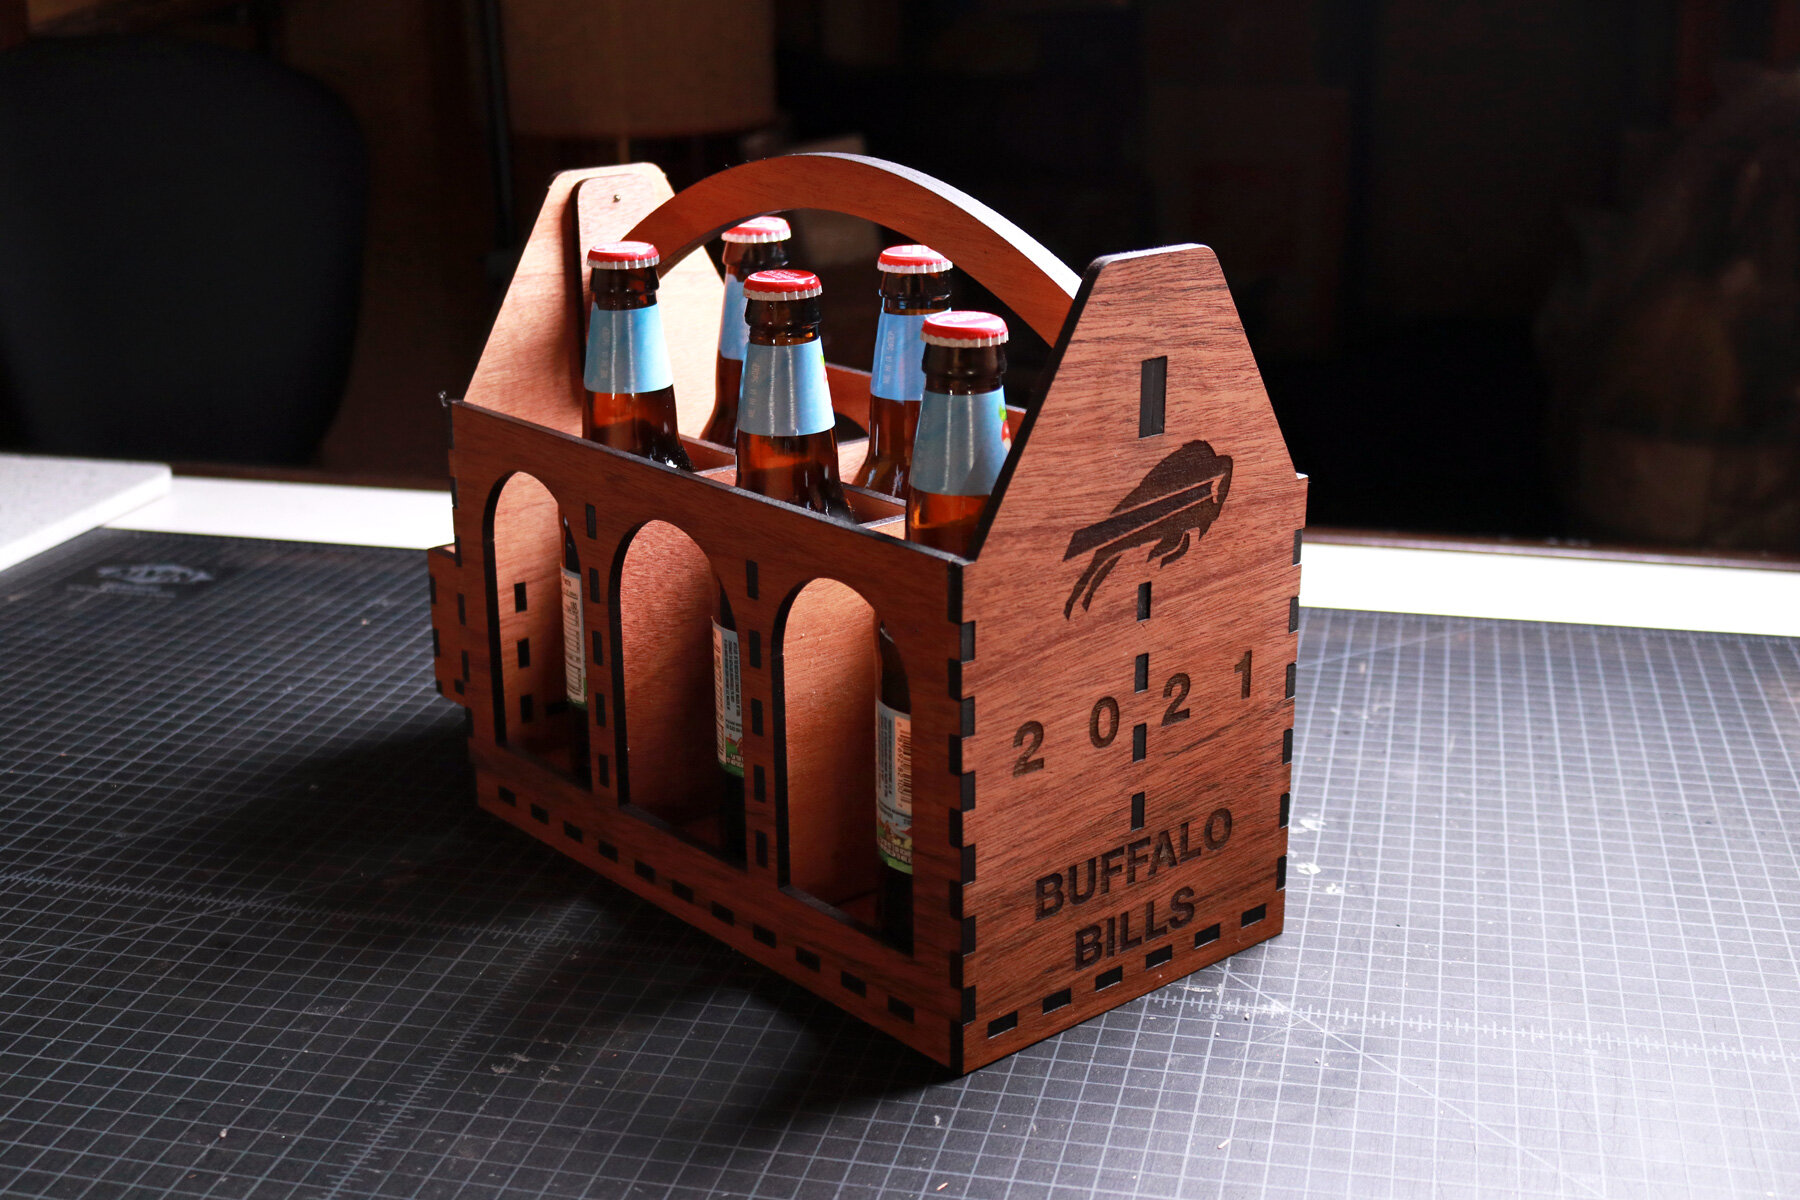
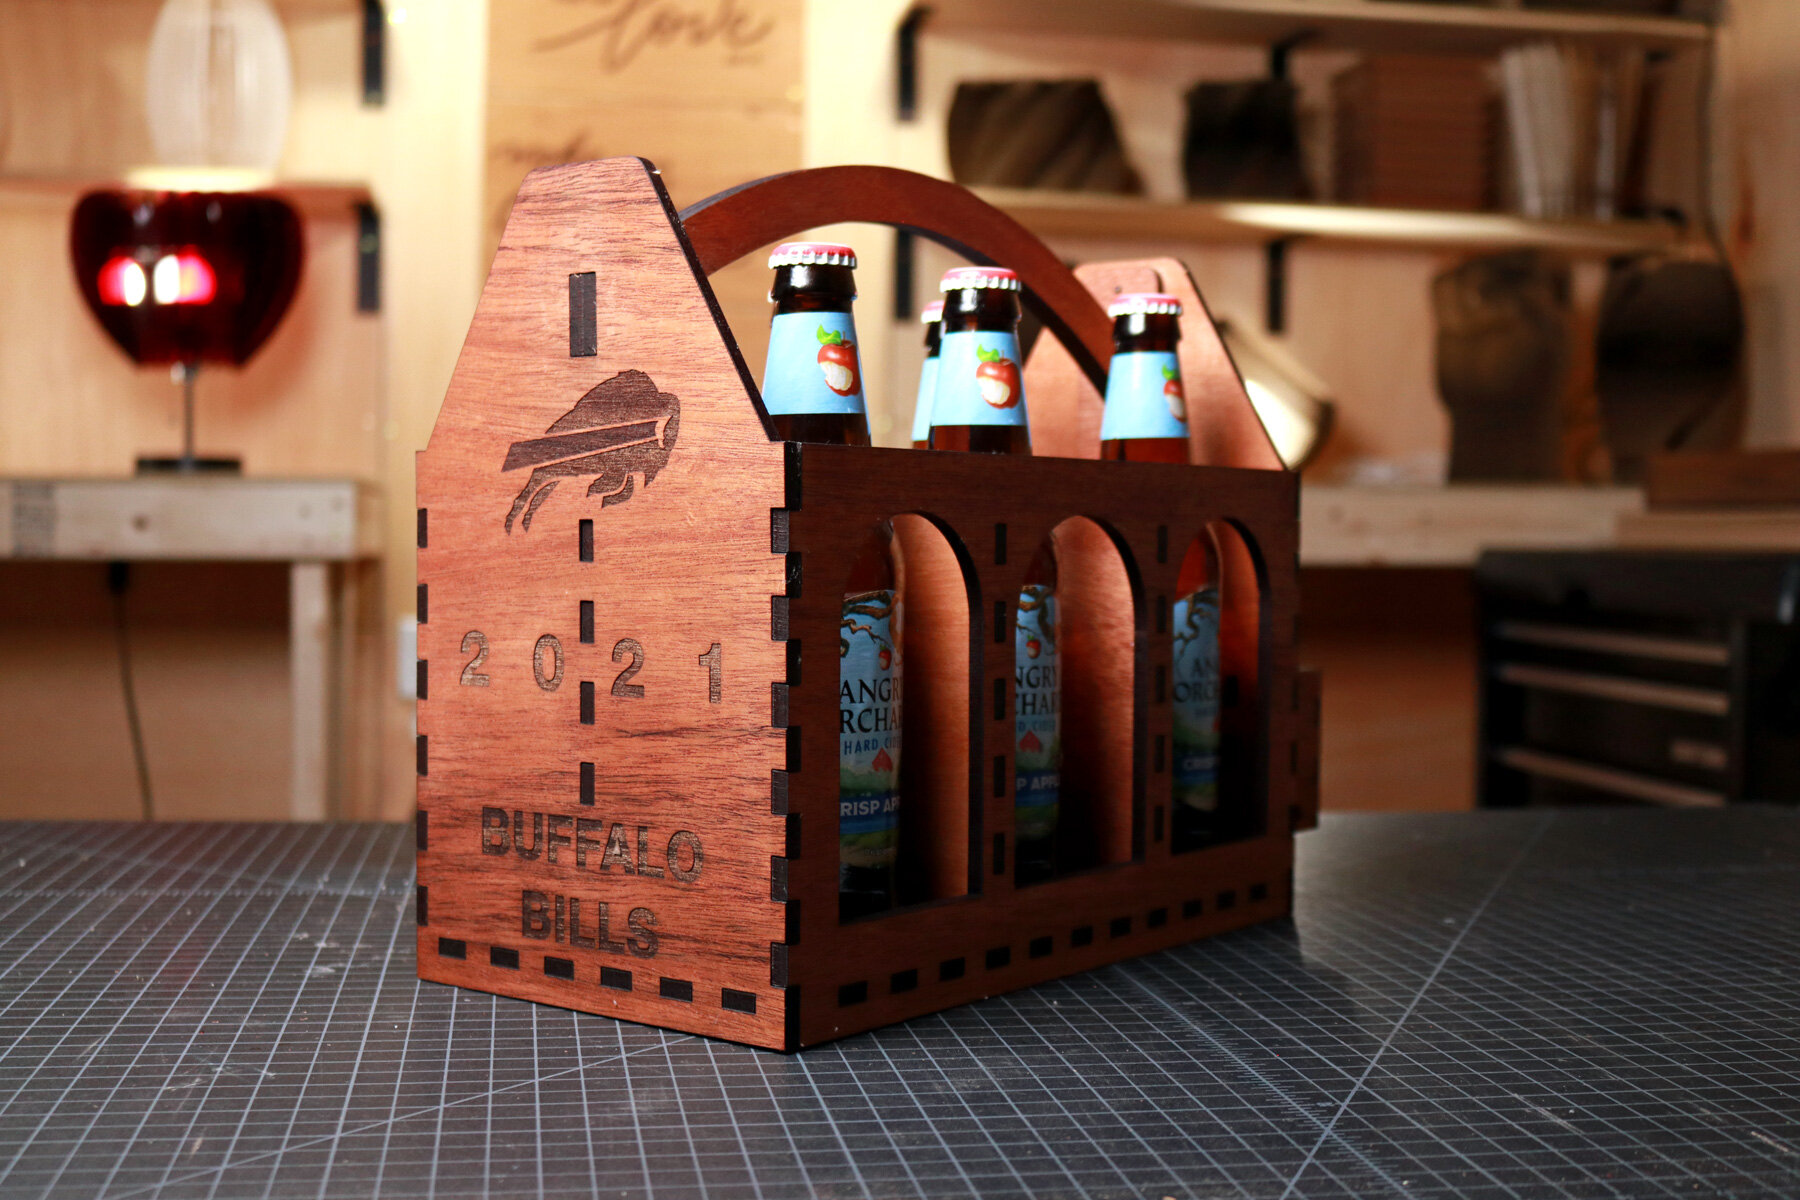
The challenging part of this project is figuring out the assembly process and the order in which every piece needs to come together. Each component serves a specific function and add to the stability of the final product. One side of the beer caddy will have a small box attached under a bottle opener so that all caps are easily caught and held in one place. There’s an opportunity on the other side of the beer caddy to engrave a custom image and phrase to personalize the beer caddy for the recipient.
Process
Using a software called Rhinoceros, I started by drawing the overall width and height of the project, which came out to roughly 6 inches deep by 12 inches wide by 7 inches tall. When these overall dimensions were drawn, I began sketching the rough shape of the side panels that would taper to create a triangular top. Then, I designed the finger joints and slots of every panel to be inserted and wood glued into place.
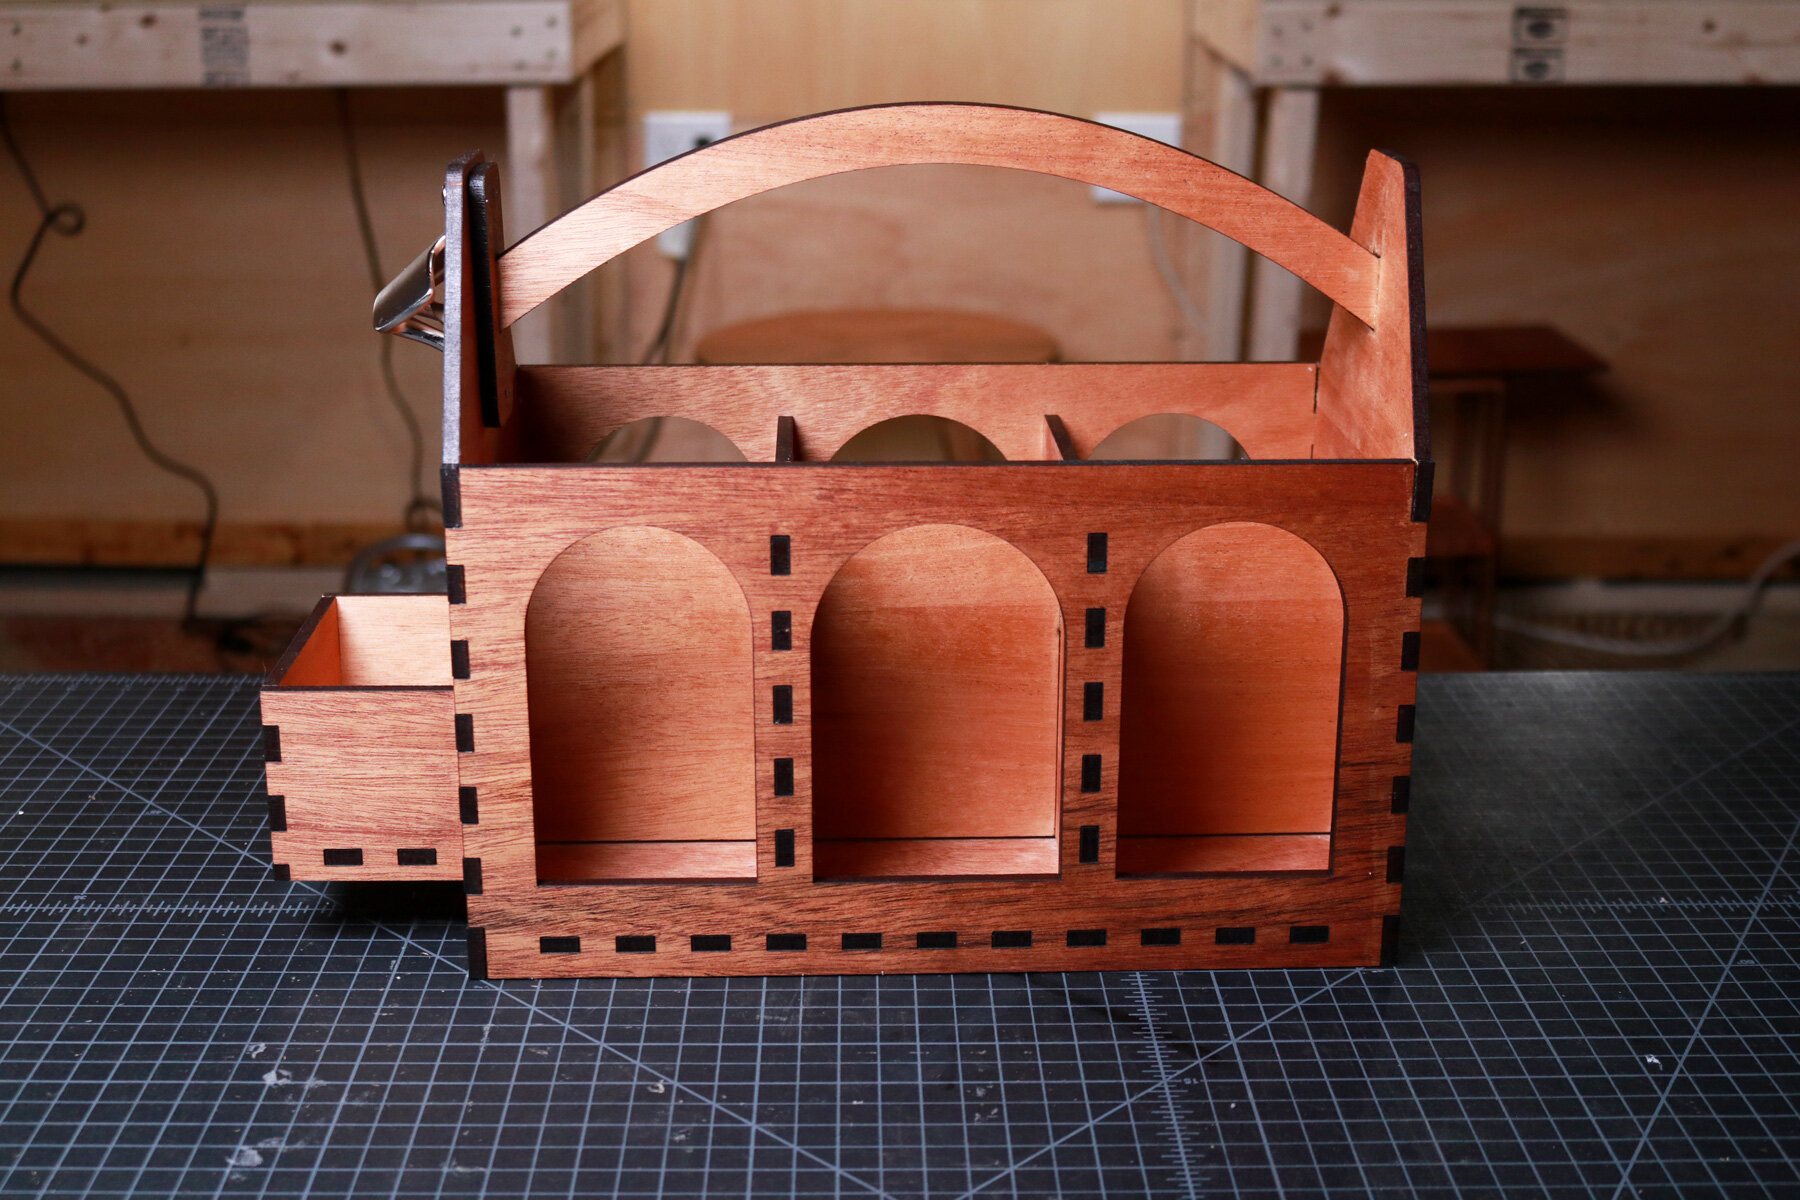
When the panels and floor were designed, I moved onto cutting out voids from the front and back panels. These voids would cut down on the weight of the beer caddy and also create a beautiful aesthetic that showcases the labels of the drinks being placed inside of each slot. After that, I moved onto designing the dividers that are slotted into one another and finger jointed to the front and back panels.
Then, I designed the curved wood handle that would span from one side panel to the other as well as the bottle opener backing and the cap catcher tray. Once the 2 dimensional drawings of every piece was complete, I developed a 3D model to double check that they would all slot into one another as planned. I continued refining the design of every piece based on what I found through the 3D modeling process.
When the design was complete, I began the process of laser cutting every piece. I covered the mahogany plywood with paper masking tape to protect it from any burns and chars. Once all of the pieces were cut, I removed the masking and organized the pieces in the order that they would be assembled. Starting with the interior divider panels, I wood glued the slots of both shorter pieces into the slots of the longer one. Then, I installed it onto the back panel of the beer caddy along with the floor.
After that, I glued the finger joints of the divider to the slots of the front panel and hammered it into place. Then, I installed one side panel and hammered the assembly together. Next, I inserted one end of the wood handle into one side panel’s slot and glued it into place. This allowed me to align the finger joints of the entire assembly with the other side panel and hammer it into place. I assembled the cap catcher, hammered it into place, and installed the bottle opener above it. To finish the project, I applied an oil finish.