Engraving an iPhone 12 Pro Max Photo with a Glowforge

Tools & Materials
Project Description
How can we take, edit, and engrave a photo with an iPhone 12 Pro and a Glowforge Laser Cutter?
A key feature with new smartphones are the camera improvements including its smart editing capabilities. Most phones are able to take a portrait photo, control depth of field, modify backgrounds behind subjects, and adjust lighting. Similarly, laser cutters are able to identify contrast in photographs and easily engrave it into any laser safe material.
Using my new iPhone 12 Pro Max, my goal with this project is to explore the process of taking and modifying a portrait to engrave onto a sheet of plywood with my laser cutter. All of the photo editing will be done with my phone and uploaded directly to my Glowforge’s interface where I’ll select and modify some settings and engrave the a portrait of my dog.
Process
The photograph was taken during a partly cloudy day where I sat on my floor and called Lady over to me. We sat together by a large window that receives a lot of natural light. The cloudy day created an even and soft light on her fur. At first, she was intimidated by the iPhone 12 Pro Max, but after petting her a few times, she was at ease and ready for the photoshoot.
Using portrait mode on the iPhone, I locked the camera’s focus and brightness on her head by tapping my finger and holding it down on the screen. Then, I swiped up to let more light into the lens and brighten the photo or down to do the opposite. When I found the right settings, I started taking multiple photographs. The key here is to take more than you think you need because you can always select the best ones later, but it’s tough to come back and take more photographs.
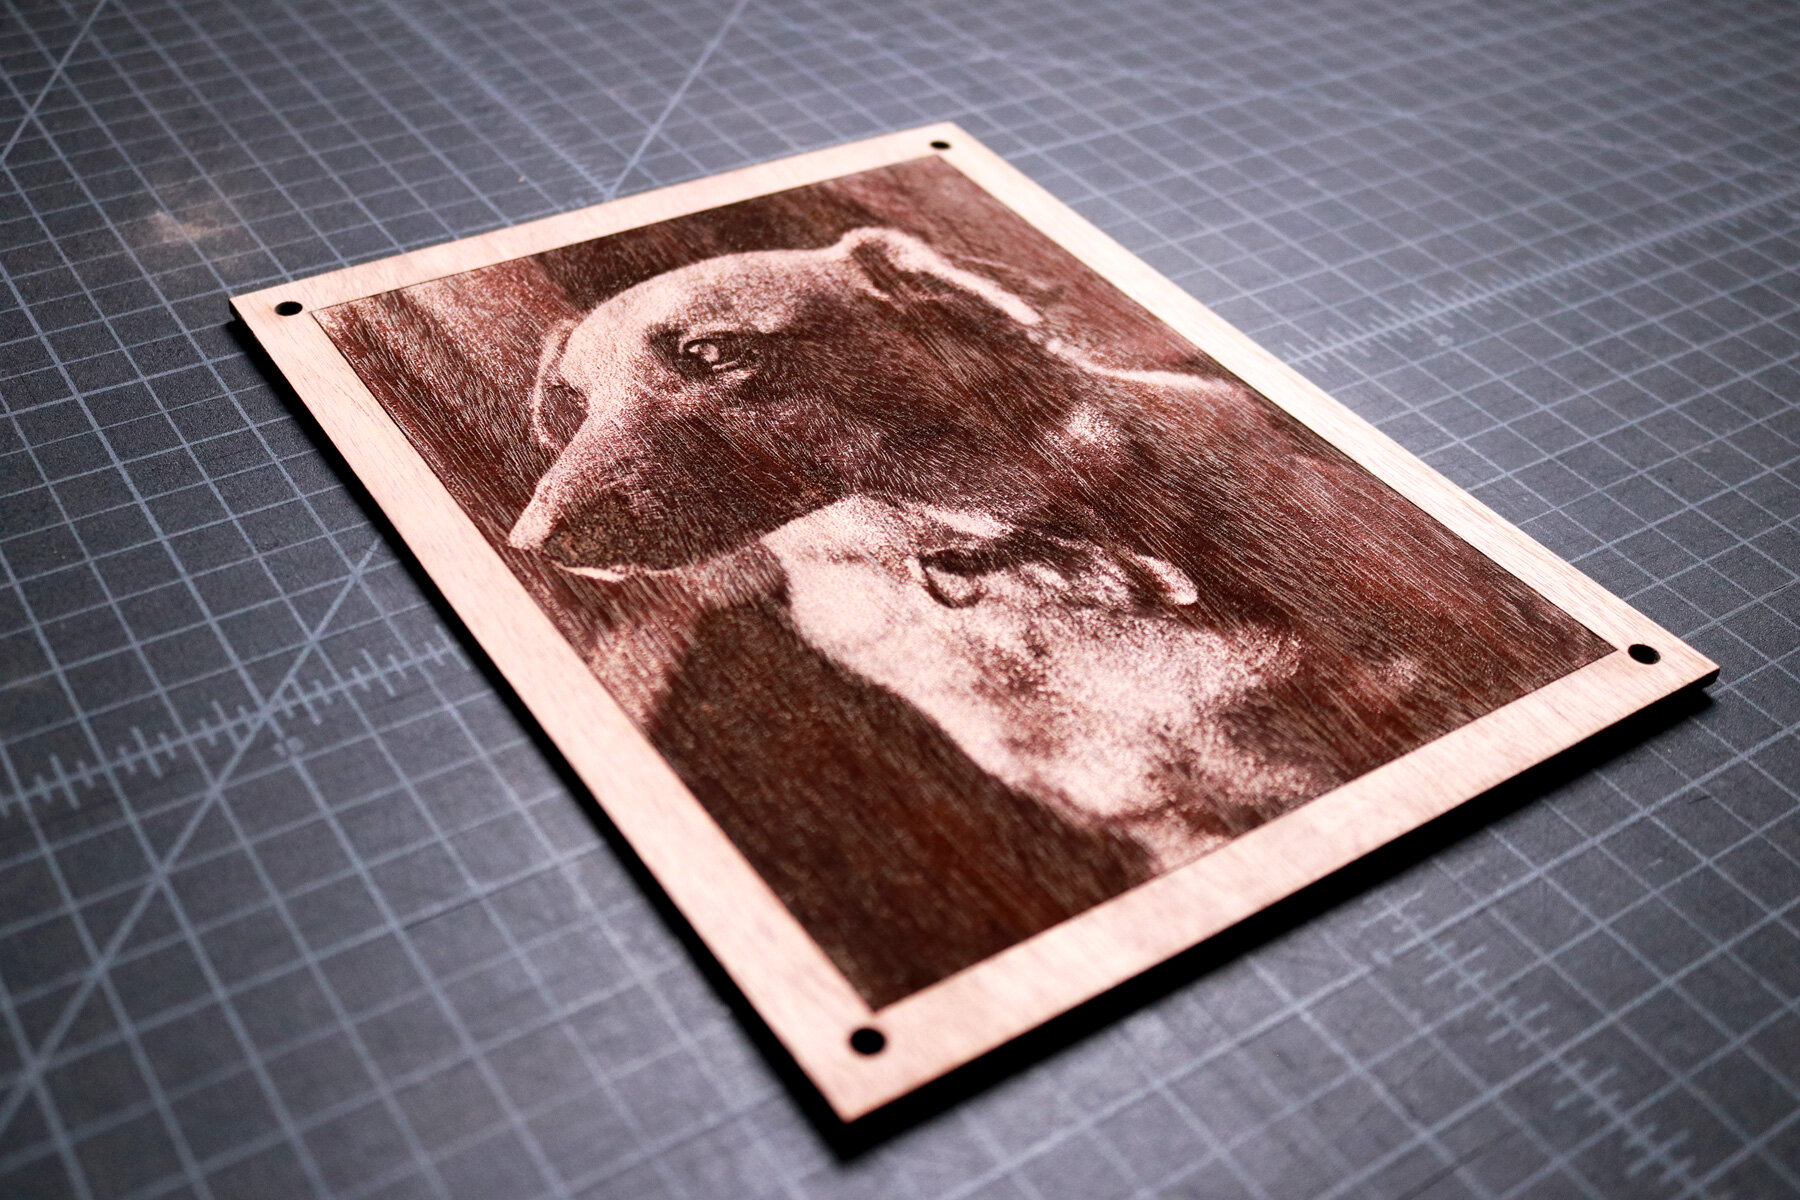
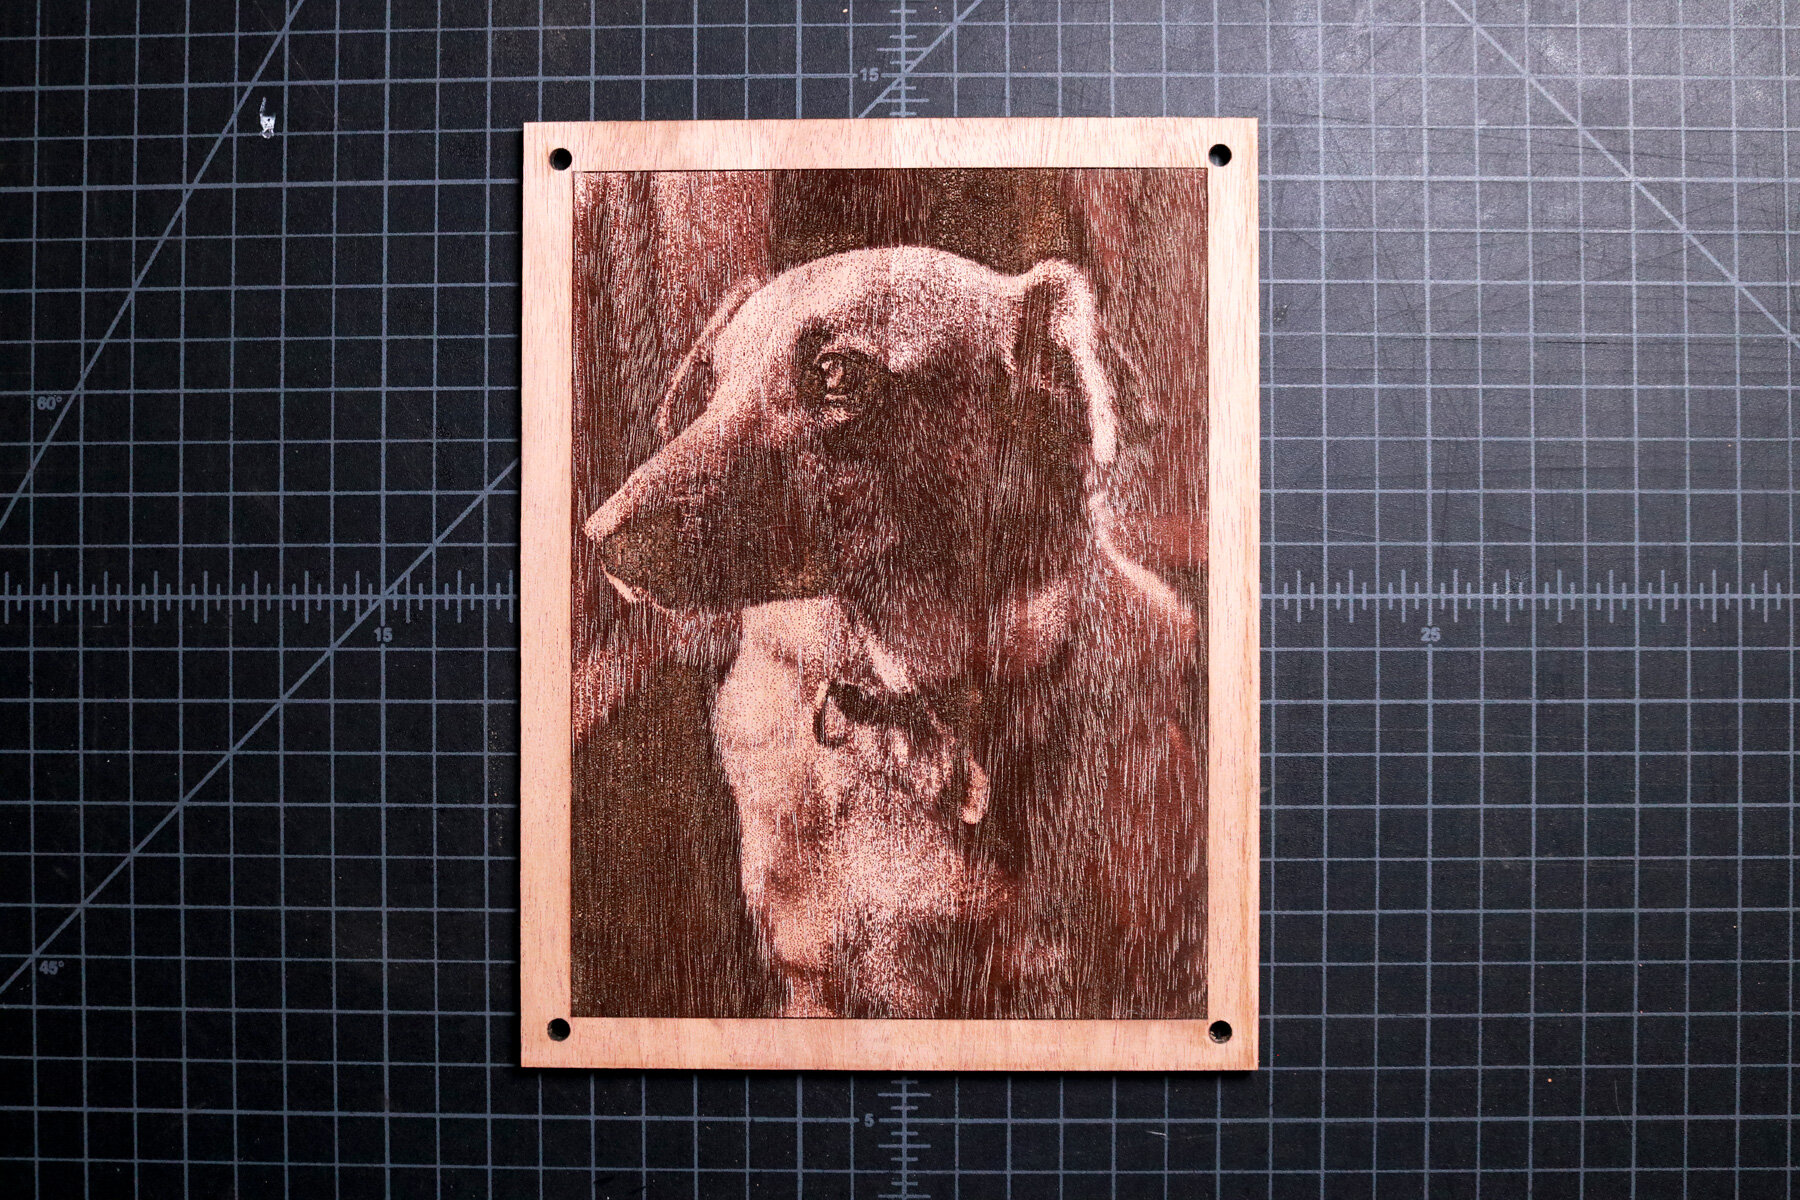
Then, I selected the photograph that I liked most and used my iPhone 12 Pro Max to edit the photograph. The goal of the editing was the turn the portrait into a black and white image. Then, brightening the photograph more than you typically would when editing. When the photograph was edited, I created a simple frame to go around the portrait and setup my Glowforge to begin the process of engraving.
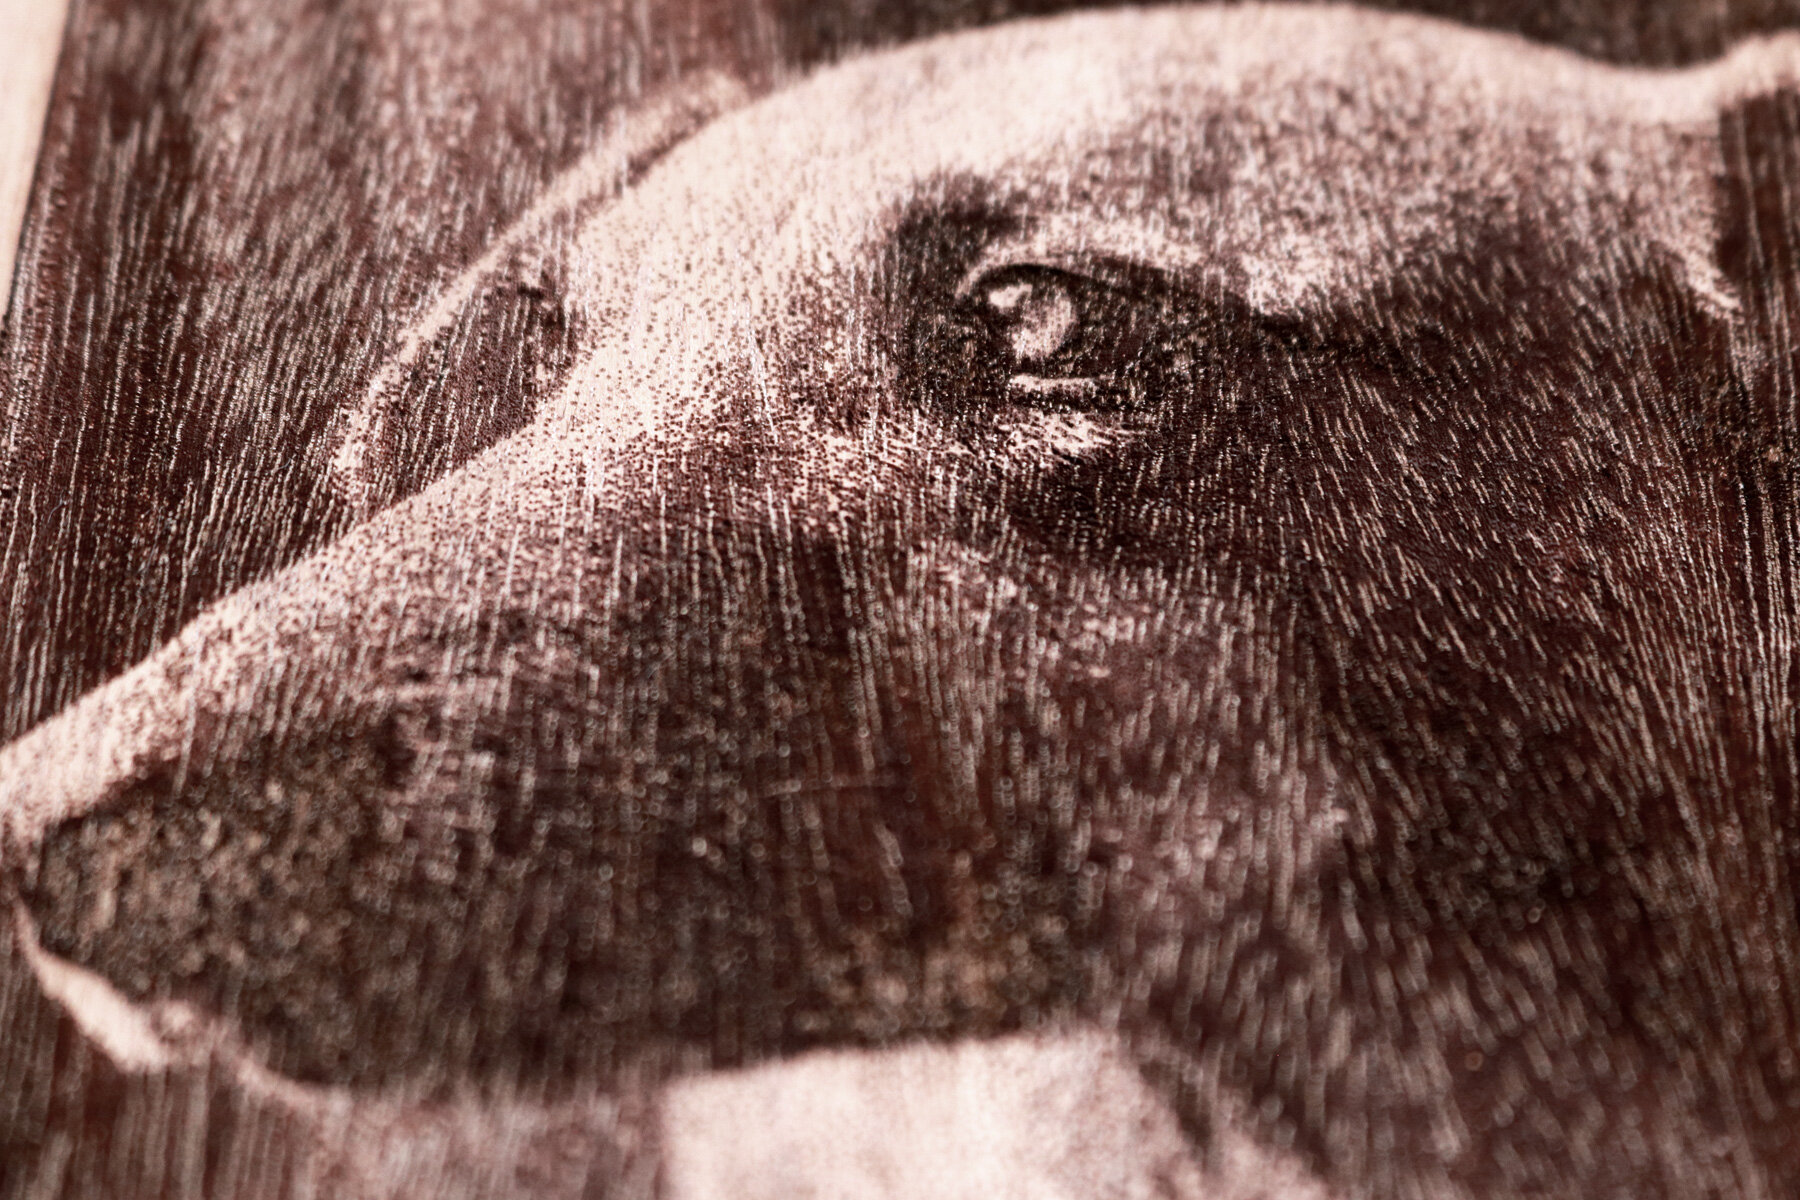
With my Glowforge ready to go, I inserted a piece of mahogany plywood and began the process of engraving the photo of lady onto its surface. The engraving took about 45 minutes from start to completion. Then, I used a lint free rag with a dab of alcohol to wipe off any excess charring from the surface of the engraving. This simple step cleaned off excess debris and residue from the surface of the wood, which brought out the contrast in the engraving of Lady.