Making a Contemporary Wood End Table with a Laser Cutter
Tools & Materials
Contemporary Table Digital Design File
Project Description
How can we design and make a contemporary side table with a simple finger joint construction?
Although my personal preference is minimally designed architecture and objects, I’ve always been fascinated by the idea of removing excess materials to reduce the weight of the final product. As different parts of each component are modified to remove excess material, there’s an opportunity to create patterns through the voids in the material.
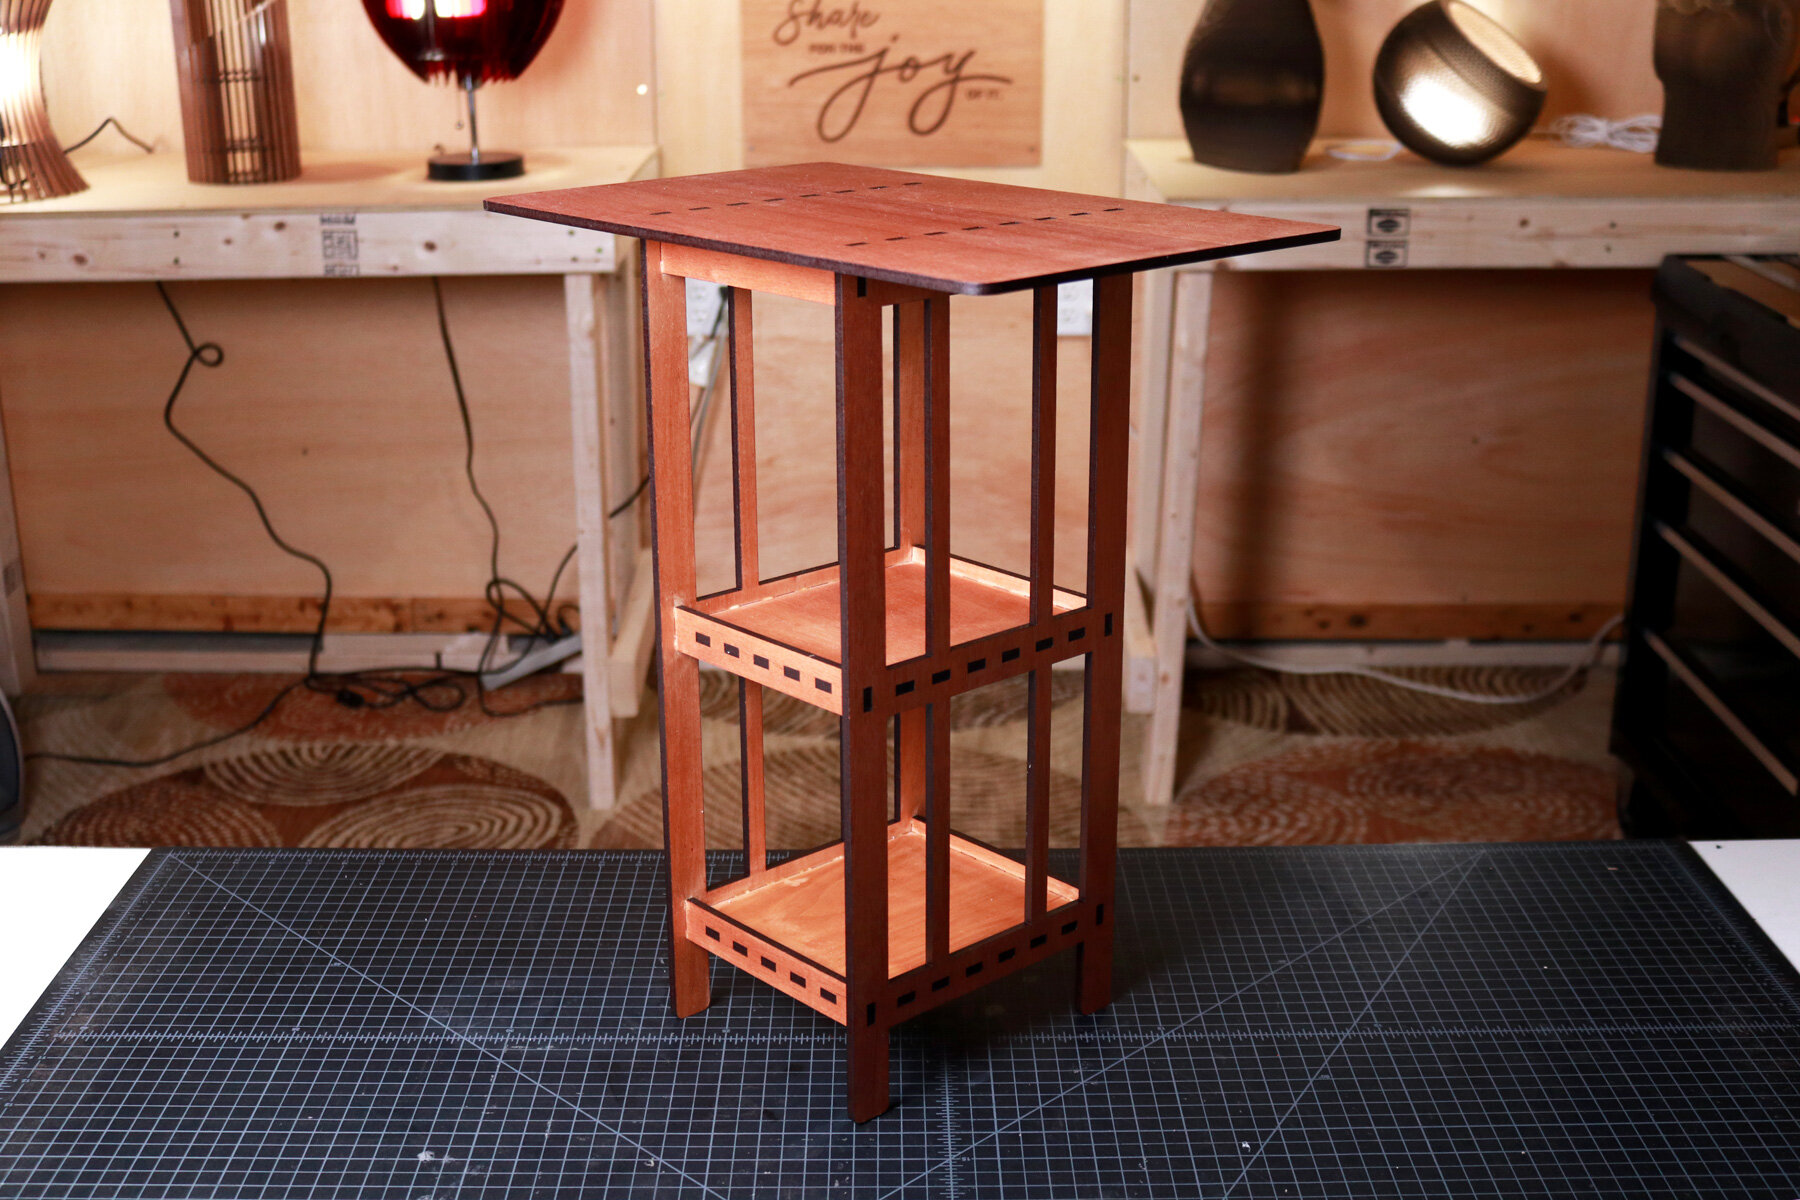
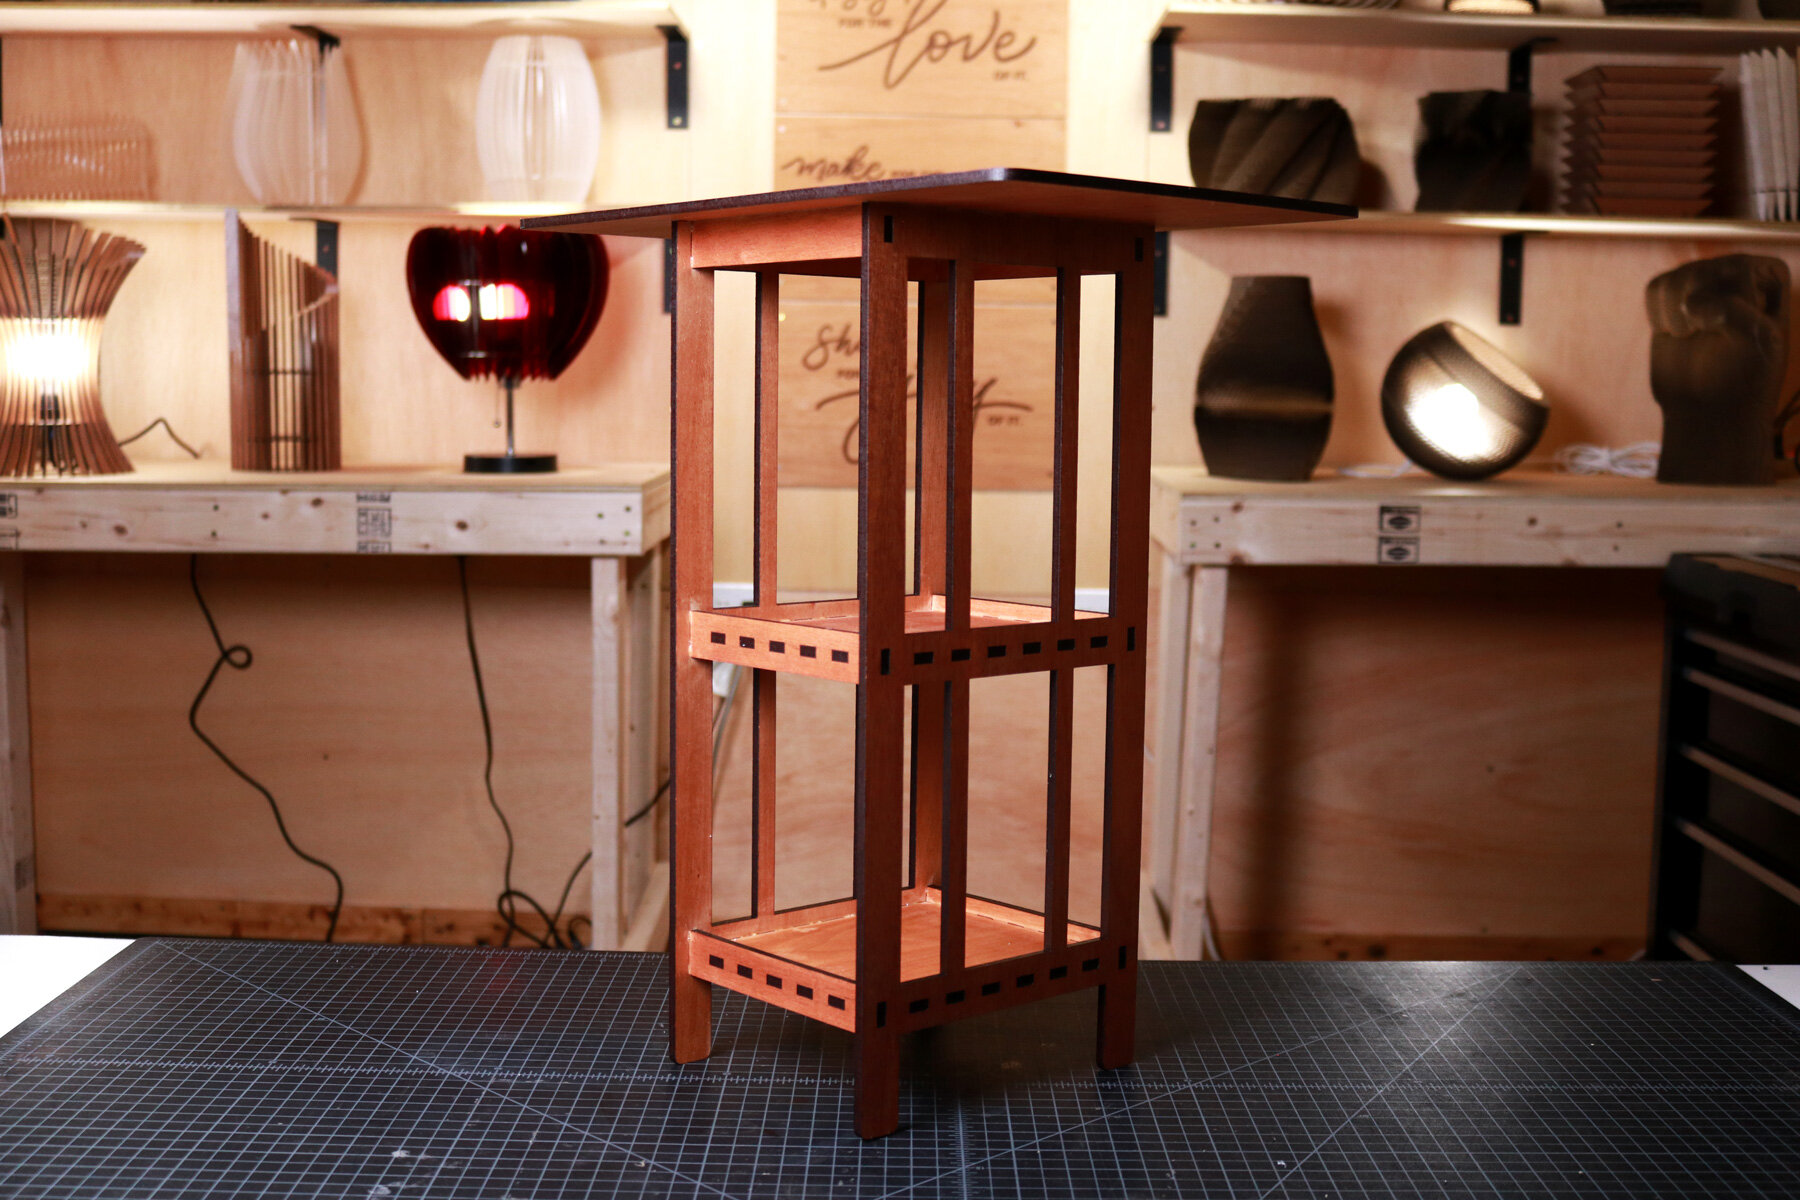
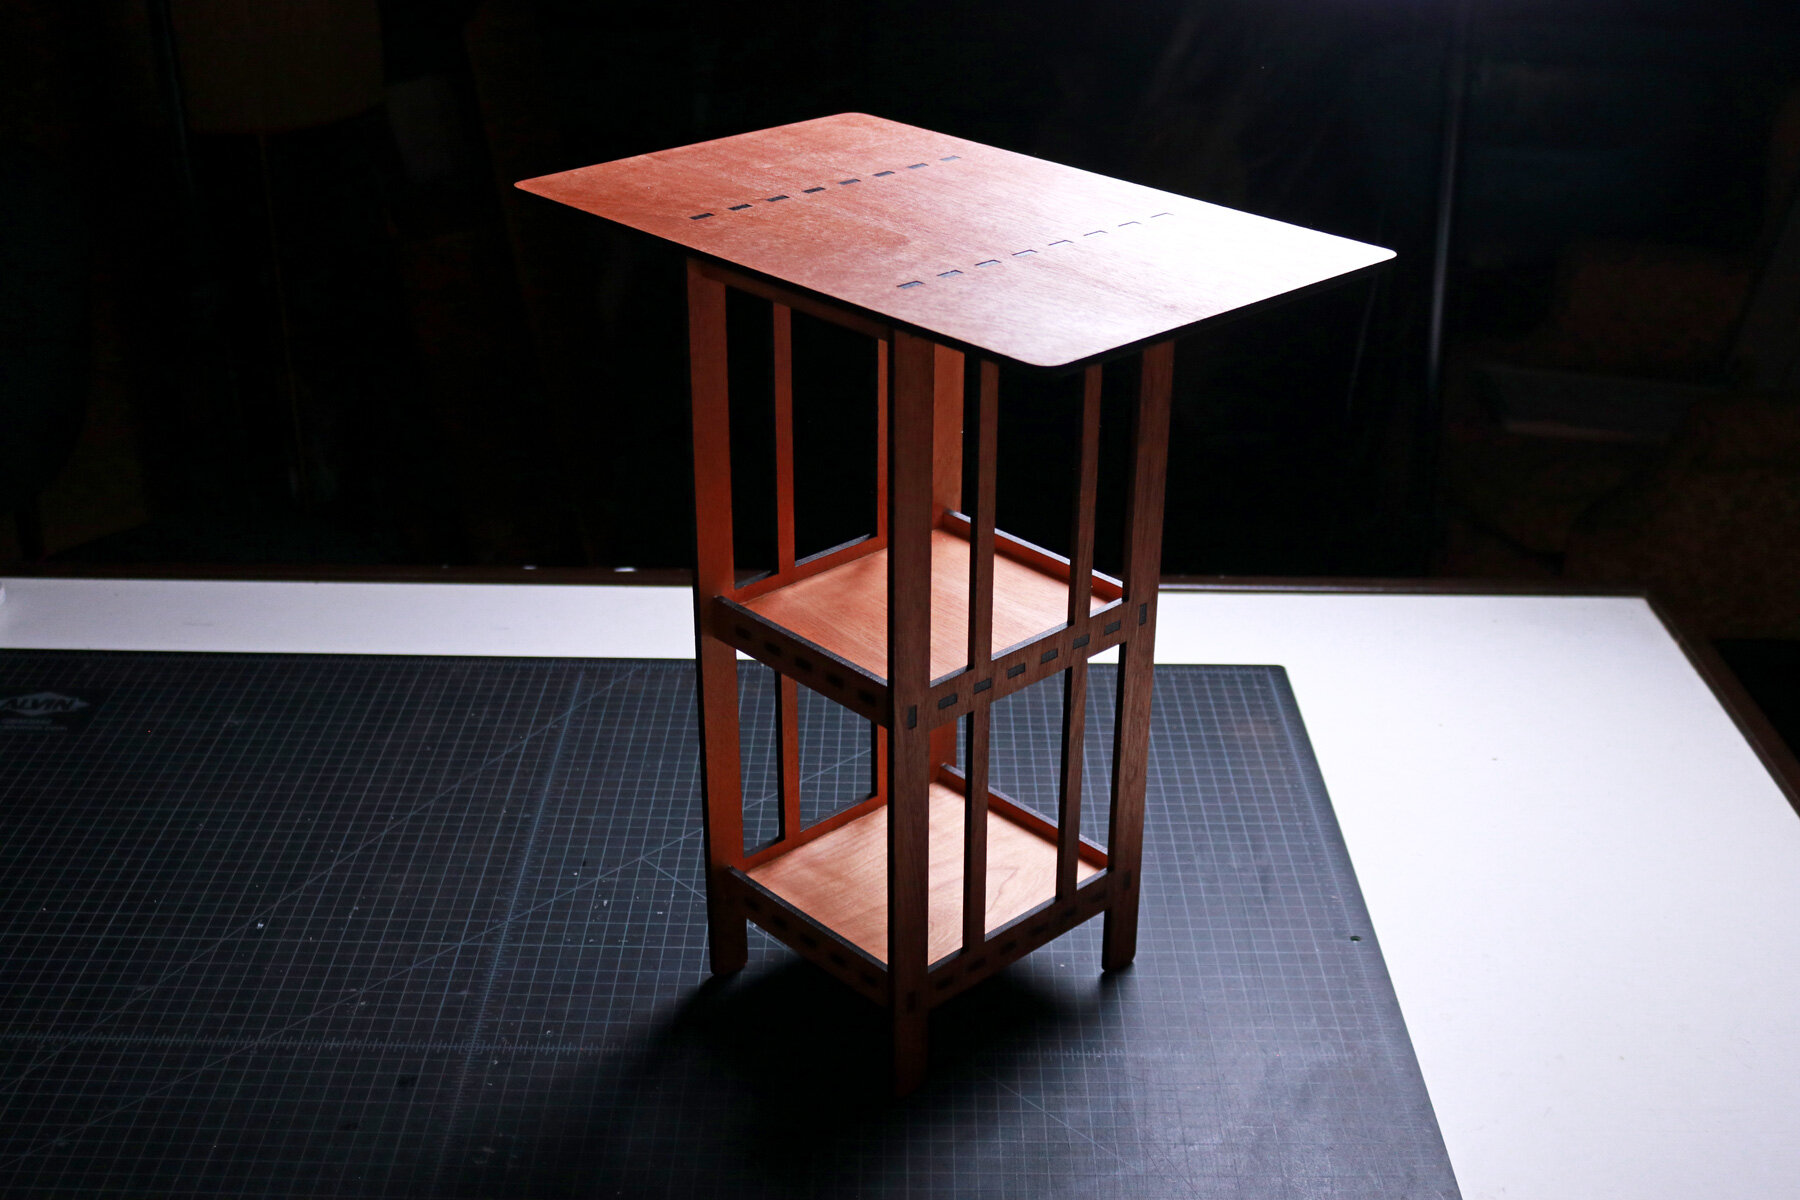
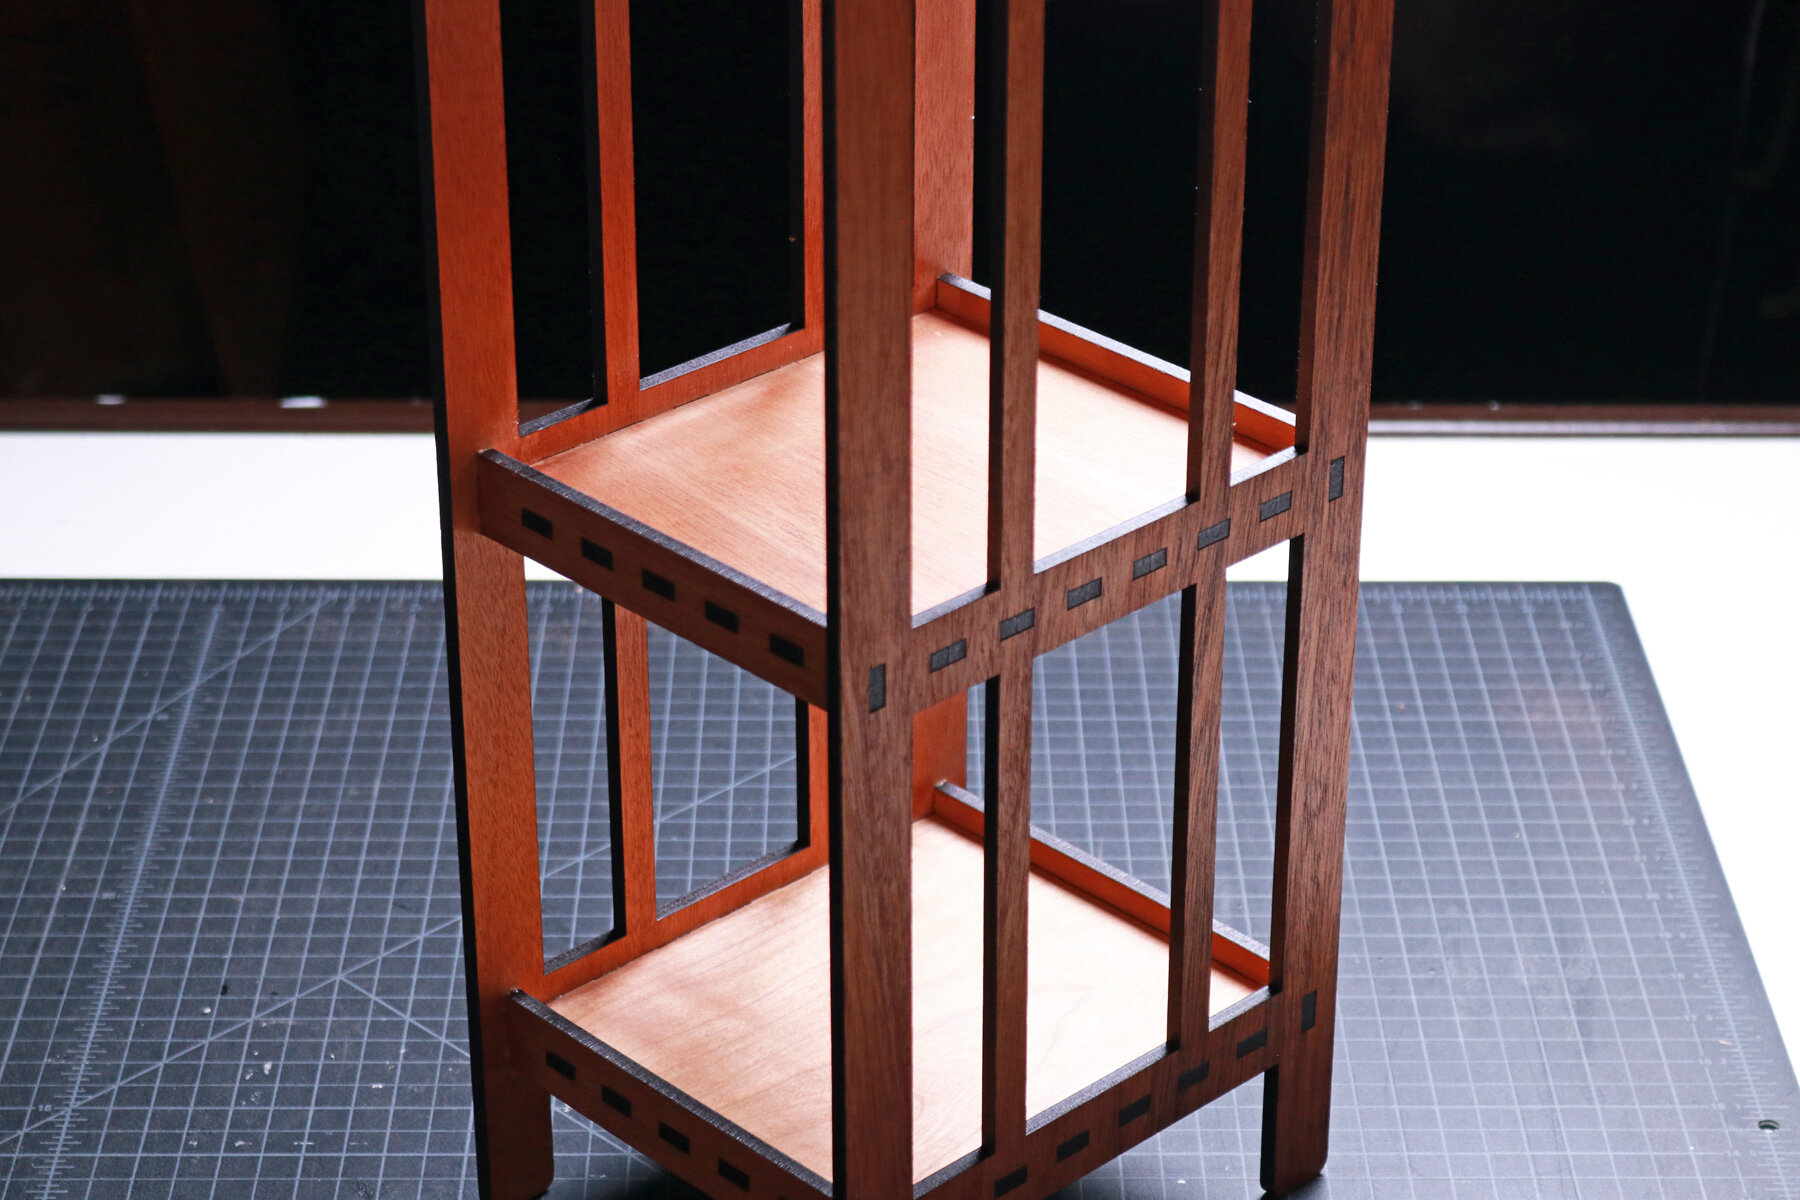
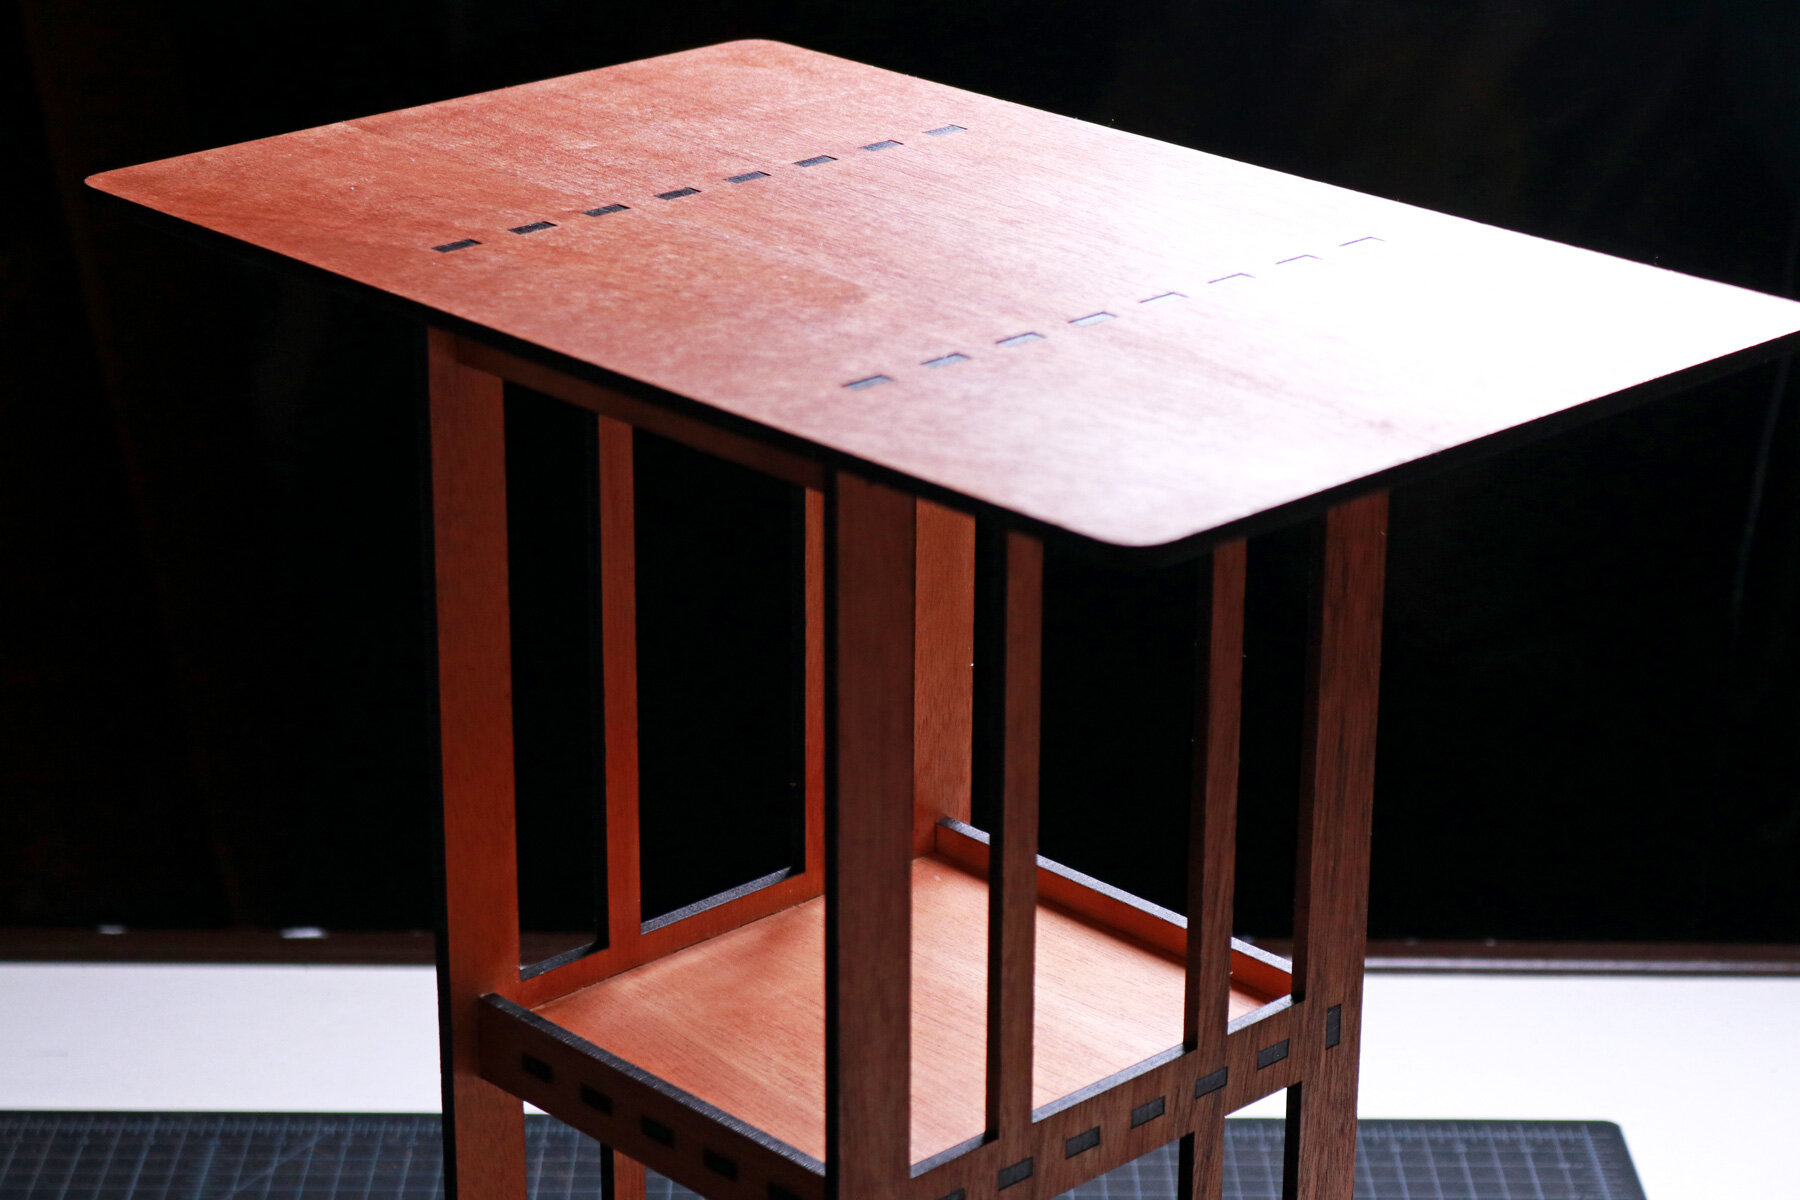
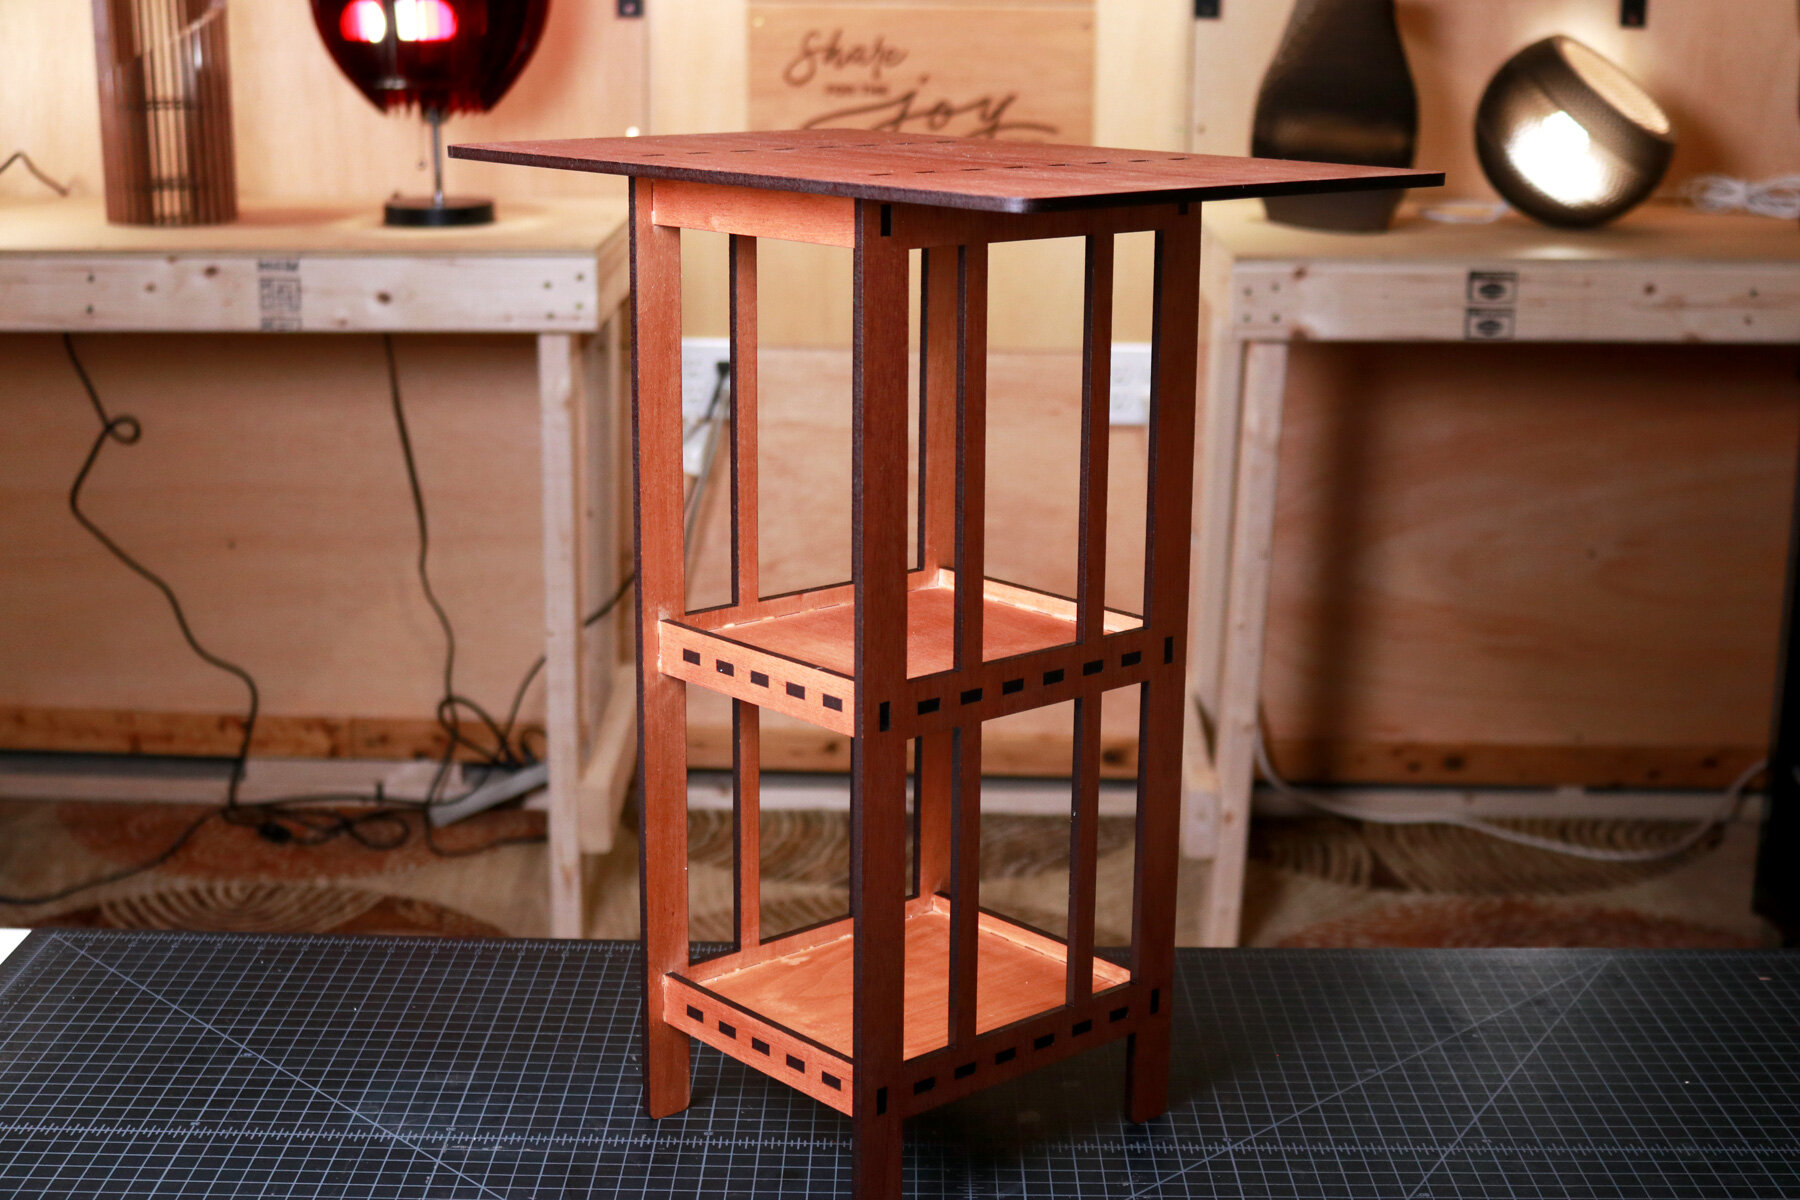
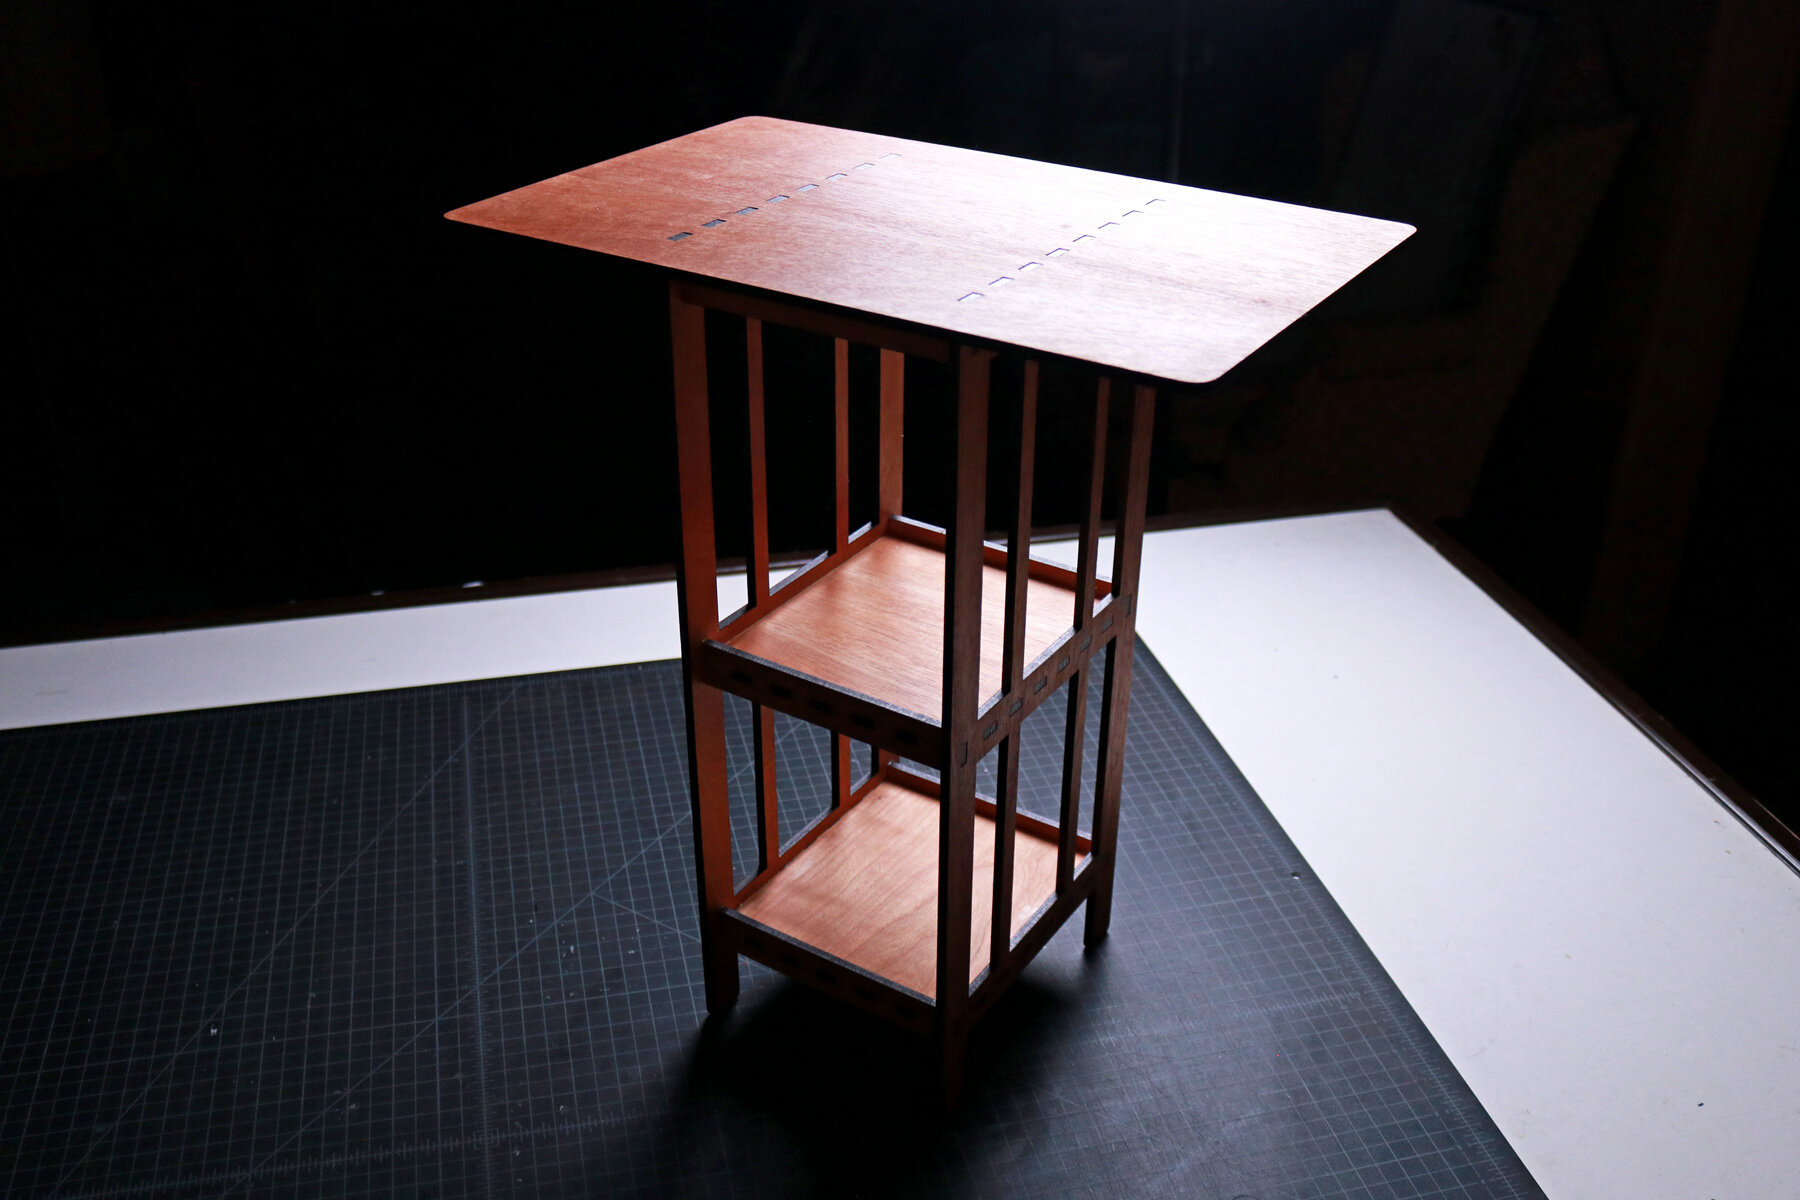
As I continue exploring laser cut side table projects, this idea of providing the appropriate amount of support and removing excess materials is a focus of this contemporary side table project. As material is removed from the two side panels that hold two shelves and the table top together, there’s an opportunity to create a pattern on its surface that’s a combination of minimal and contemporary design.
Process
Using a software called Rhinoceros, I started by drawing the overall width and height of the project, which came out to roughly 6.5 inches wide by 18 inches tall. Once this rectangle was drawn, I drew the interior rectilinear forms that would be cut out to create the contemporary aesthetic for the frame. Then, I drew lines for the legs at the base and slots for two shelves; one at the bottom and one at the center of the end table. Lastly, I drew the finger joints at the top of the decorative panel to connect into the table top.
Moving onto the front and back sides of the end table, I worked between drawing slots, finger joints, and support pieces that would come together to hold the shelves and decorative frames together. When the 2 dimensional linework was complete, I extruded them to the thickness of the mahogany plywood and built a 3 dimensional model of the contemporary end table. As I built the model, I also refined the decorative side panels and support pieces until I was satisfied with the design.
When the design was complete, I began the process of laser cutting every piece. I covered the mahogany plywood with paper masking tape to protect it from any burns and chars. Once all of the pieces were cut, I removed the masking and organized the pieces in the order that they would be assembled. Starting with the shelf and support panels, I applied wood glue to one edge of the bottom panel, inserted it into the slots of the front panel, and used my deadblow hammer to knock it into place. I repeated this with the opposite support panel and constructed both shelves.
Then, I applied wood glue on the remaining finger joints on both the shelves and the support panels and installed both shelves into one decorative side panel. After applying glue on the remaining finger joints, I installed the opposite side panel and the frame construction was complete. I placed the table top on my work bench, applied wood glue onto the remaining finger joints at the top of the decorative panels, and installed the frame onto the table top. Lastly, I applied Odies Oil onto the surfaces of the contemporary end table and buffed off the excess oil to finish the project.