Making a Minimal Laser Cut Wood Stool and Side Table

Tools & Materials
Minimal Stool and Side Table Design File
Project Description
How do we design and make a stool and side table using a laser cutter and finger joints?
A craft project with a design and construction process similar to a large scale puzzle is a minimal stool and side table where the components are cut with a laser cutter and finger joined together. There are several factors that need to be considered simultaneously through the design process including the maximum cutting dimensions of my Glowforge laser cutter, proportions of the product, stress on components due to weight, and assembly without fasteners.
The goal of this project is to design a product in as few components as possible while maintaining a minimal and elegant aesthetic. There are several design features that were developed as a way of maintaining rigidity and creating opportunities for components to come together seamlessly. Projects like this one are great learning opportunities because working within the confines of the parameters lead to innovative solutions.
Process
I started this project by going around my house and measuring the height, width, and depth of various chairs. The goal was to determine the proportions that would be comfortable to sit on and be a beautiful piece of furniture.
When I had the overall dimensions of the wood stool, I started designing it in a software called Rhinoceros. I started by drawing an 18 inch square because the height, depth, and width of a standard chair seemed to fall within that range. Using this as a guide, I began designing the legs of the stool and side table. The first version looked like a capital letter C with acute and obtuse angles. However, these angles seemed like potential points of failure.
To resolve this issue, I decided to curve all the corners to create soft corners and also to match the minimal personal table and serving tray that I designed in previous weeks. These curves would also add some structural support at the corners because it would transfer more load to down to the ground.
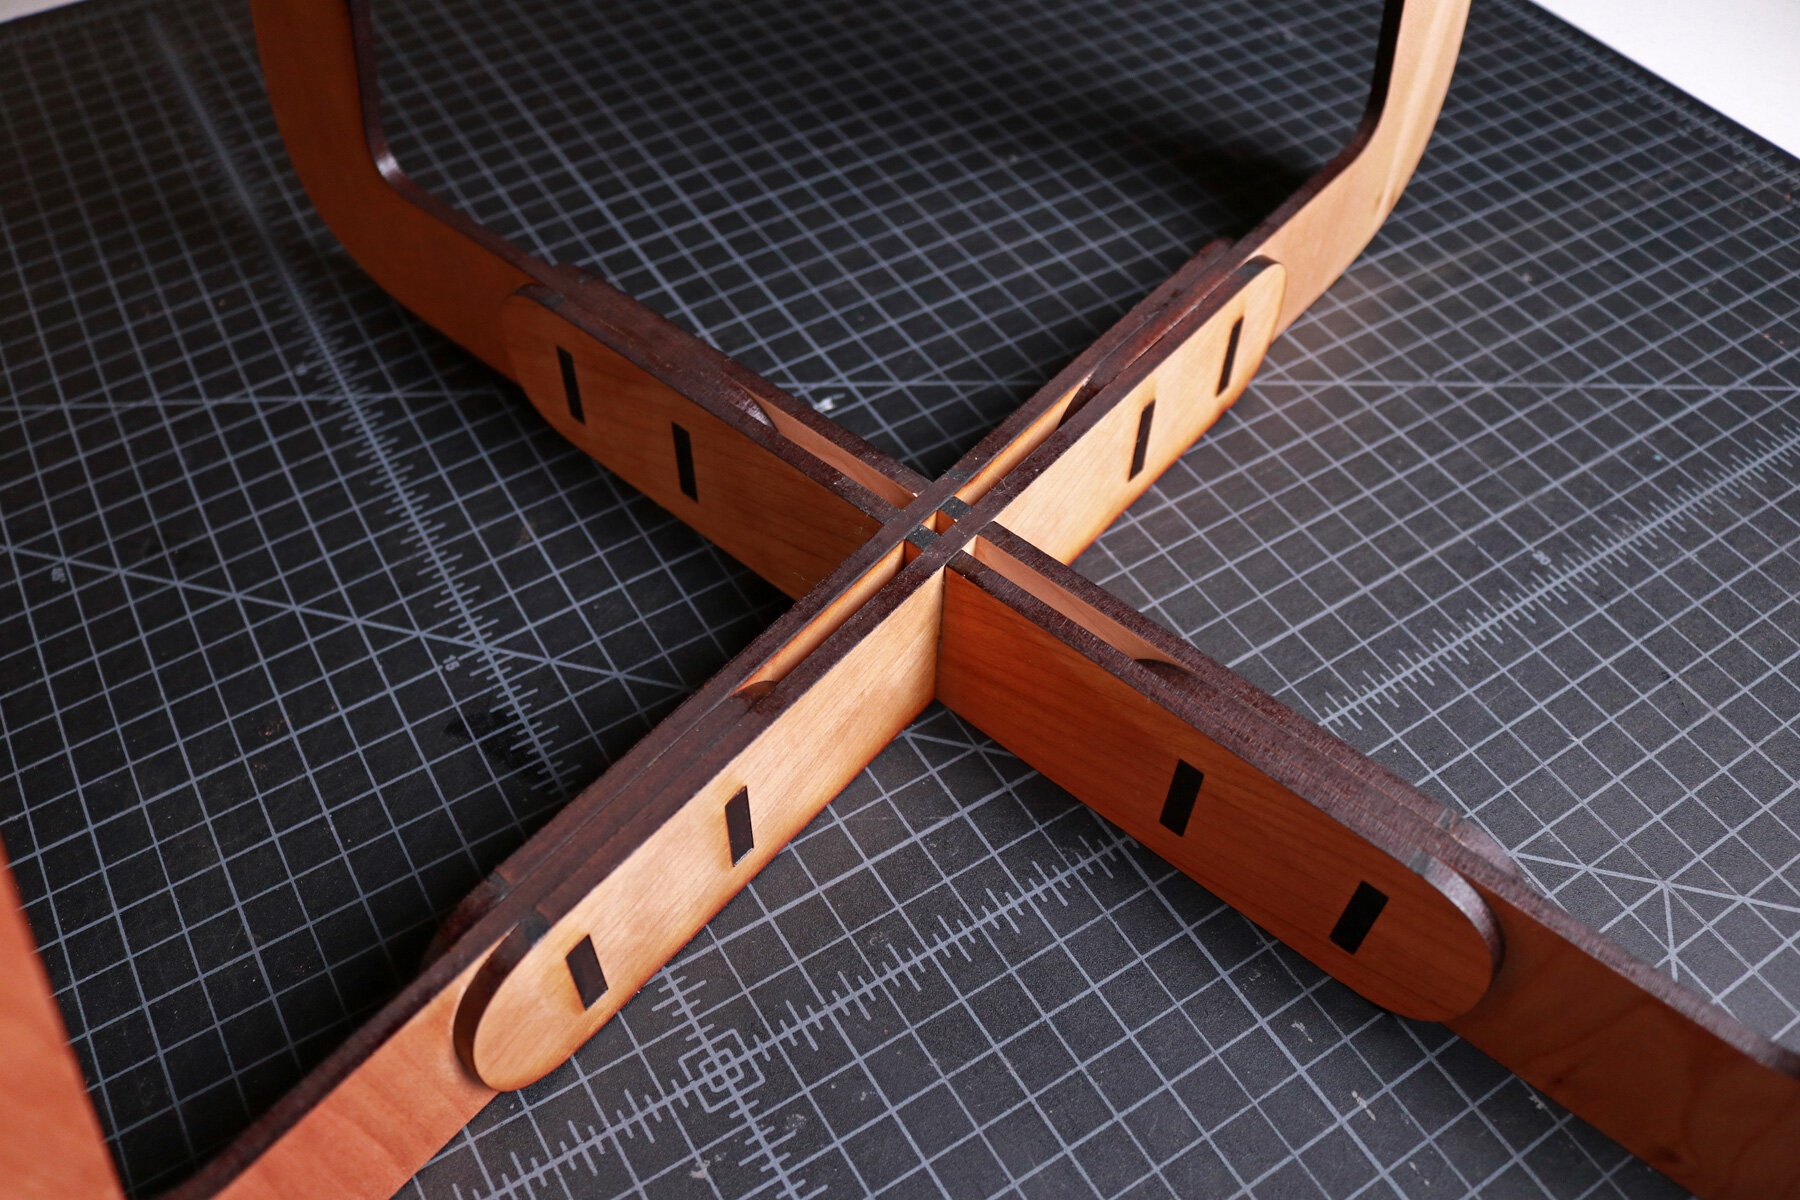
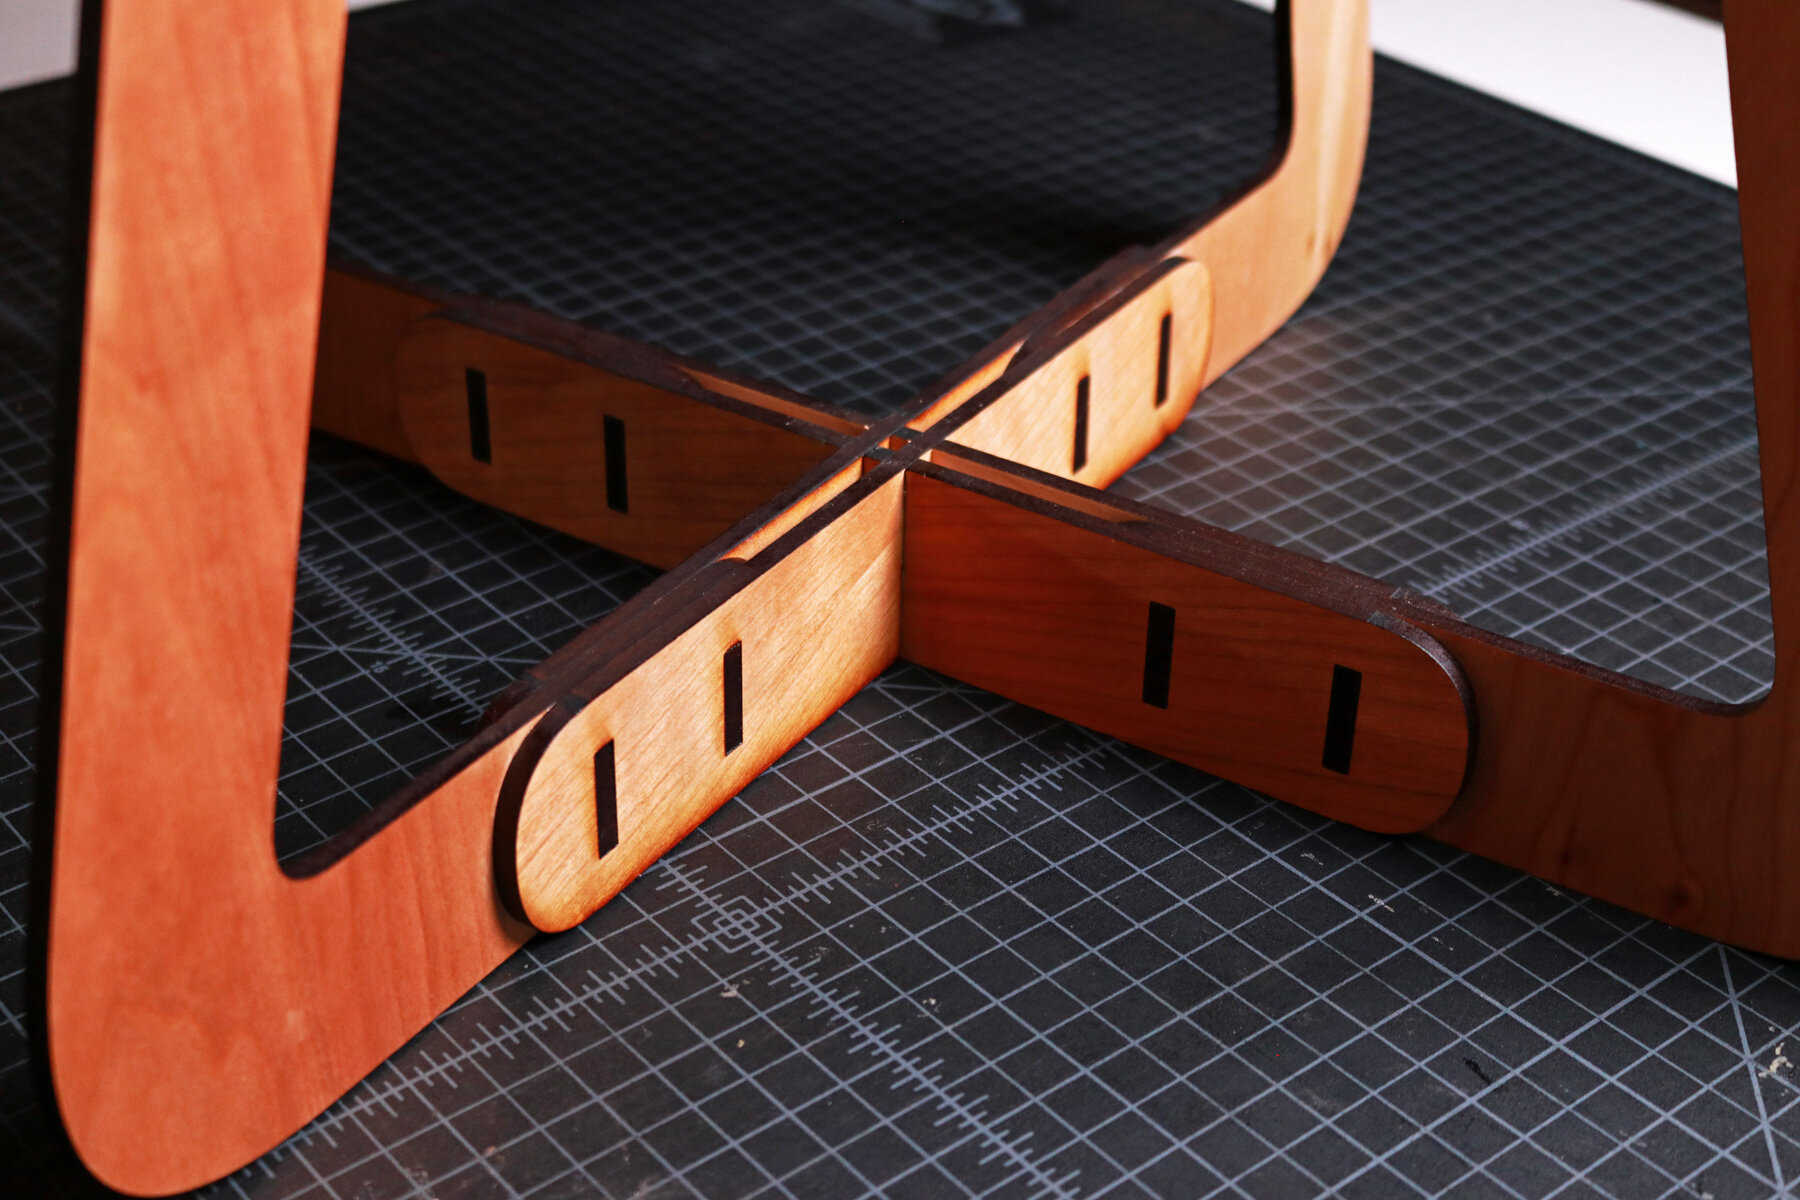
Due to the size of my laser cutter, I had to separate the 4 legs, which created another potential point of failure where the legs might splay apart when someone sits on the stool. To support the separated legs, I decided to design a structural support piece that would sandwich the legs and a tab would be installed to hold all the pieces together. This would prevent the legs from separating when weight is on the seat.
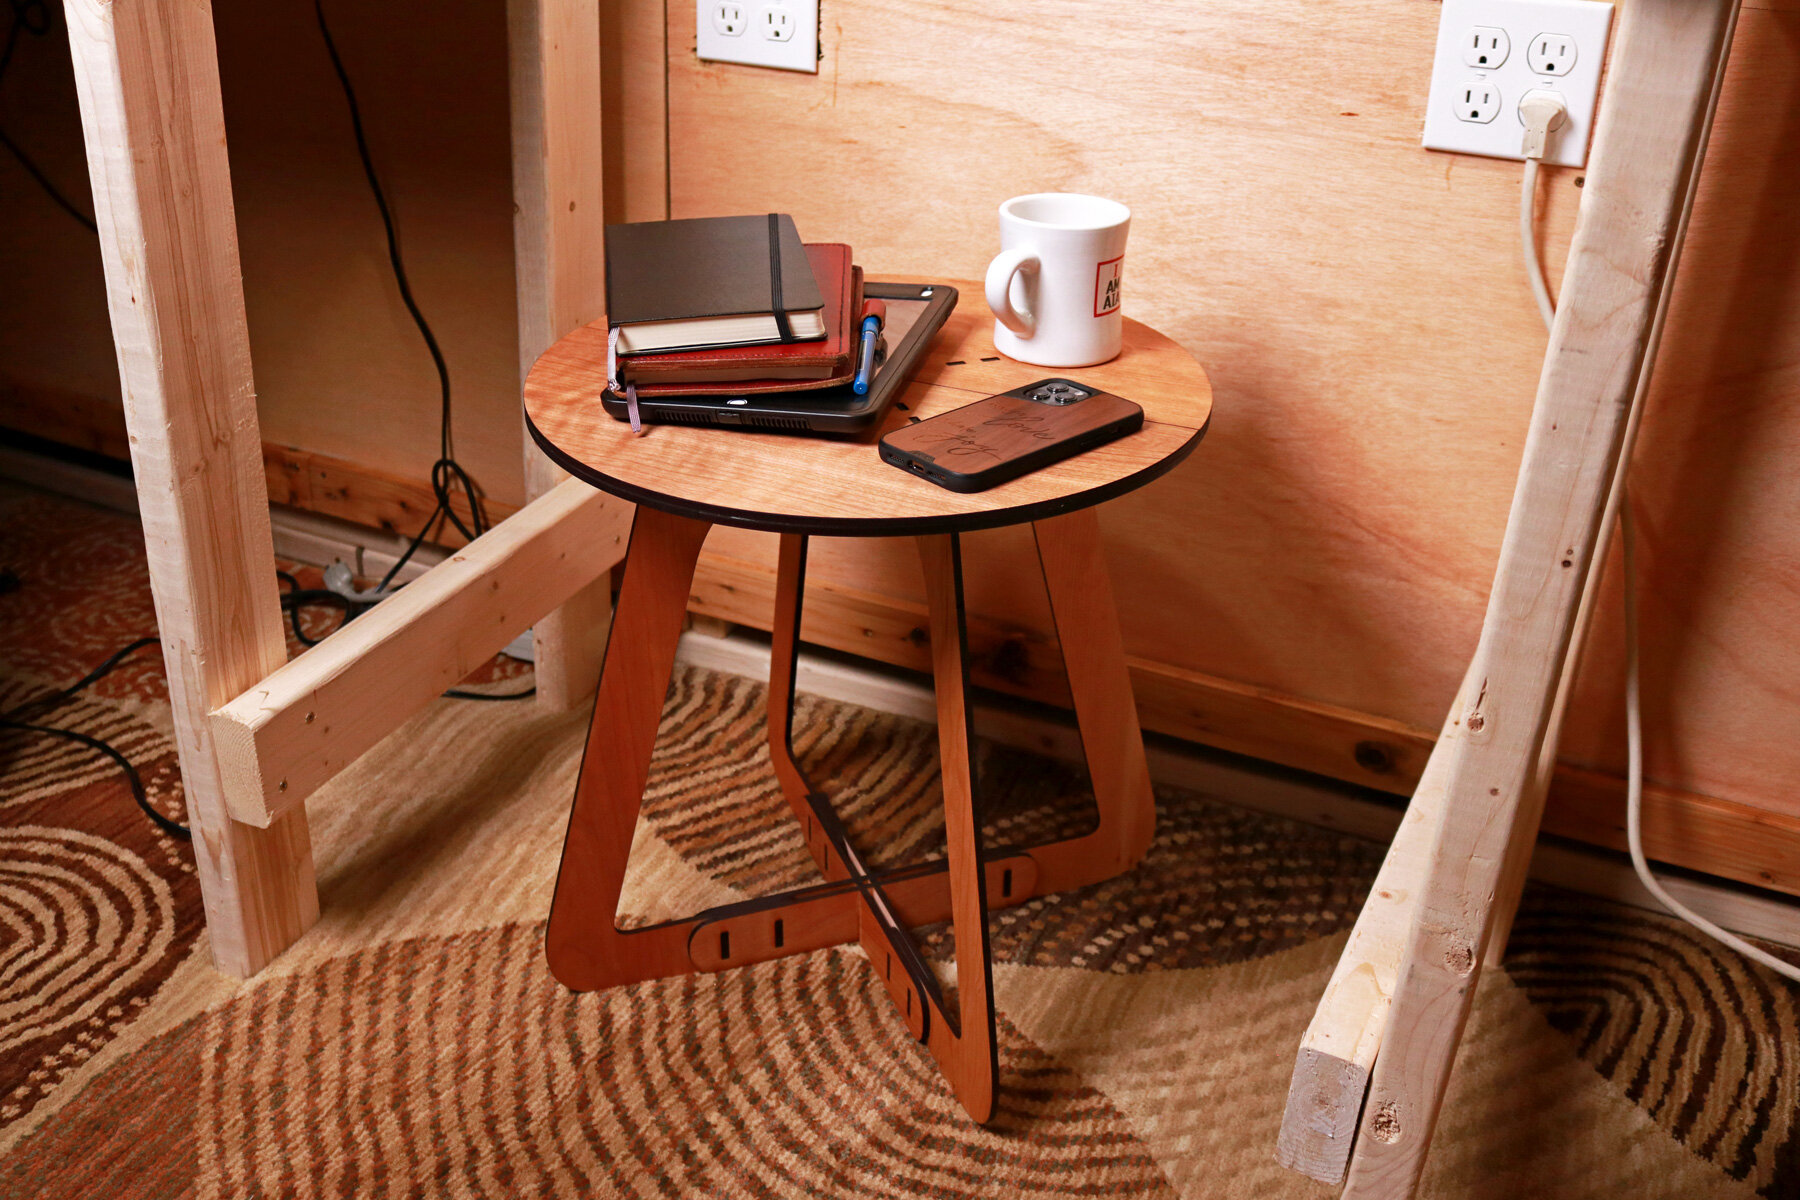
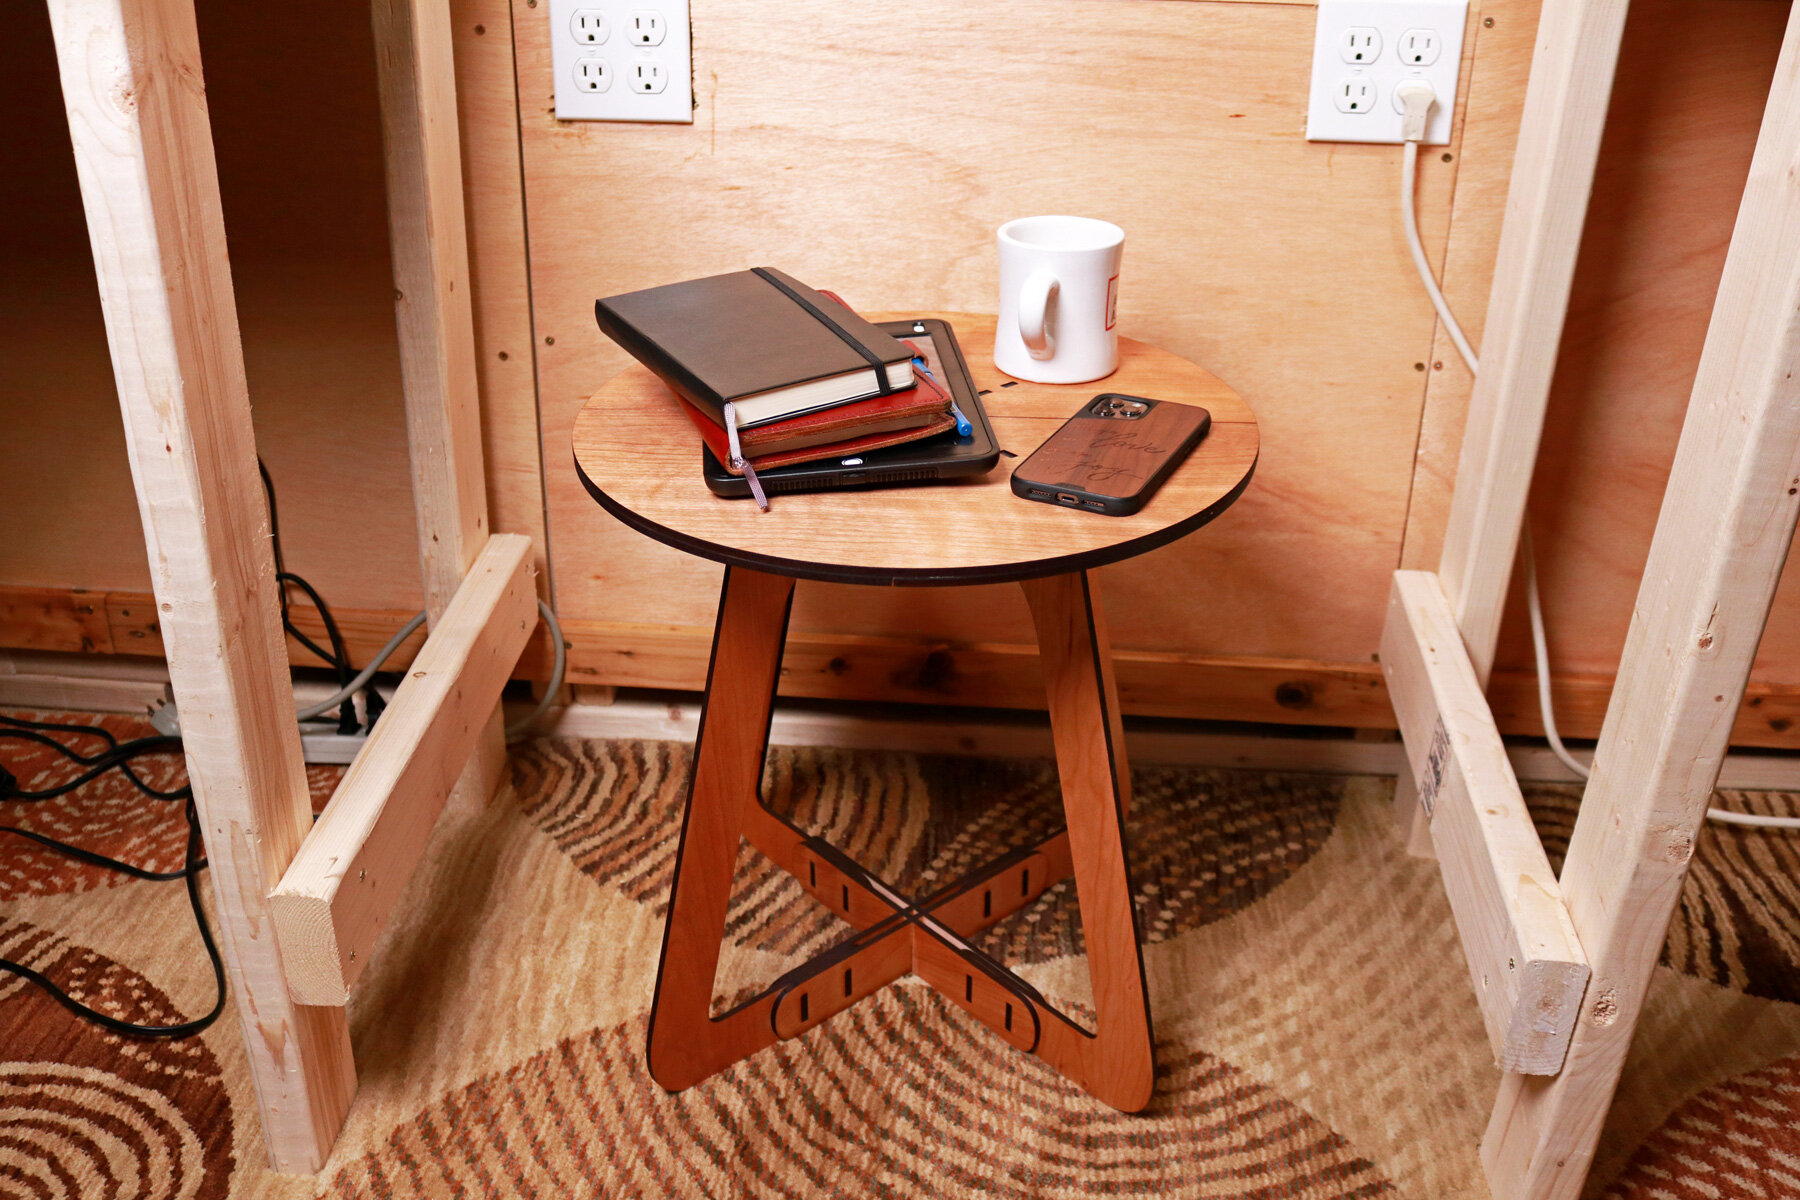
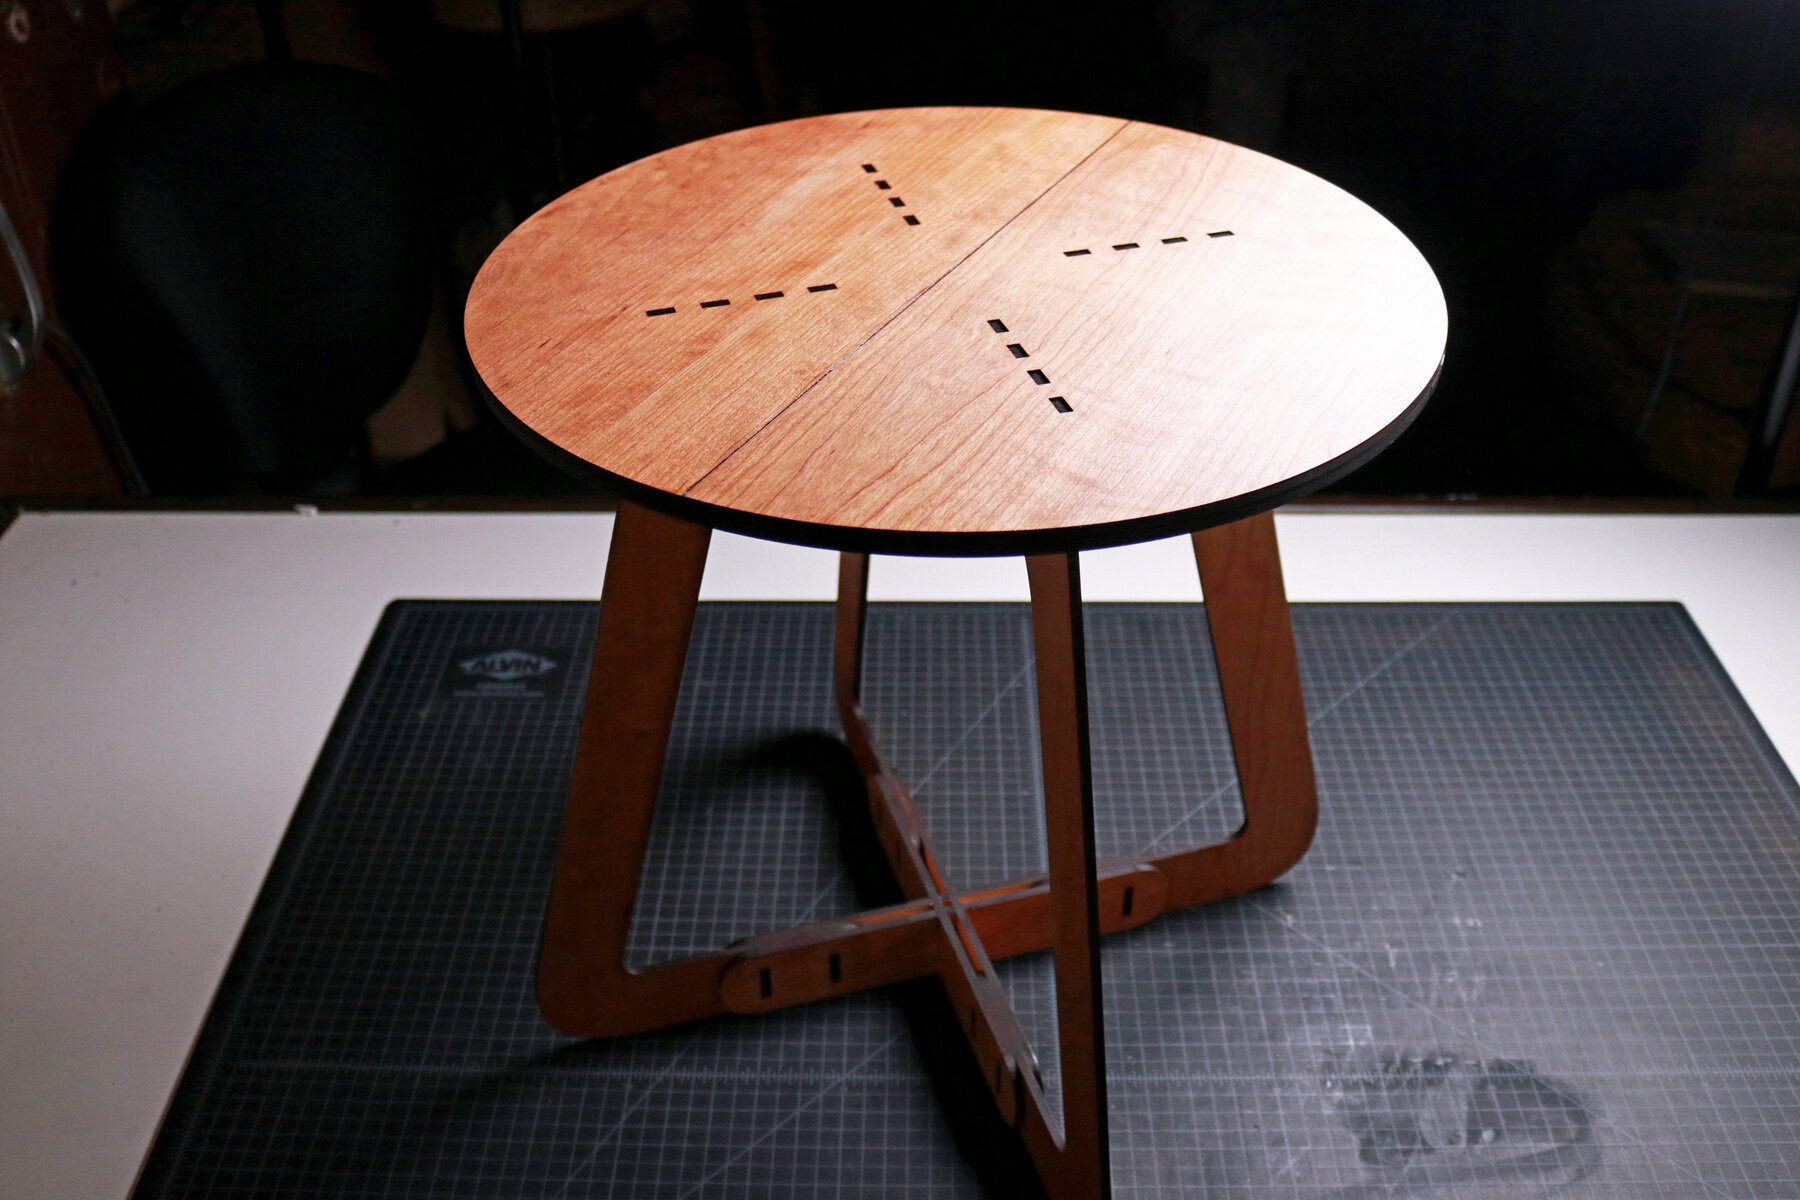
The last part of the design was the seat itself. I knew I wanted the stool and table to be a round top, but the issue was that I couldn’t cut a perfect 18 inch diameter circle on my Glowforge. My maximum cutting dimensions are roughly 11 inches x 19.2 inches. I decided to cut half of the circle seat and glue two of them together to create a sturdy seat. The layers would be rotated 90 degrees to add additional support when they’re glued together and tabs would be cut in each part of the seat to align with finger joints at the top of each leg.
Once the design was complete, I applied paper masking to my ¼ inch cherry plywood and cut all the pieces in my Glowforge. After removing the masking from the pieces, I started by assembling and wood gluing the support members together for both the base and top of the legs of the stool and side table.
When the support pieces were assembled, I applied wood glue to each leg and sandwiched them between the support pieces. Then, I applied wood glue on each tab and pushed them through the slots of all 3 layers of plywood in the support pieces and the leg. This created a tight fit and ensured that every piece was aligned. I repeated this with the top support piece and clamped all of them together.
Once the legs and supports were fully attached and the wood glue dried, I applied wood glue to the finger joints at the top of each leg where the seat would come in contact with it. Then, I aligned the first half of the bottom layer of the seat and pushed it into place. I repeated this step with the opposite side, then turned the next layer of plywood seats 90 degrees and repeated the process to glue the seats together. When all the glue was dry, I finished the surfaces of the wood stool with a natural oil.