Making a Wood 3 Layered Round Light

Tools & Materials
Table Lamp - Remove the shade that comes with it
Project Description
How can the architectural design of a 3 layered circular building influence the design of a table lamp?
This light fixture was inspired by an architecture project called the He Art Museum designed by one of my favorite architects, Tadao Ando. I’ve always been a fan of his work because of the ways he uses concrete as a primary material and infuses a sleek and timeless beauty in the composition of all his projects.
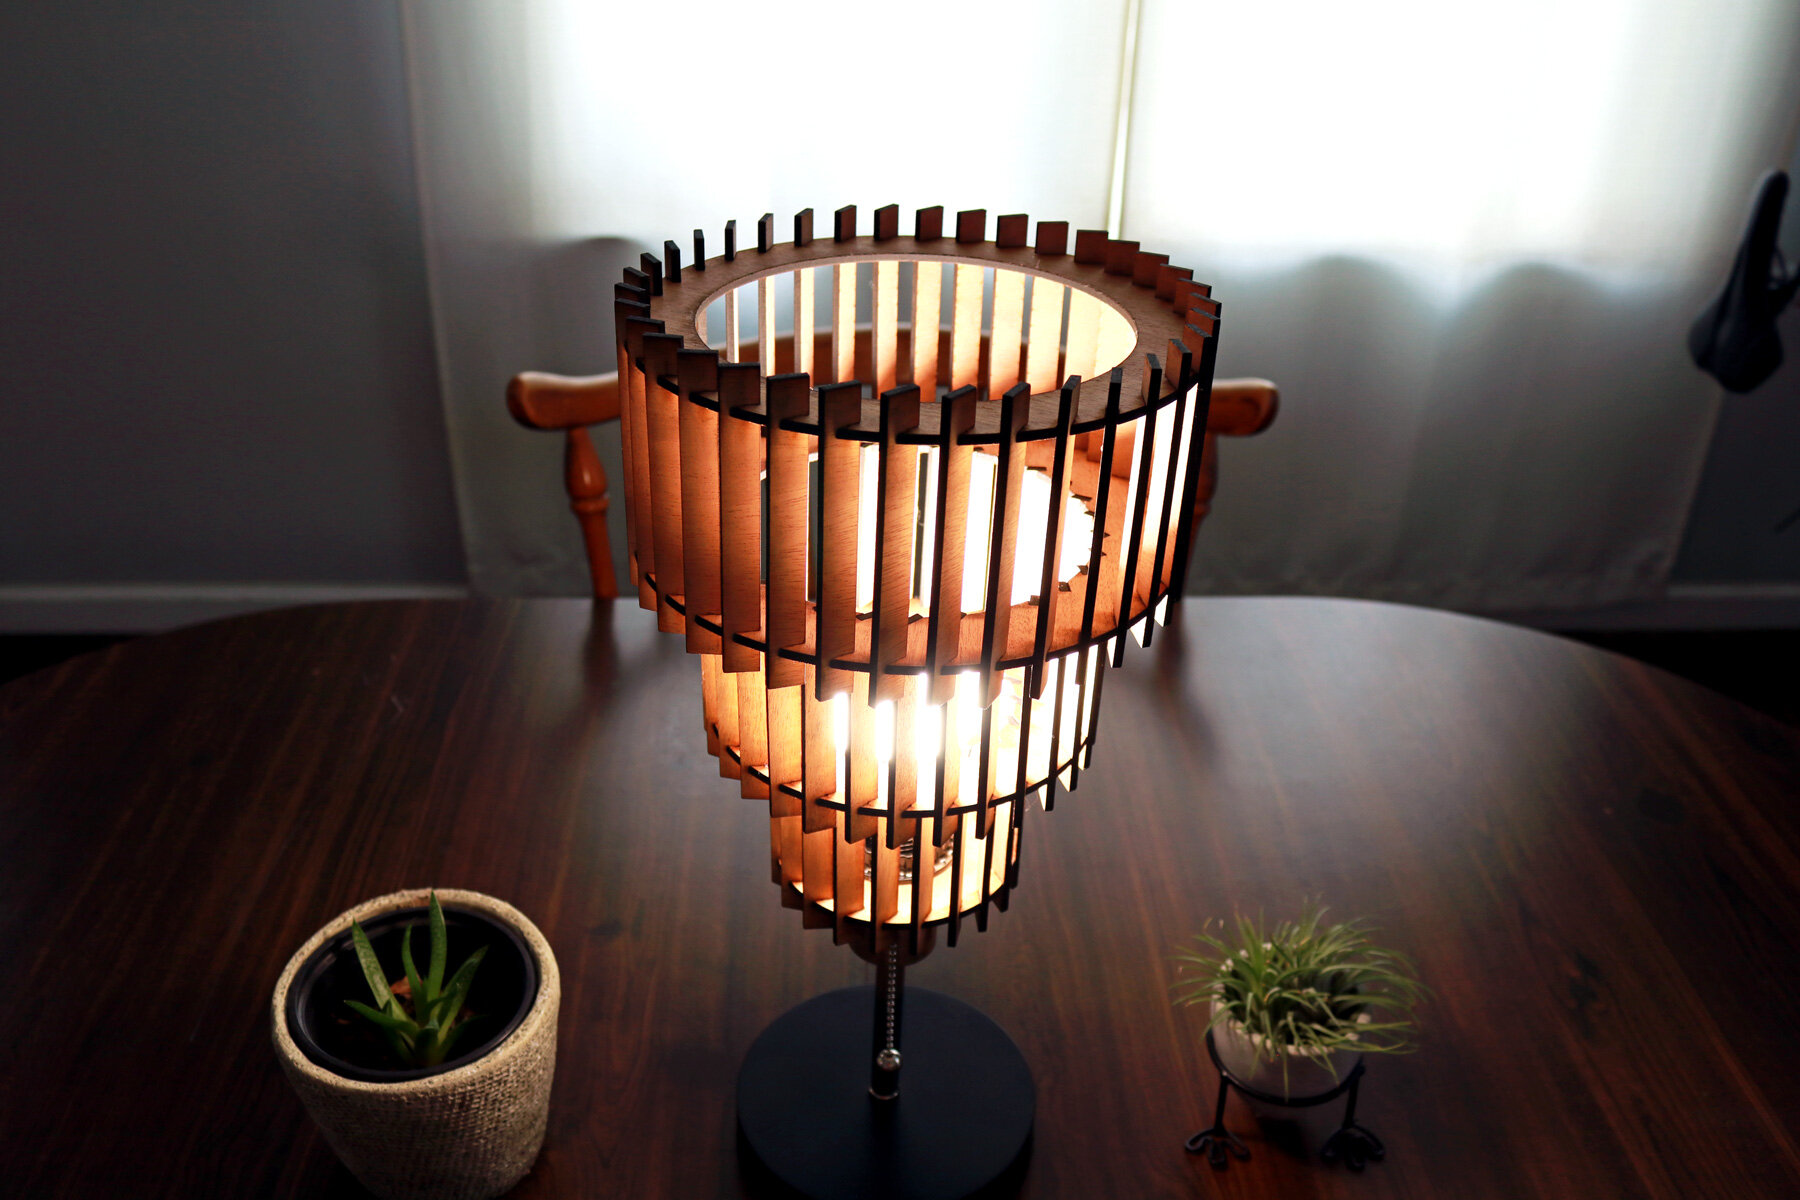
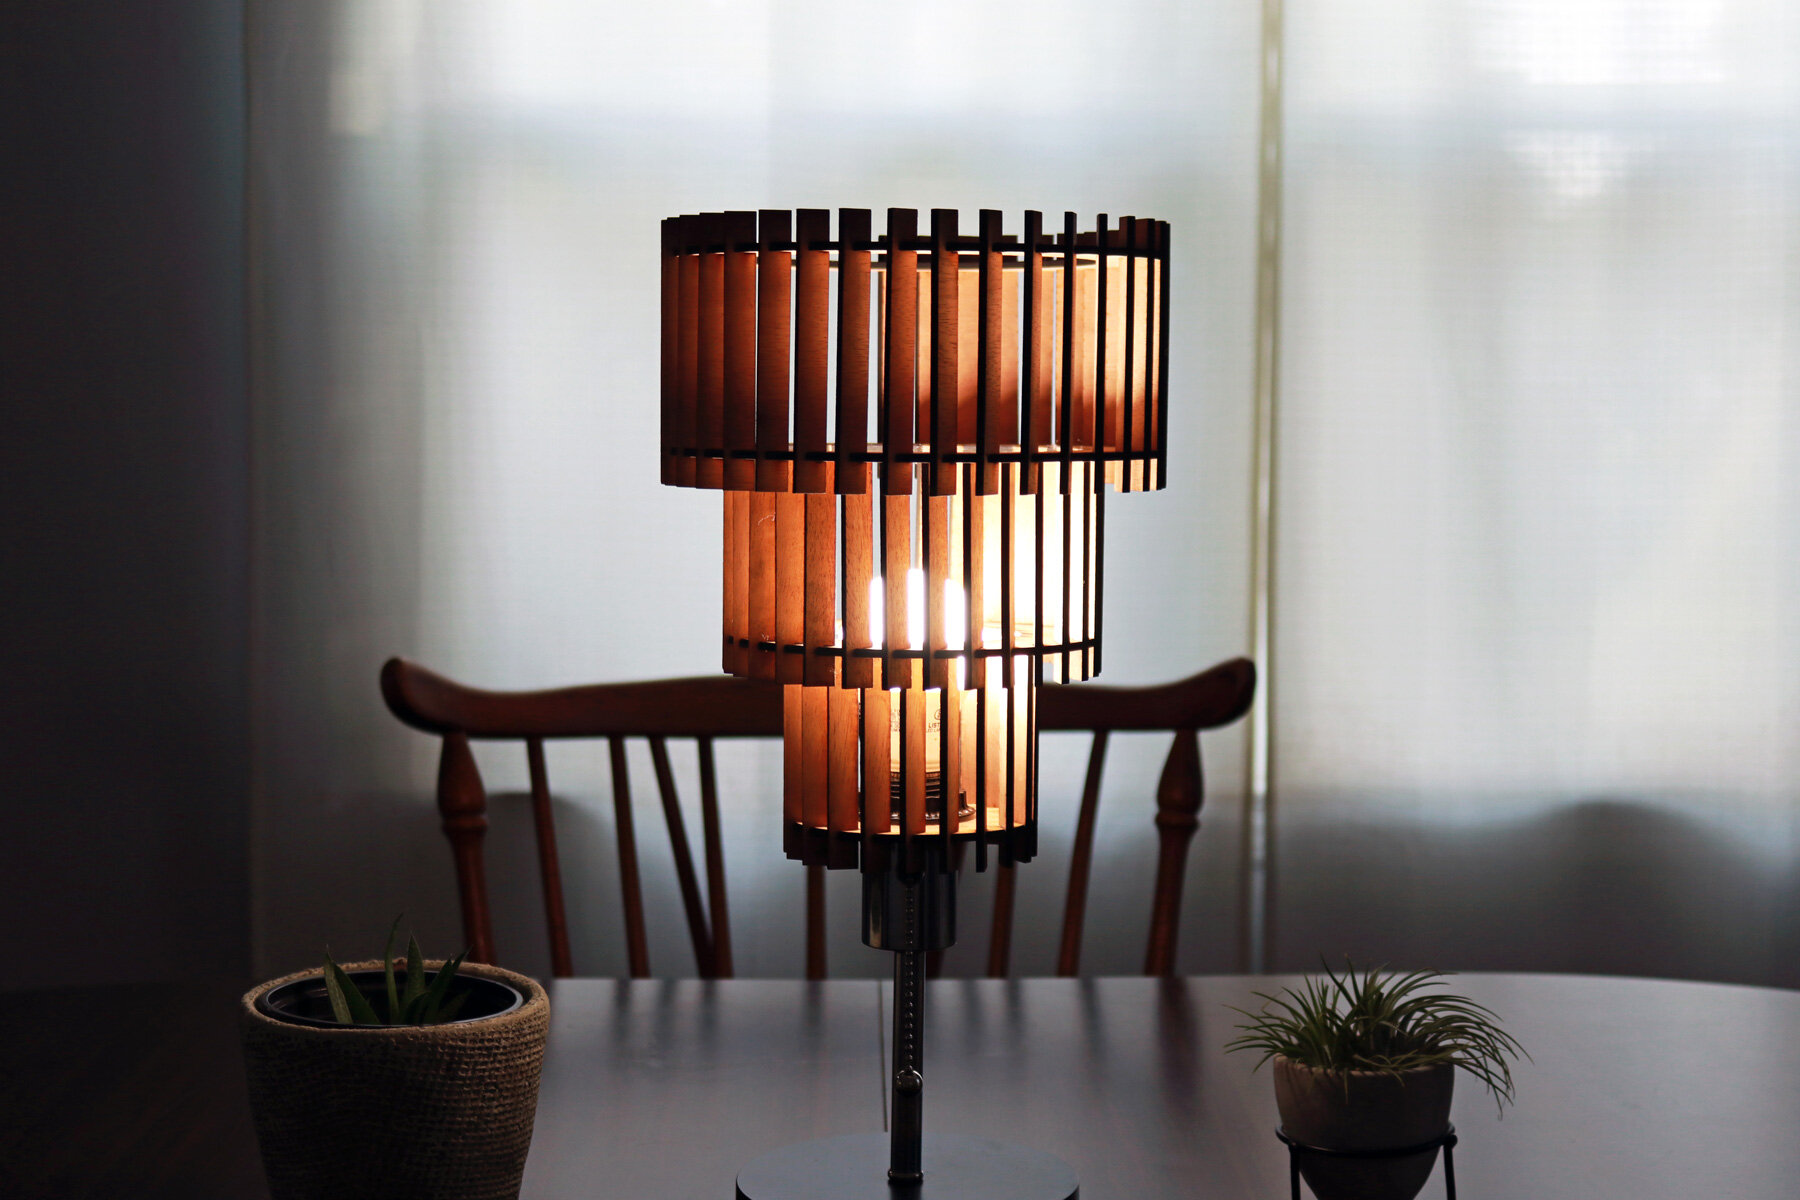
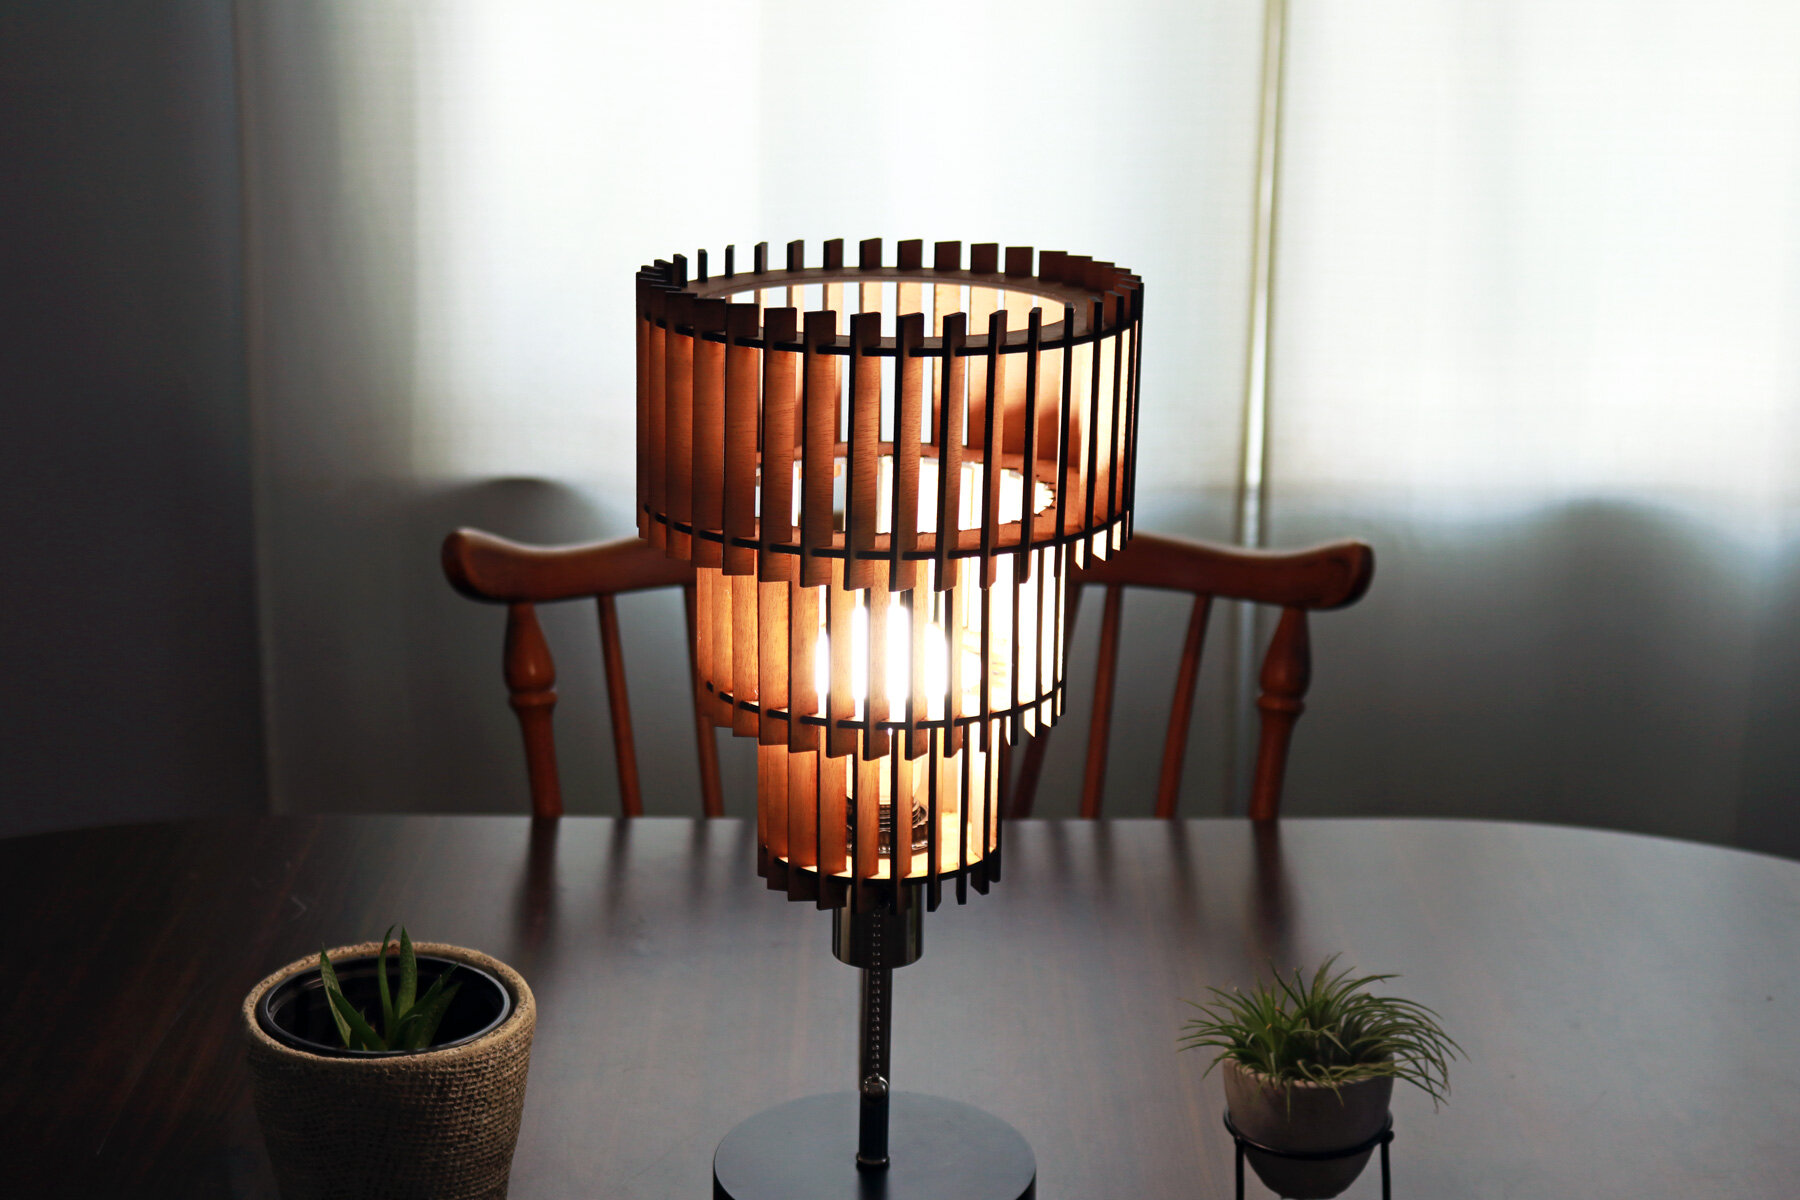
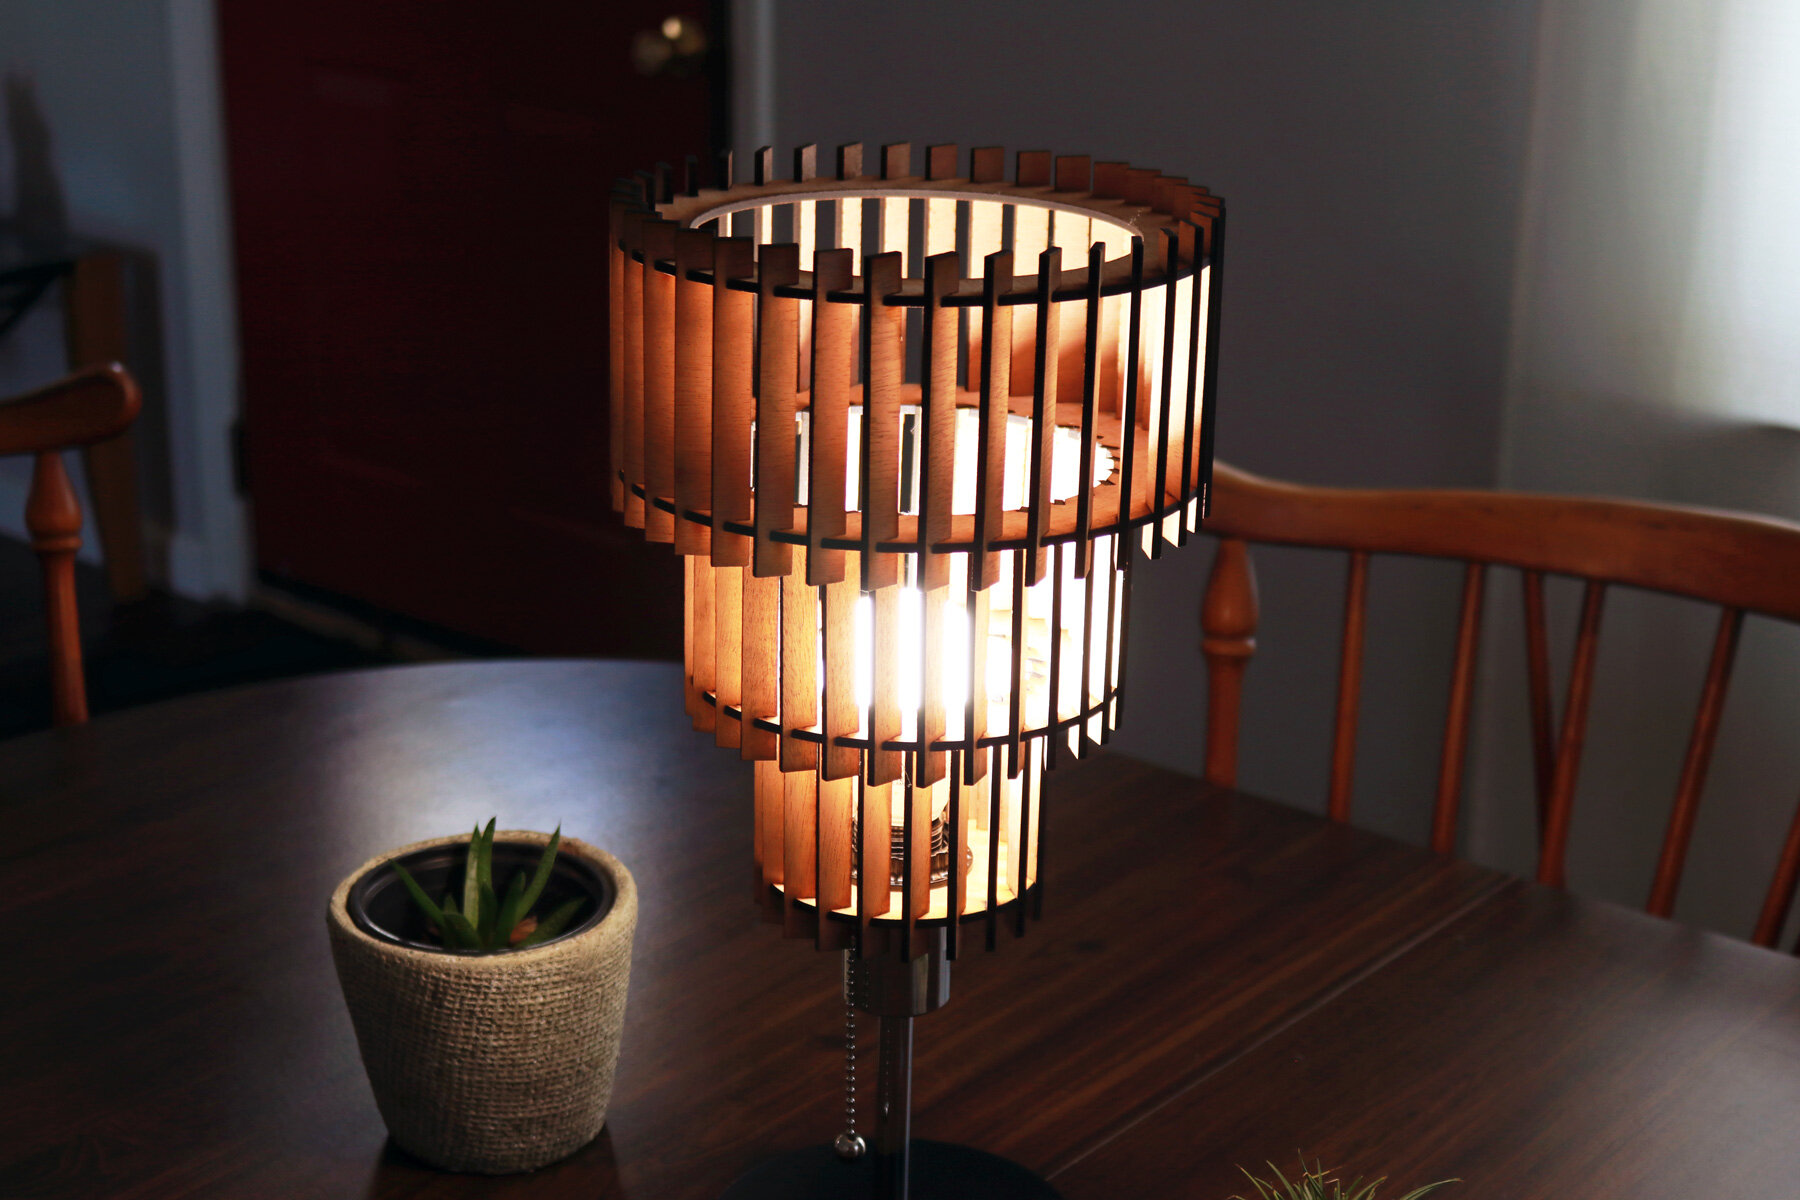
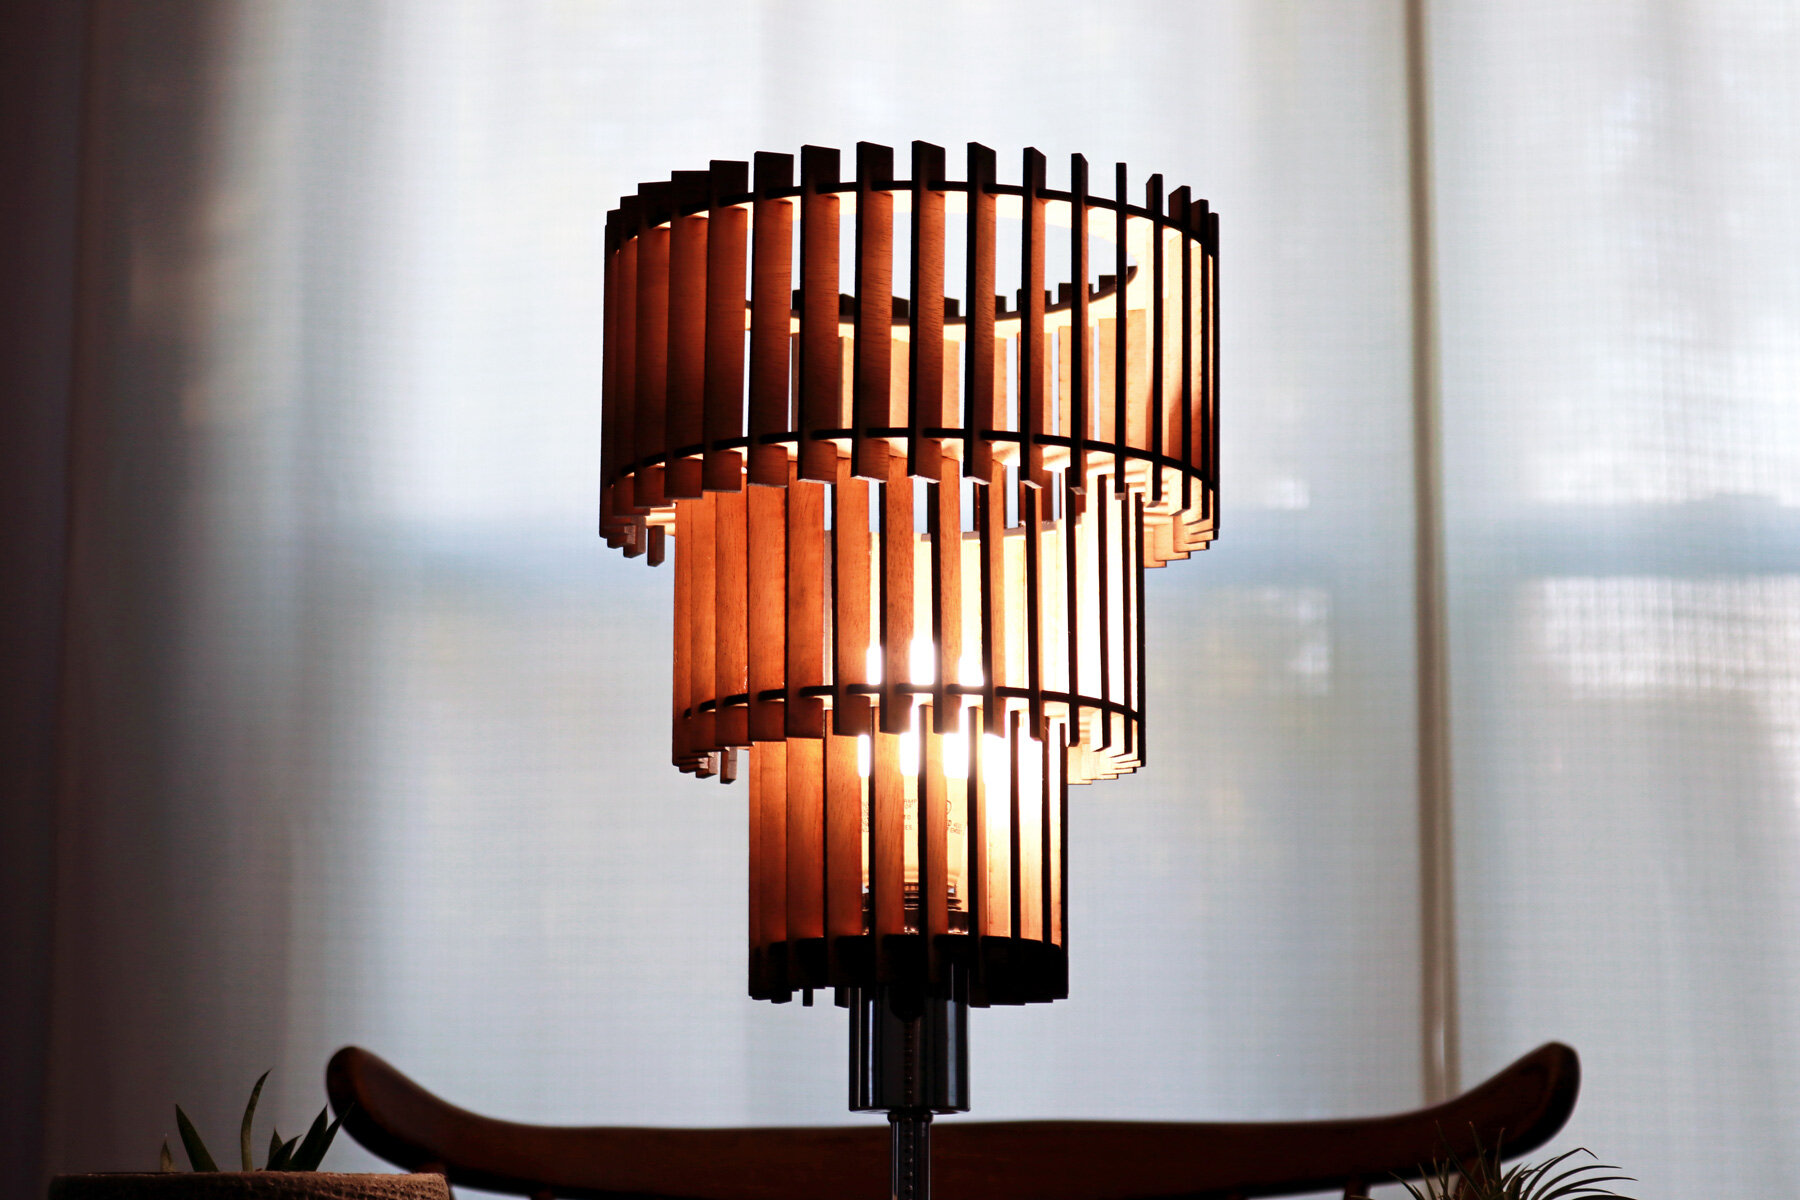
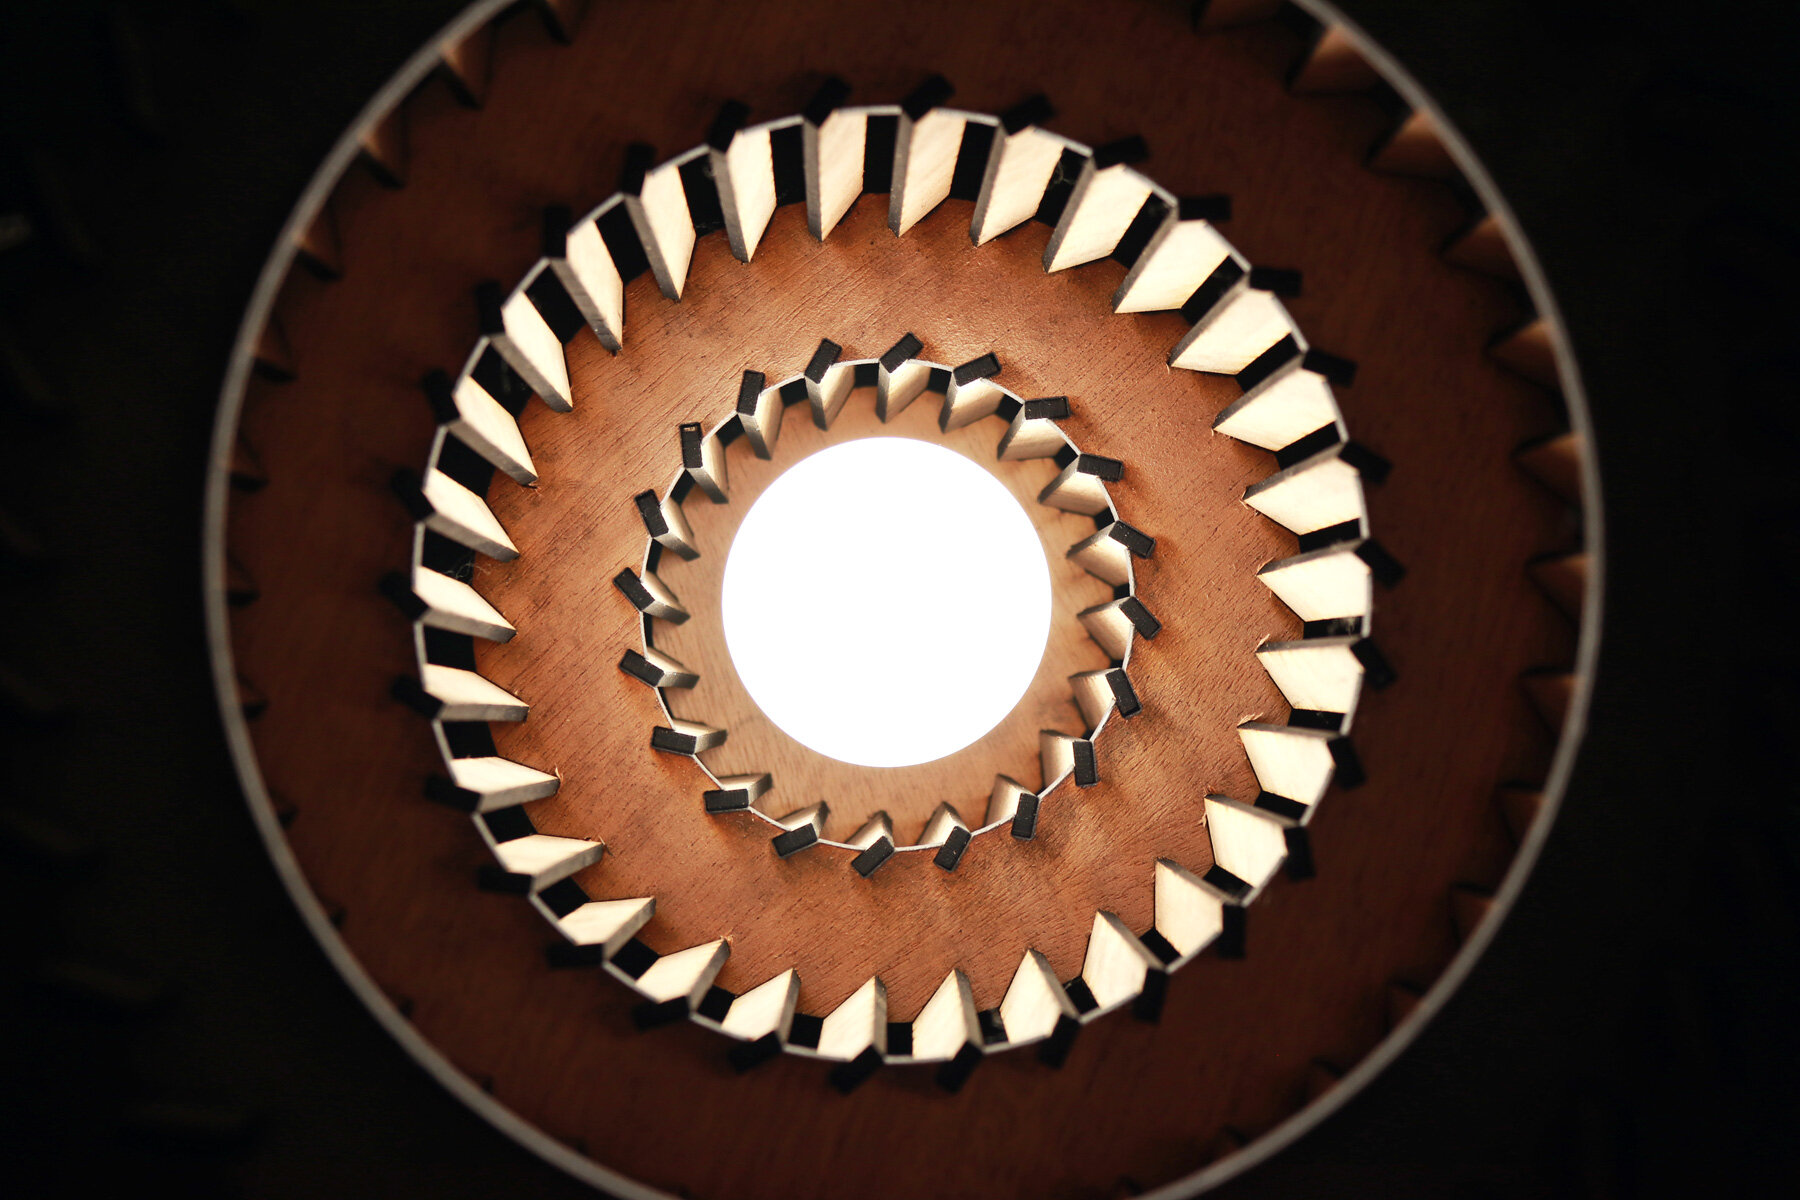
As an inspiration for this wood 3 layered round light, I deconstructed the design elements of the He Art Museum down to 2 primary design ideas; stacking round forms from small to large to create overhangs and using vertical fenestrations to shade the interior spaces from direct light. The bottom tier has a smaller circumference and the sizes of each upper layer increases to create a top heavy lampshade. The final product can be used as a table lamp or hung on a ceiling as a chandelier.
Process
The wood 3 layer round light was designed in a software called Rhinoceros where I began by defining the diameter of each layer. My goal was to design a proportionally beautiful light fixture and the primary constraint for the size of each layer’s diameter was that it had to be cut in my Glowforge laser cutter, which has a maximum diameter of approximately 11 inches. Rather than going with the maximum size, I decided to go no larger than 8 inches for the largest layer and work down in increments of 2 inches for the remaining layers.
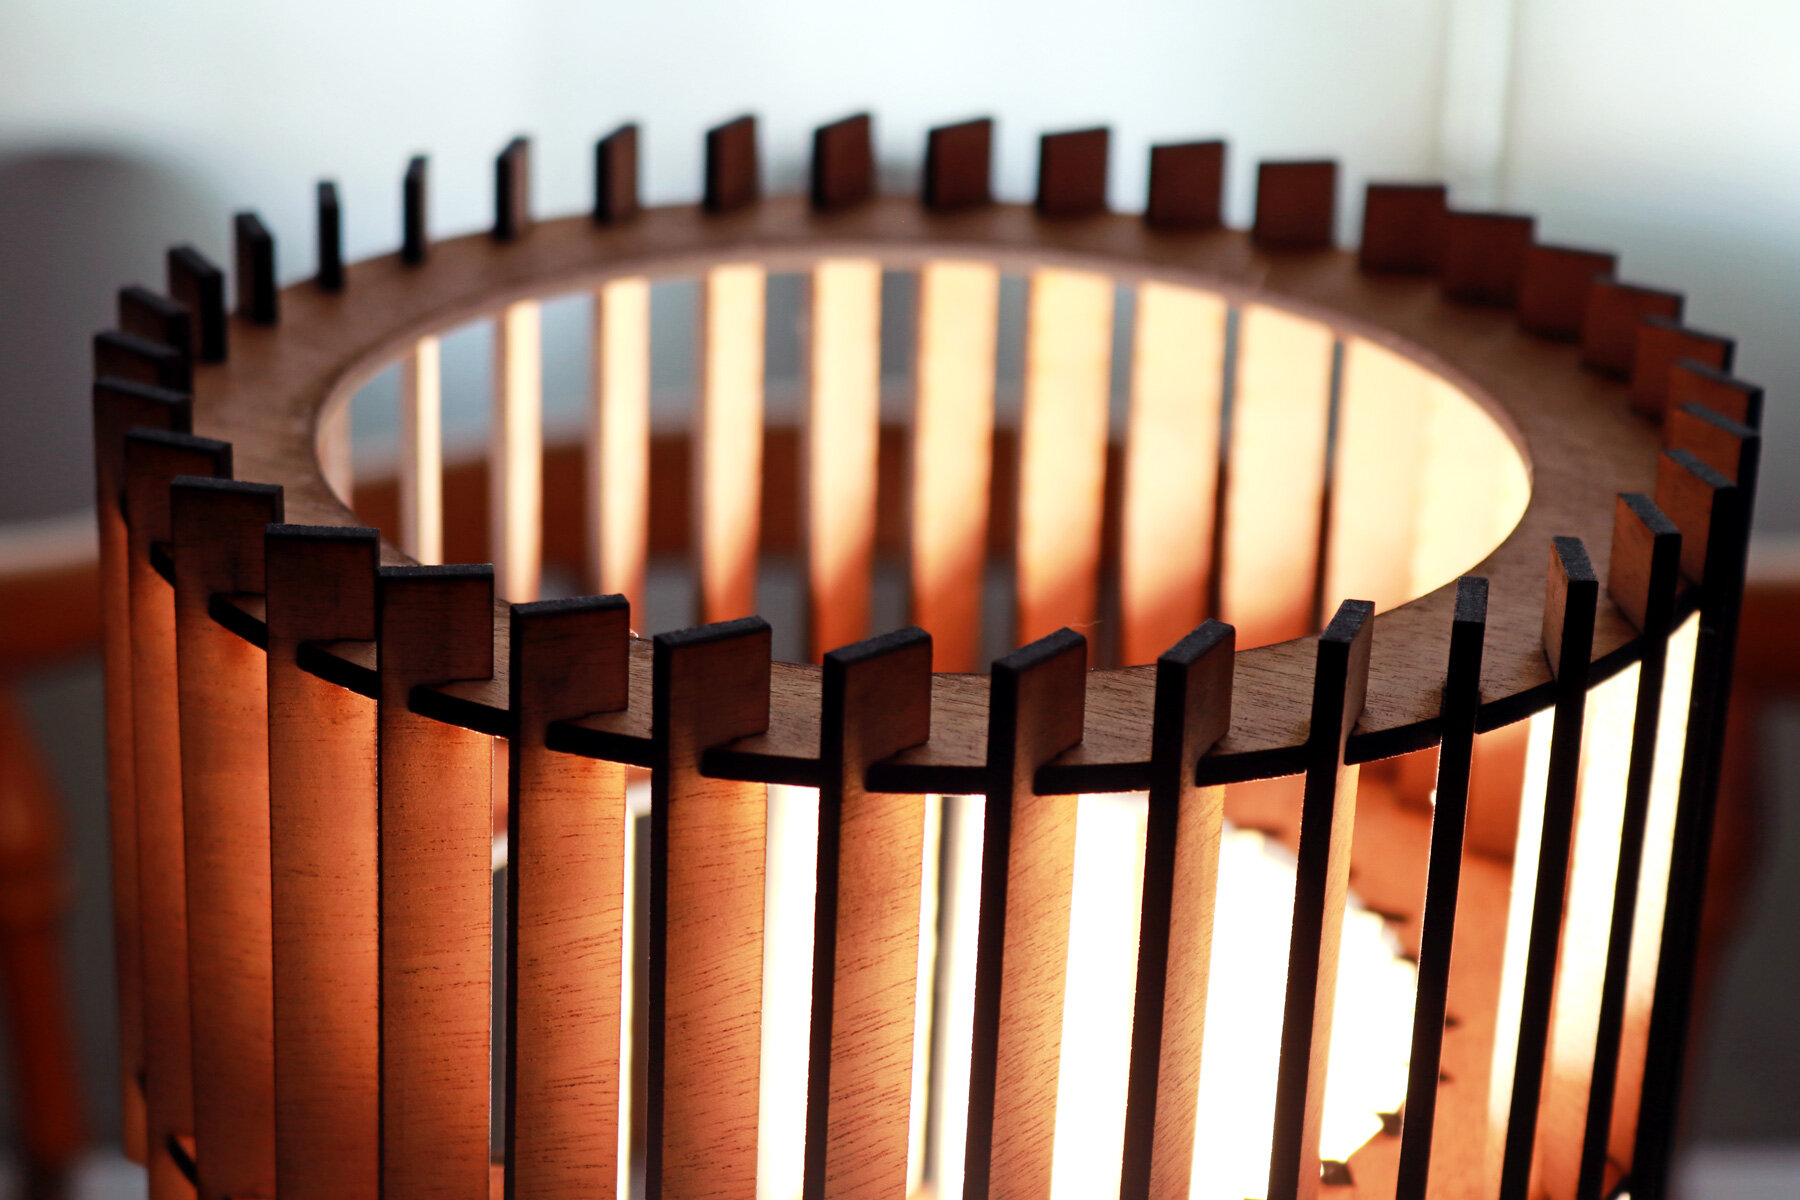
After the diameters were finalized, I cut finger joints at an angle around the entire perimeter of the circular frames at regular intervals. For this project, I also decided to try a different type of joint where each vertical panel would have a finger joint that slots into one on the circular frame. However, the top of the panel would have a similar, but open, finger joint that would rotate into place on the interior voids of the circular frames. This would allow each piece to align vertically as intended and provide the stability for the light fixture.
Once the design of the frames and the vertical panels were finalized, I extruded each shape and created a 3D model of the final 3 layered round light to ensure that the pieces would lock into one another as intended. Then, it was time to move onto the fabrication part of the project.
This project took a total of 2 sheets of 1/8 inch mahogany plywood that fits within the full tolerance of the laser cutting bed of my Glowforge laser cutter. After loading the sheet of plywood into my Glowforge, I uploaded my design to its interface and started the process of cutting every piece. It was important to keep all of the vertical panels together because they varied in size.
When all of the pieces were cut and organized, I tested a few of the vertical panels to figure out the best way to get each piece into place at their respective finger joints. Then, I pushed each joint into place without glue to see if they would be friction fit together as intended. Once I verified that the construction process I had in mind would work, I was able to quickly assemble all of the pieces and finish the 3 layered round light.