Making a Cardboard Twisted Oval Light

Tools & Materials
Twisting Oval Light Design File
Cardboard Sheets - C Flute Thickness
Table Lamp - Remove the shade that comes with it
Project Description
How can we design a cardboard lampshade with an elegantly curved form?
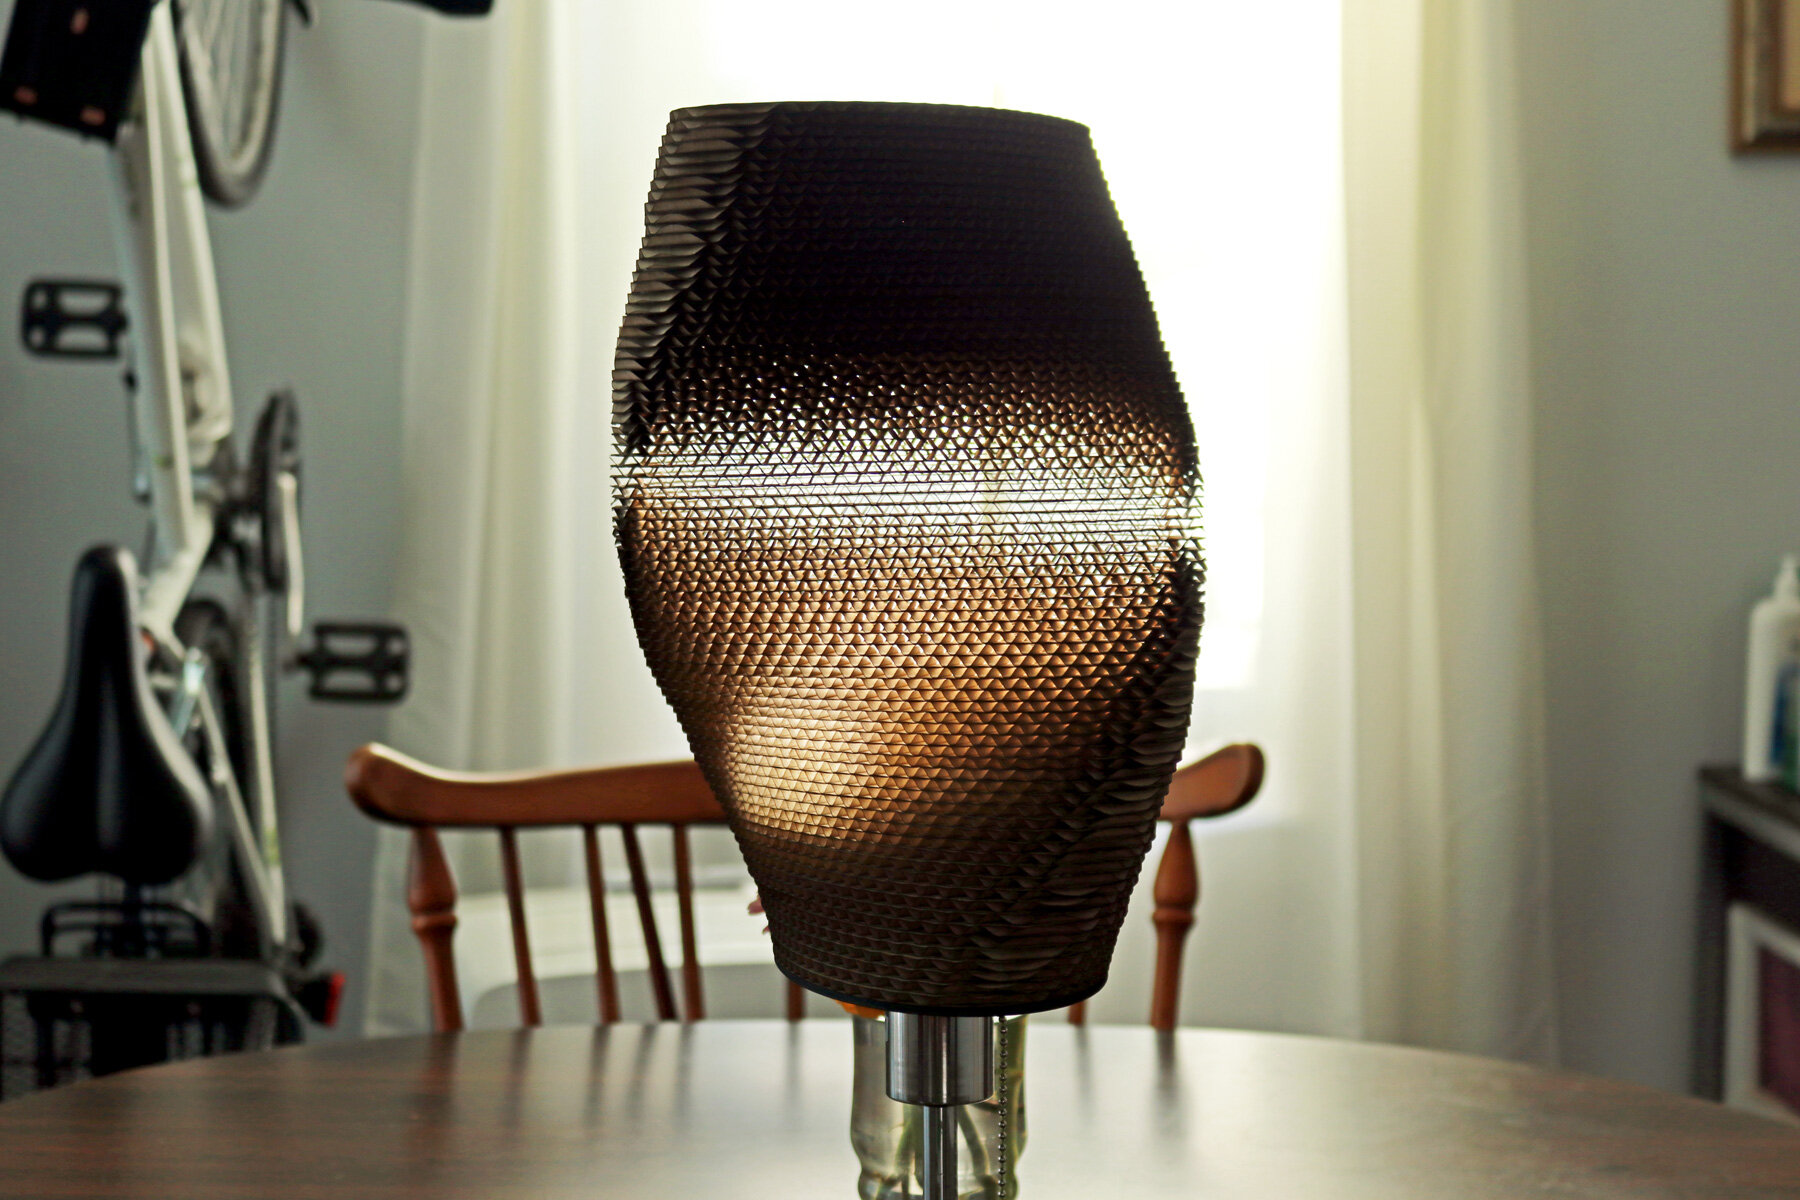
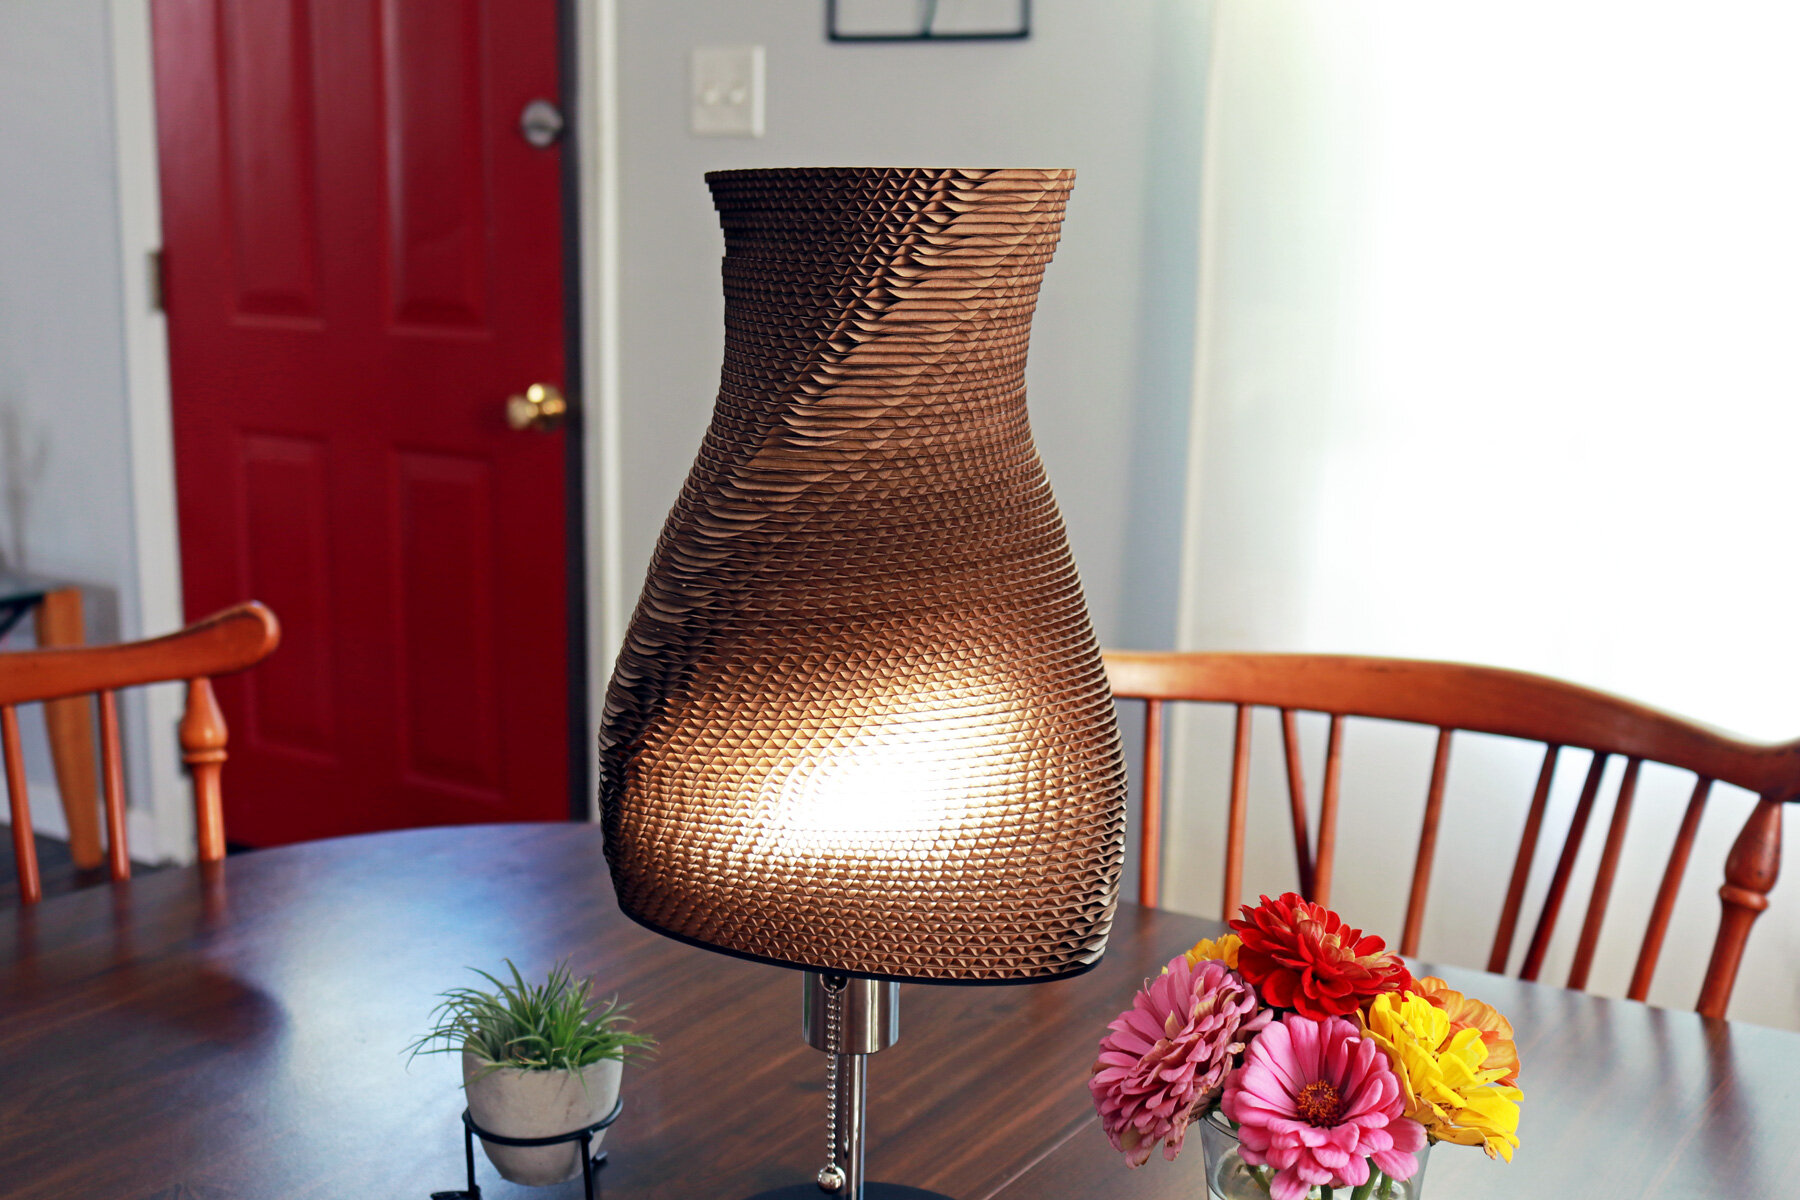
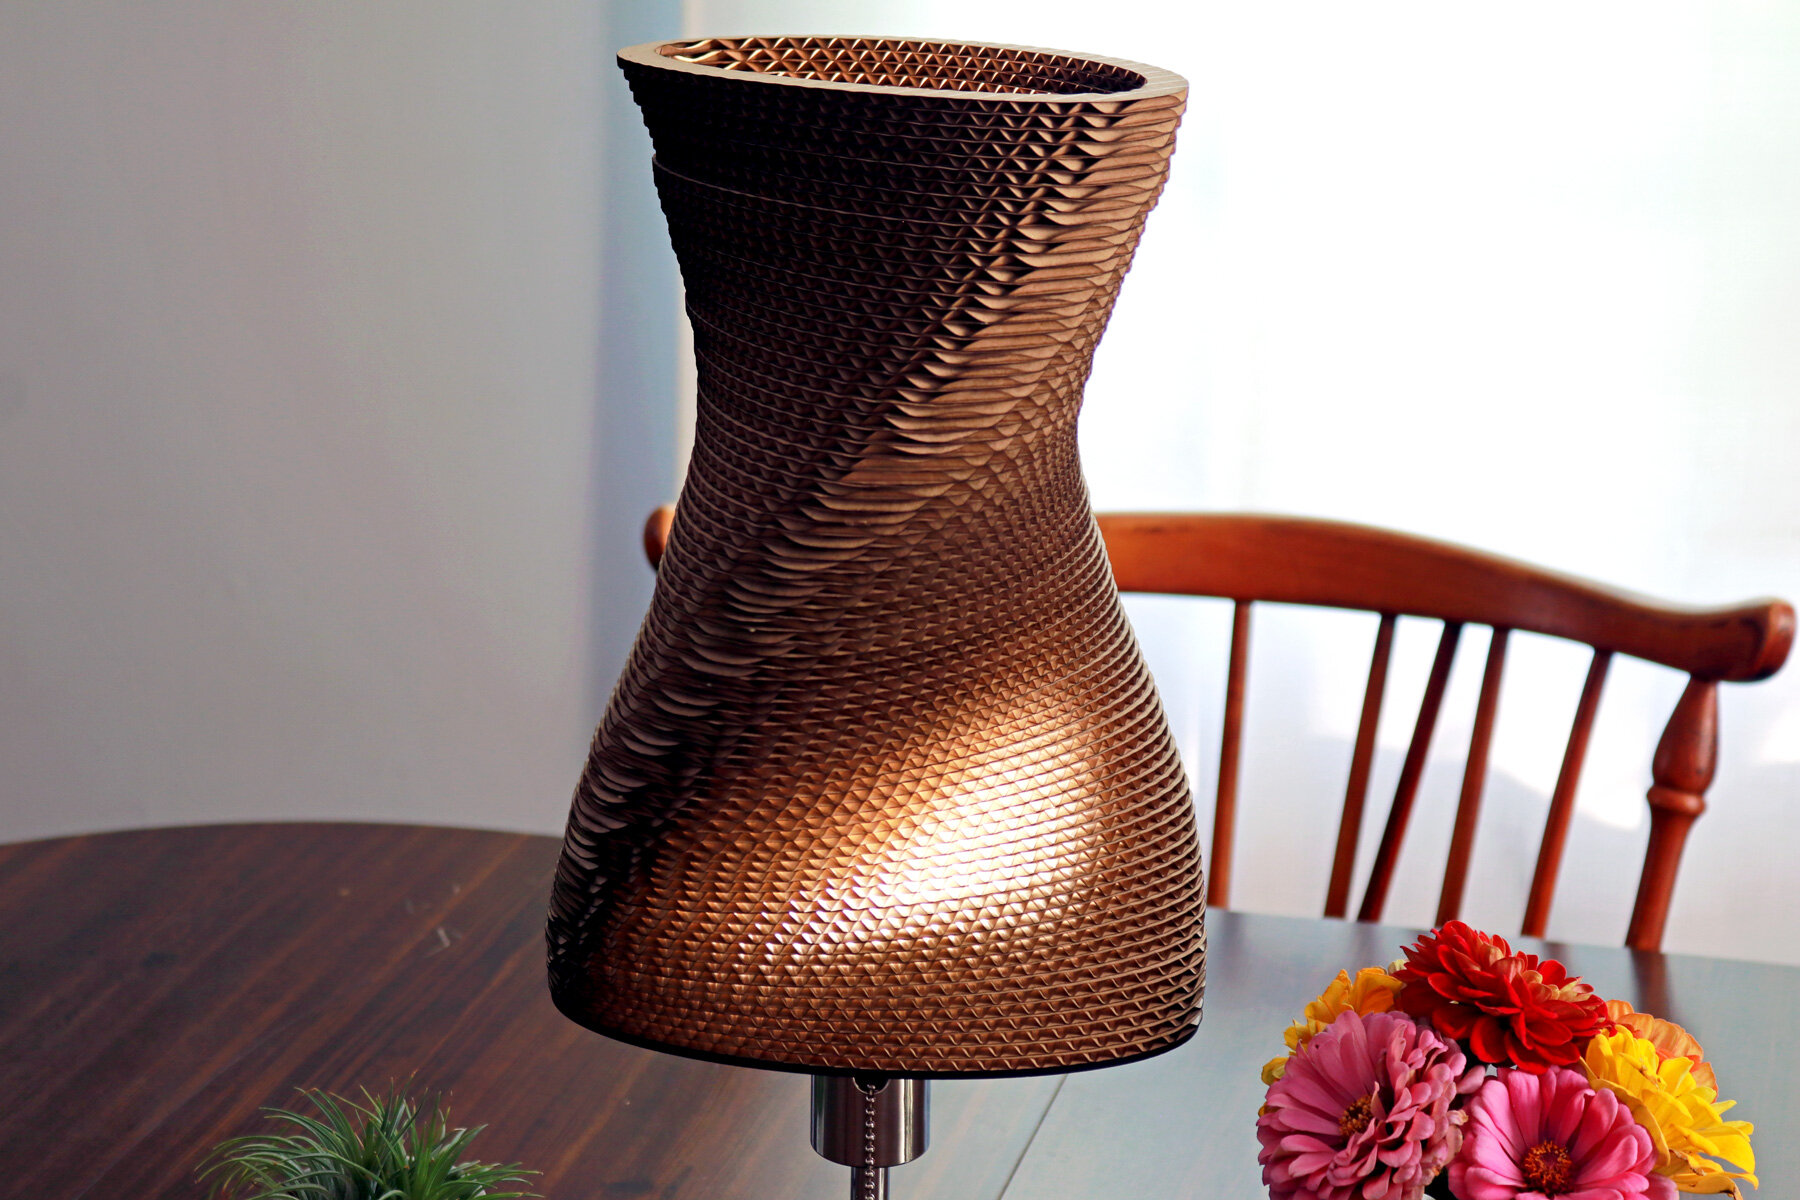
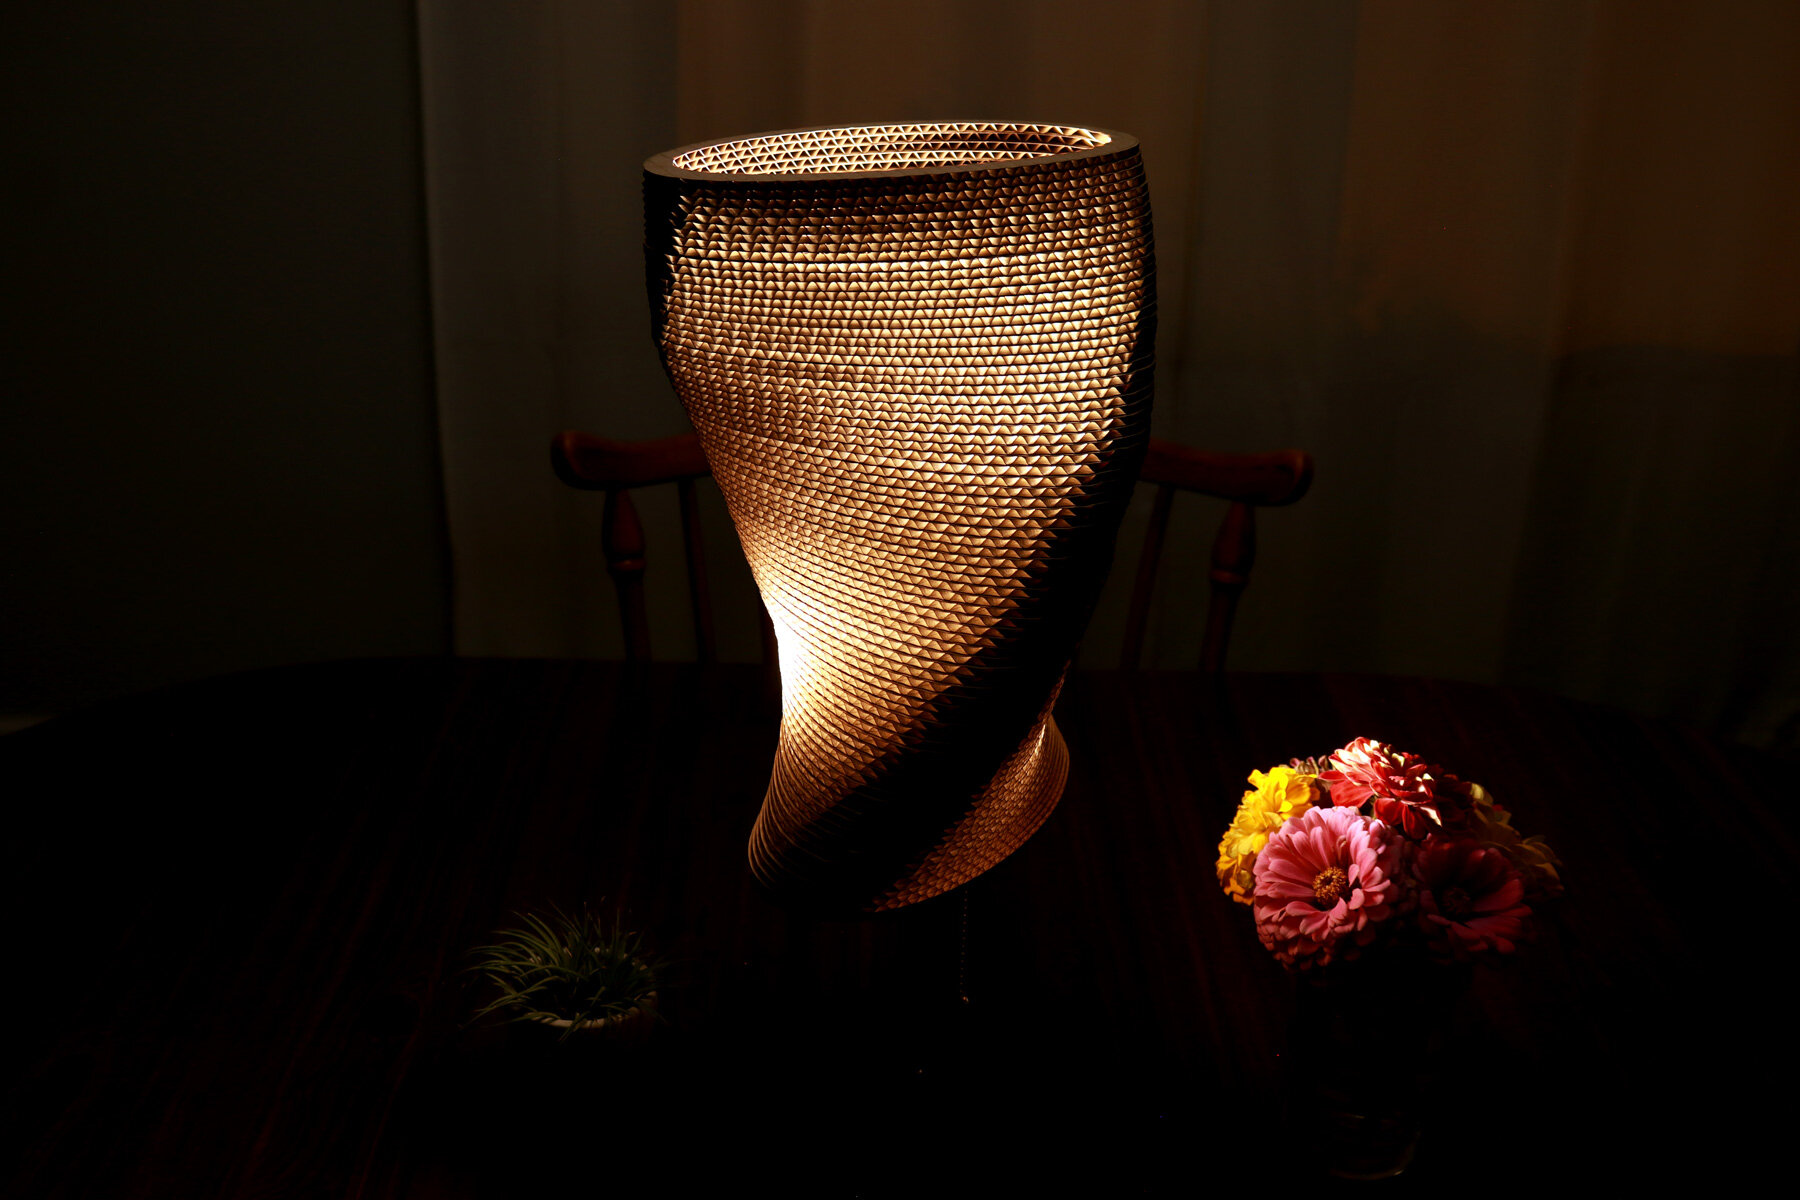
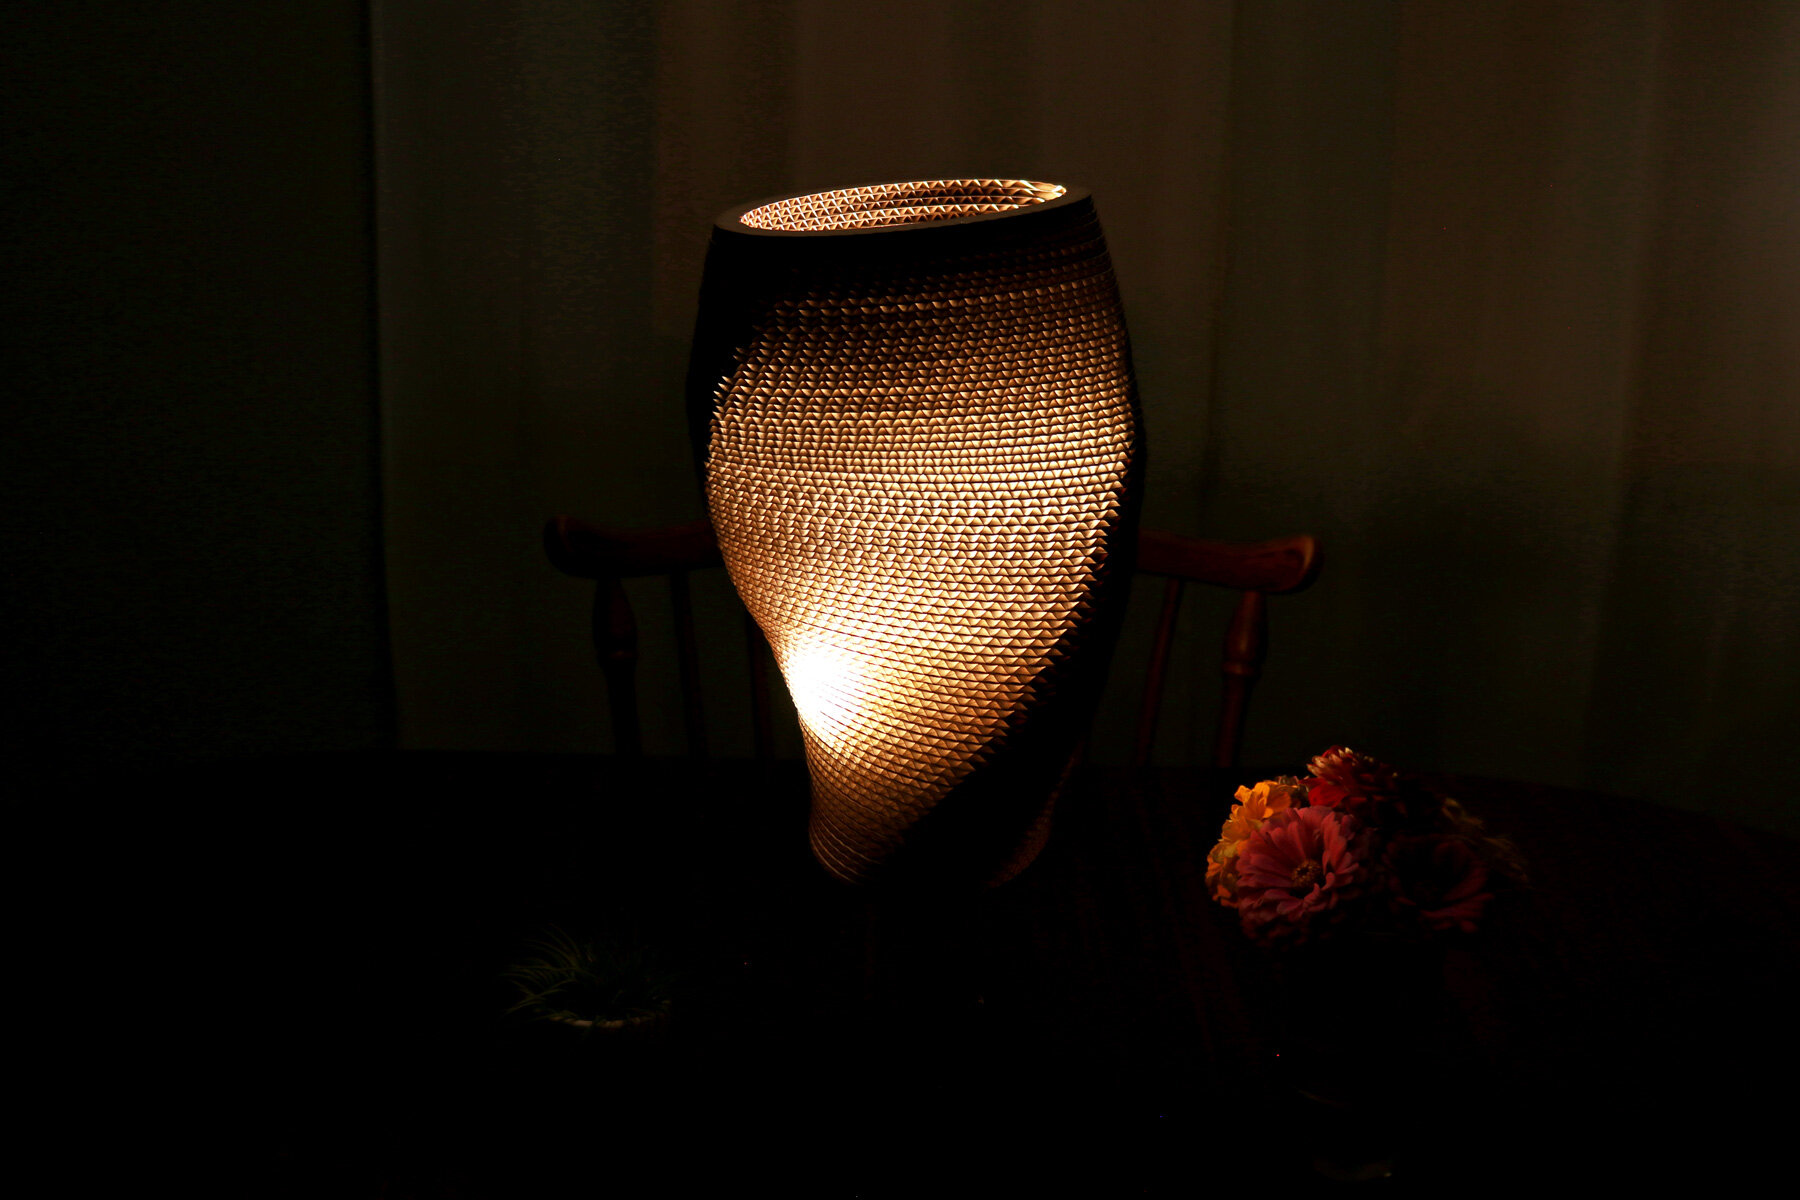
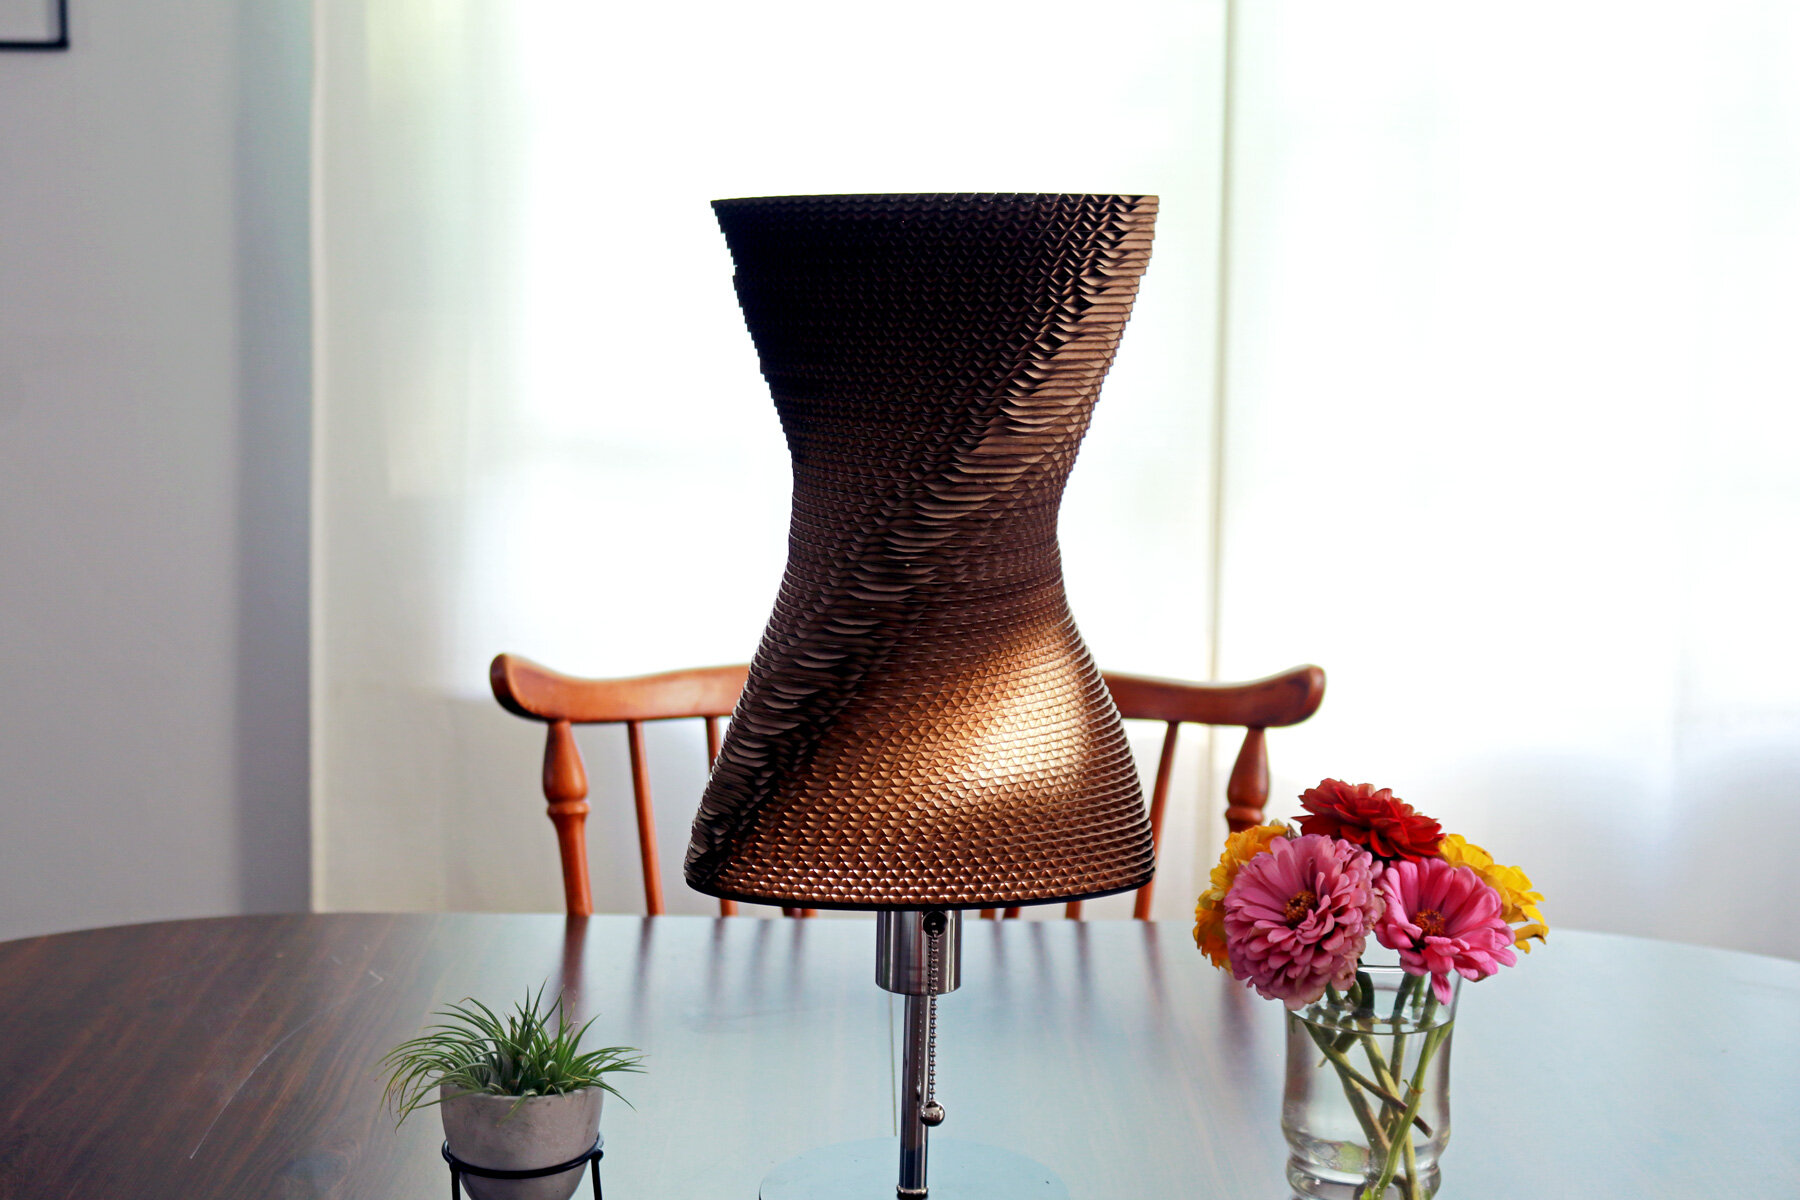
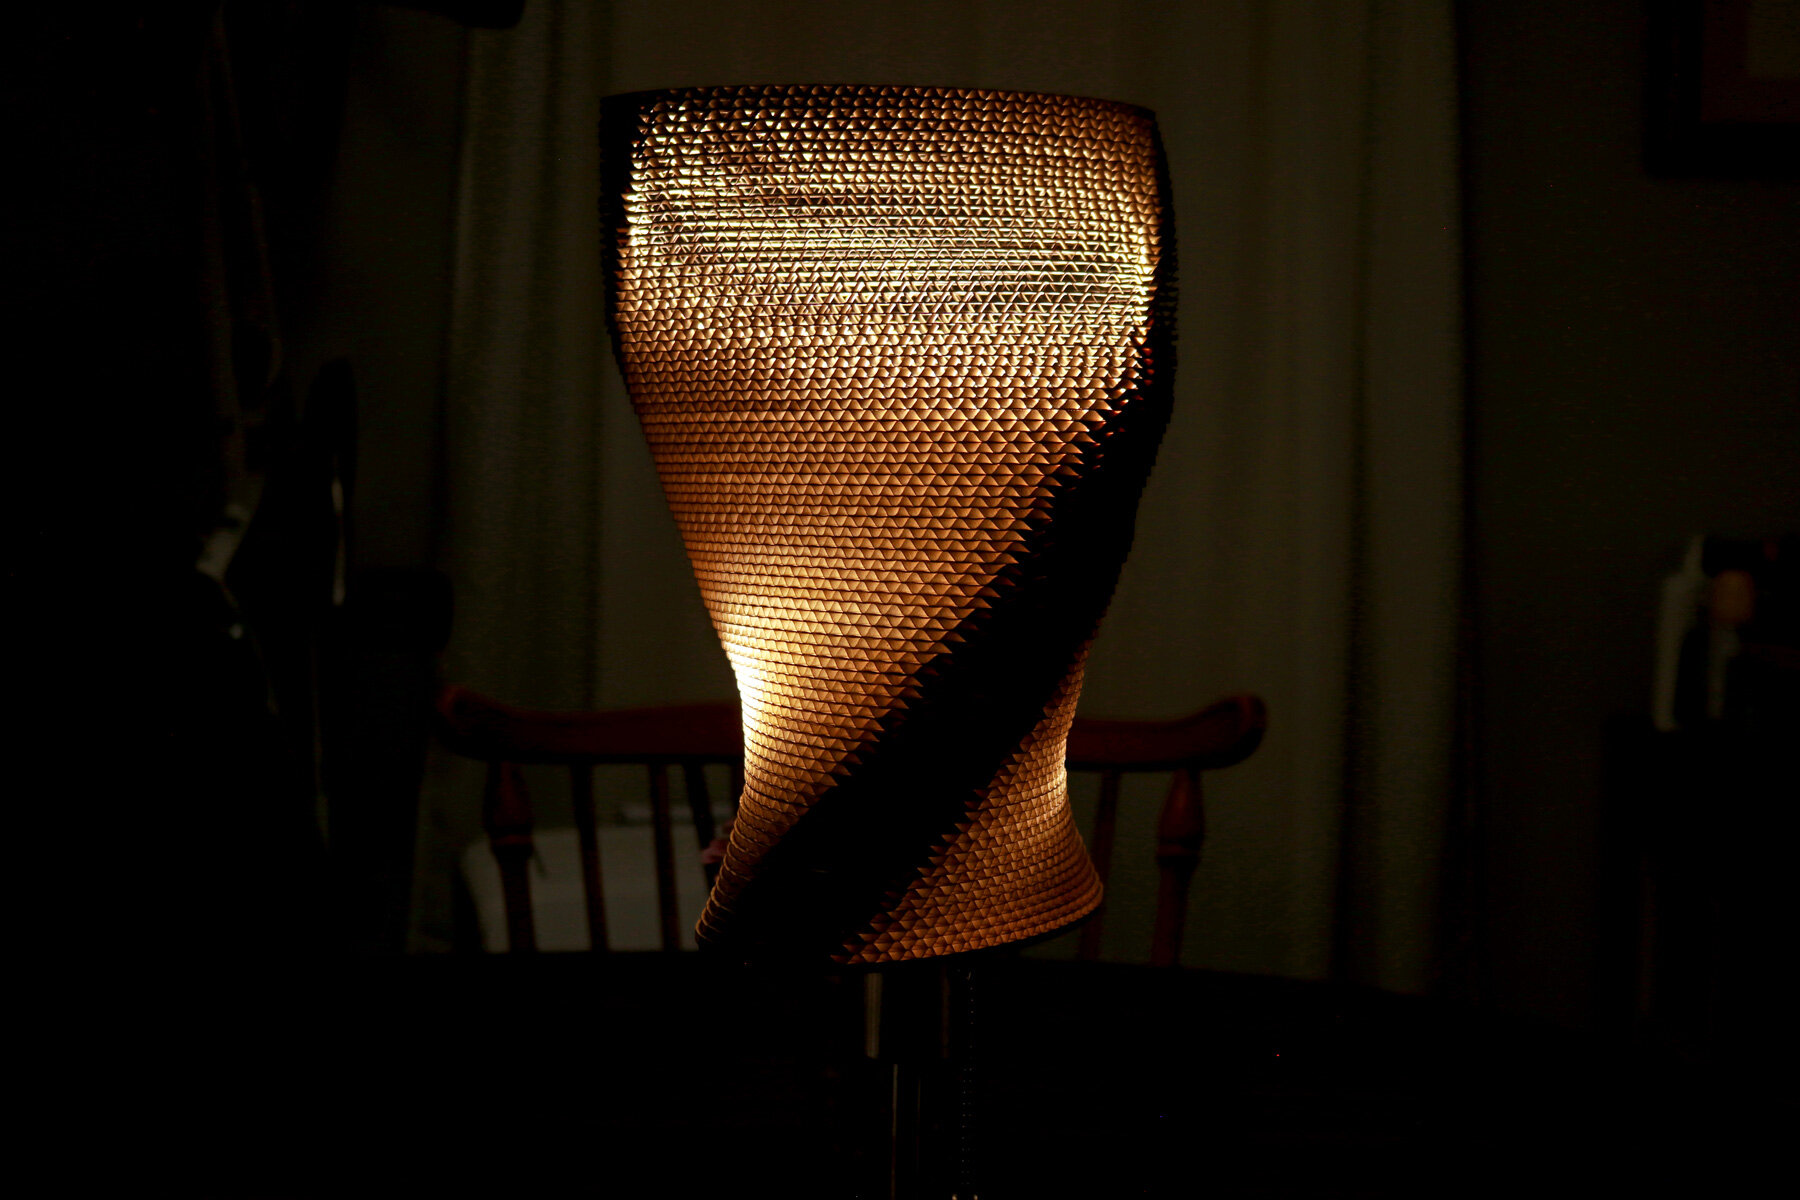
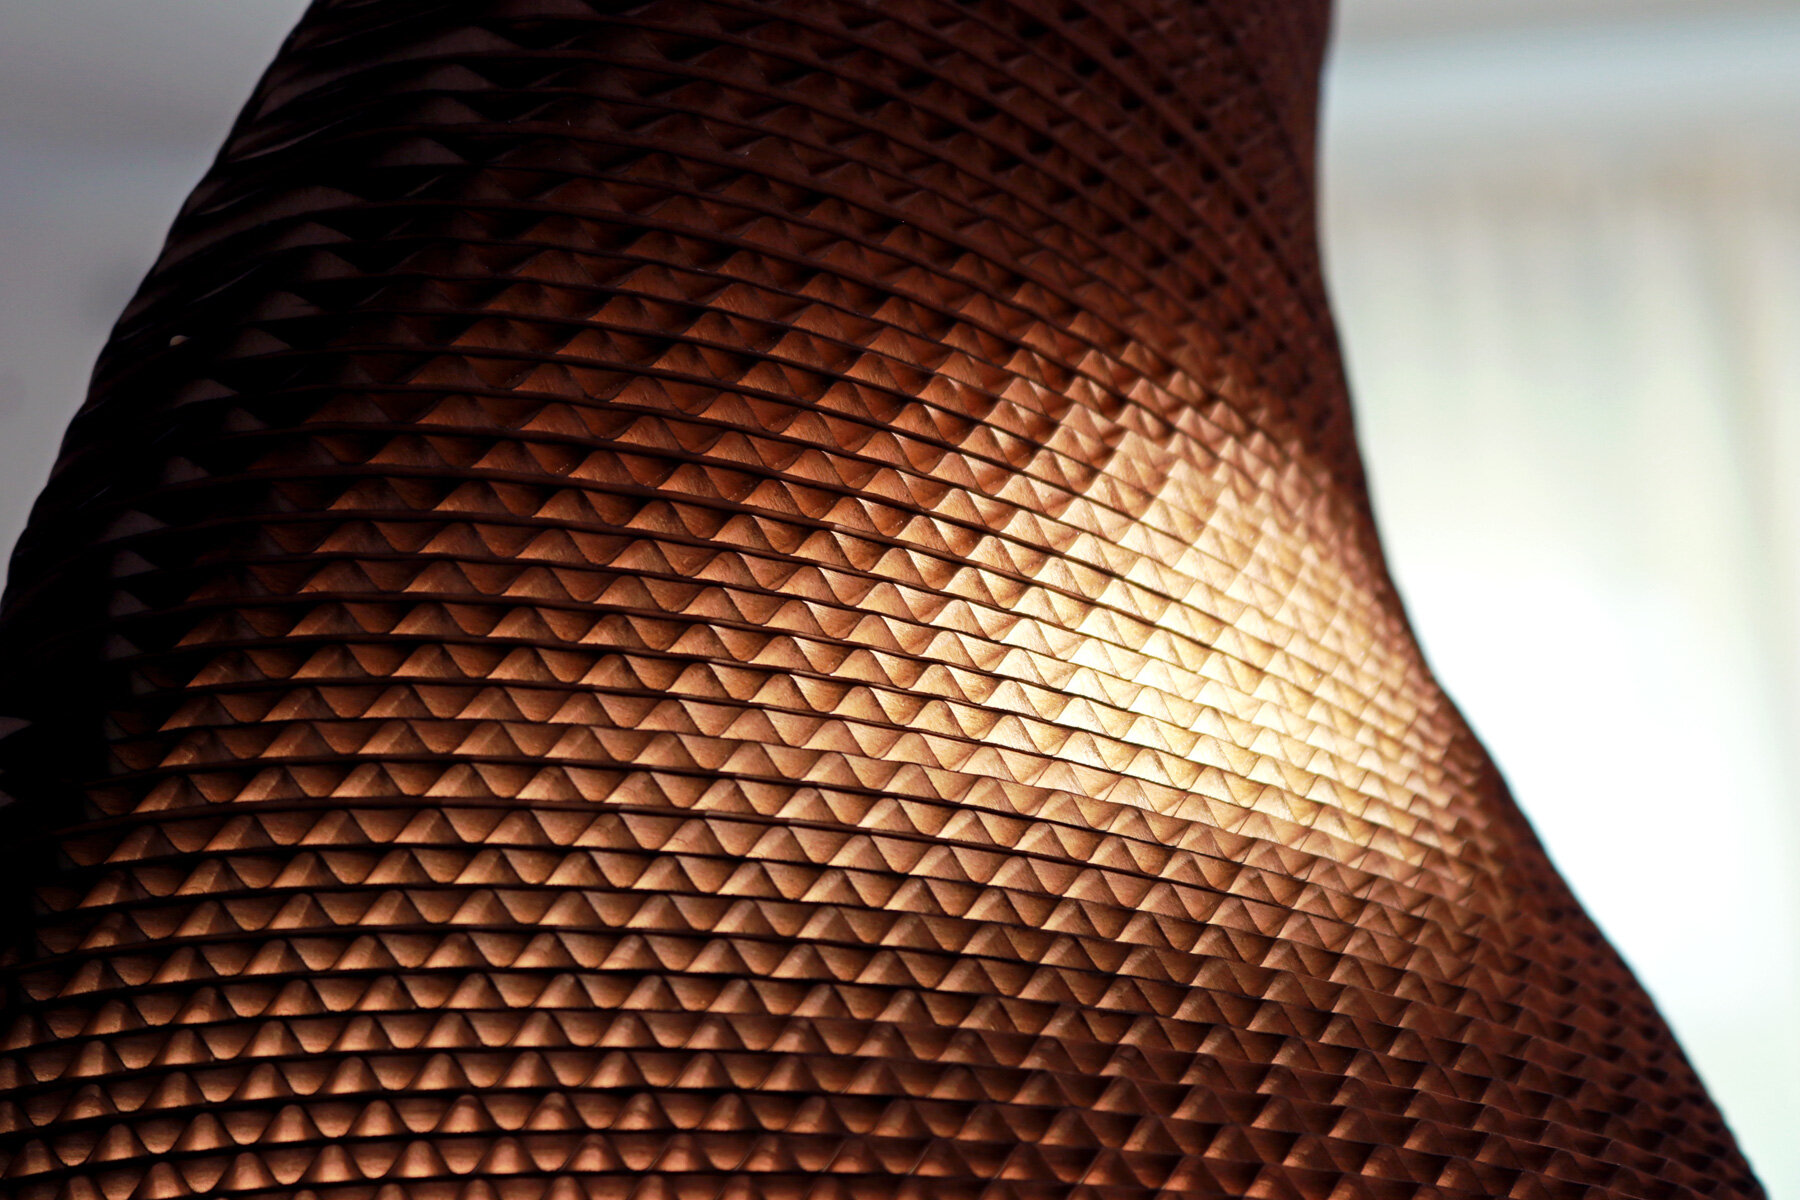
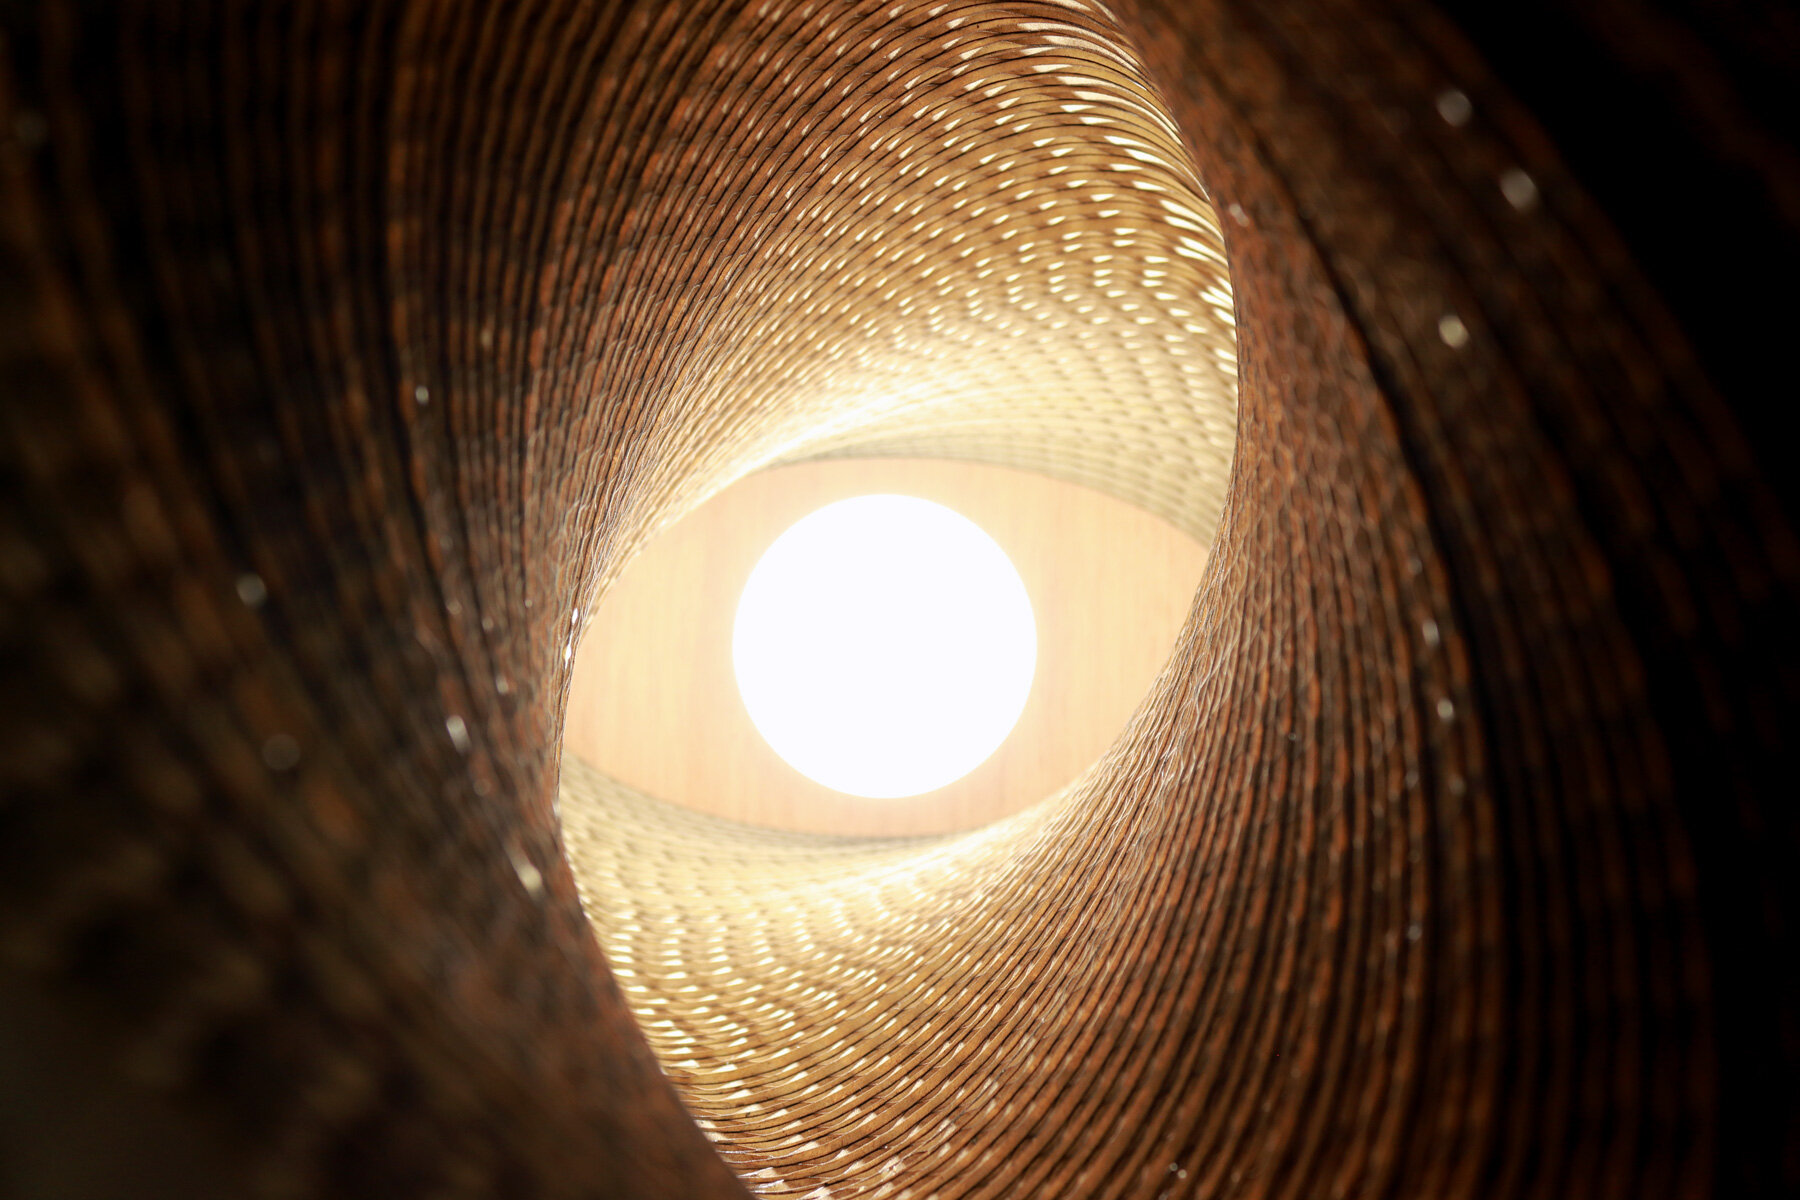
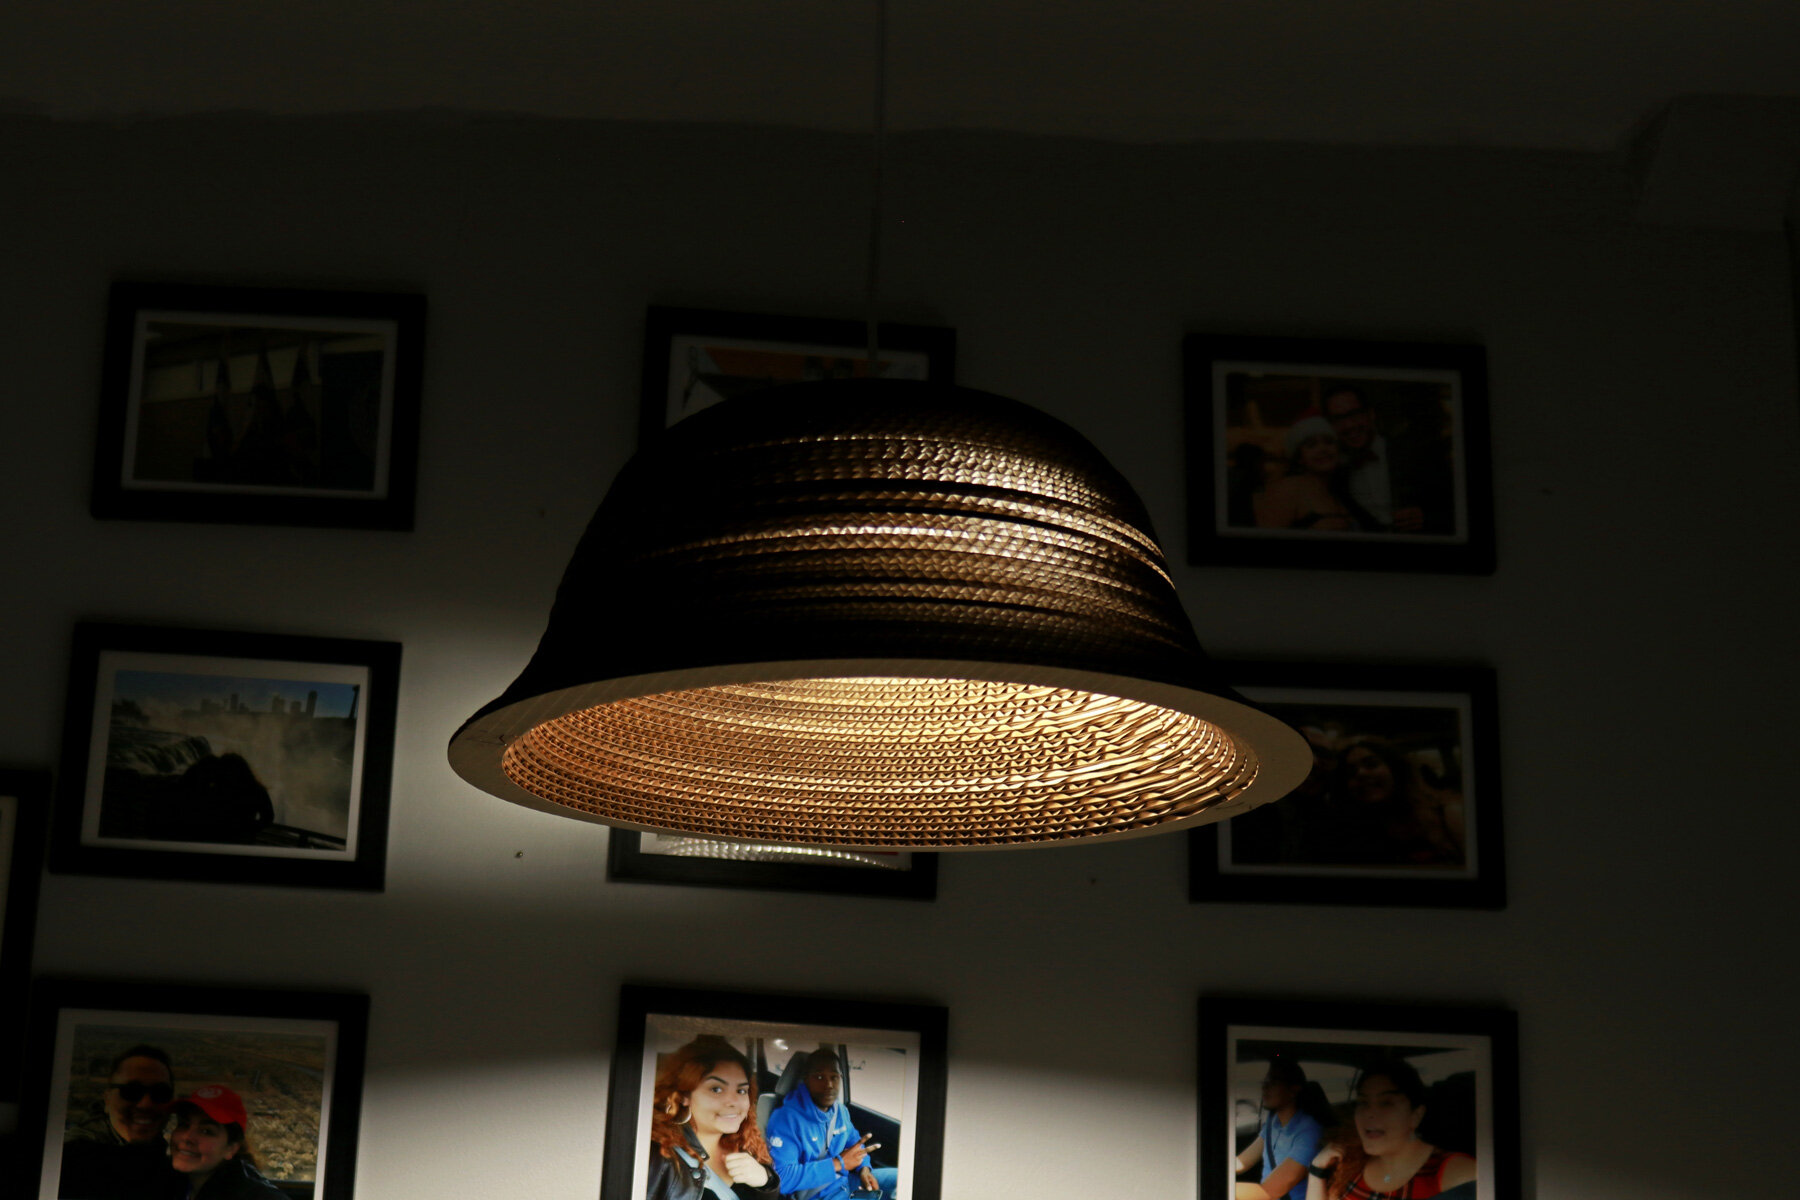
Continuing the series of twisting cardboard lampshades, this project explores the use of a simple oval shape that was inspired by the design of the Absolute towers by MAD Architects. The curved shape along with the twisting layers creates an elegant and dynamic form with a captivating warm glow of light.
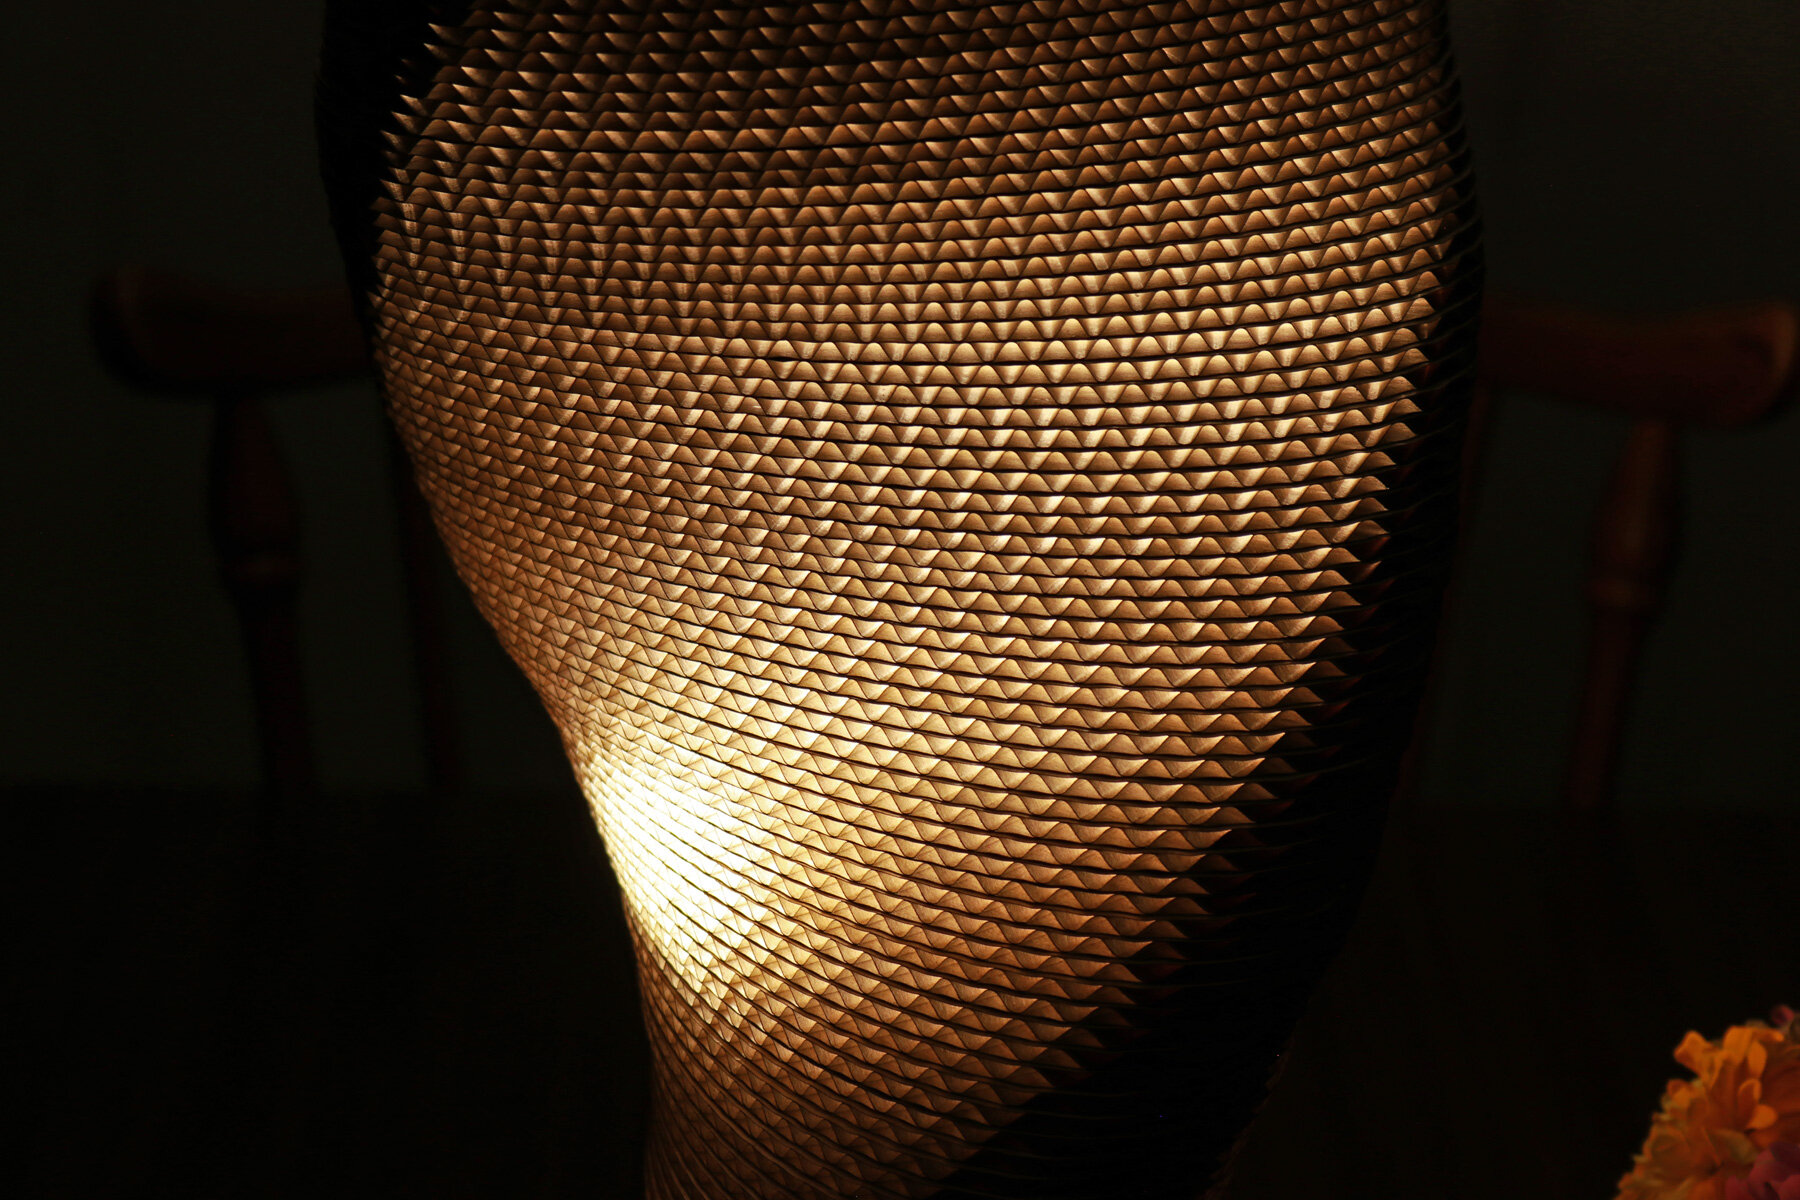
Two properties of cardboard that adds to the aesthetic are the repetitive corrugations in the material and the natural color of it. These two aspects allows light to pass through and diffuse into a beautiful earthy color. Closer to the source, the light passing through the corrugations is brighter and as the oval light grows taller, there’s a decrease in the amount of light passing through the lampshade.
Process
One of my favorite skyscraper projects is one designed by the architecture firm MAD architects from China. The project is the Absolute Towers that twists as it grows in height. The oval shaped floor plates create a beautiful and organic form. Using this project as a precedent, I was curious to see how it would look if it were lamp made out of cardboard.
This project was designed in a software called Rhinoceros where I started by laying out an oval and sizing it to fit within my Glowforge laser cutter and also allow my hand to fit inside to install a light bulb. Once the proportions were correct and the oval was finalized, I offset it to create a half inch thick ring so that the cardboard would be hollow at the center and have enough surface area to be stacked and glued.
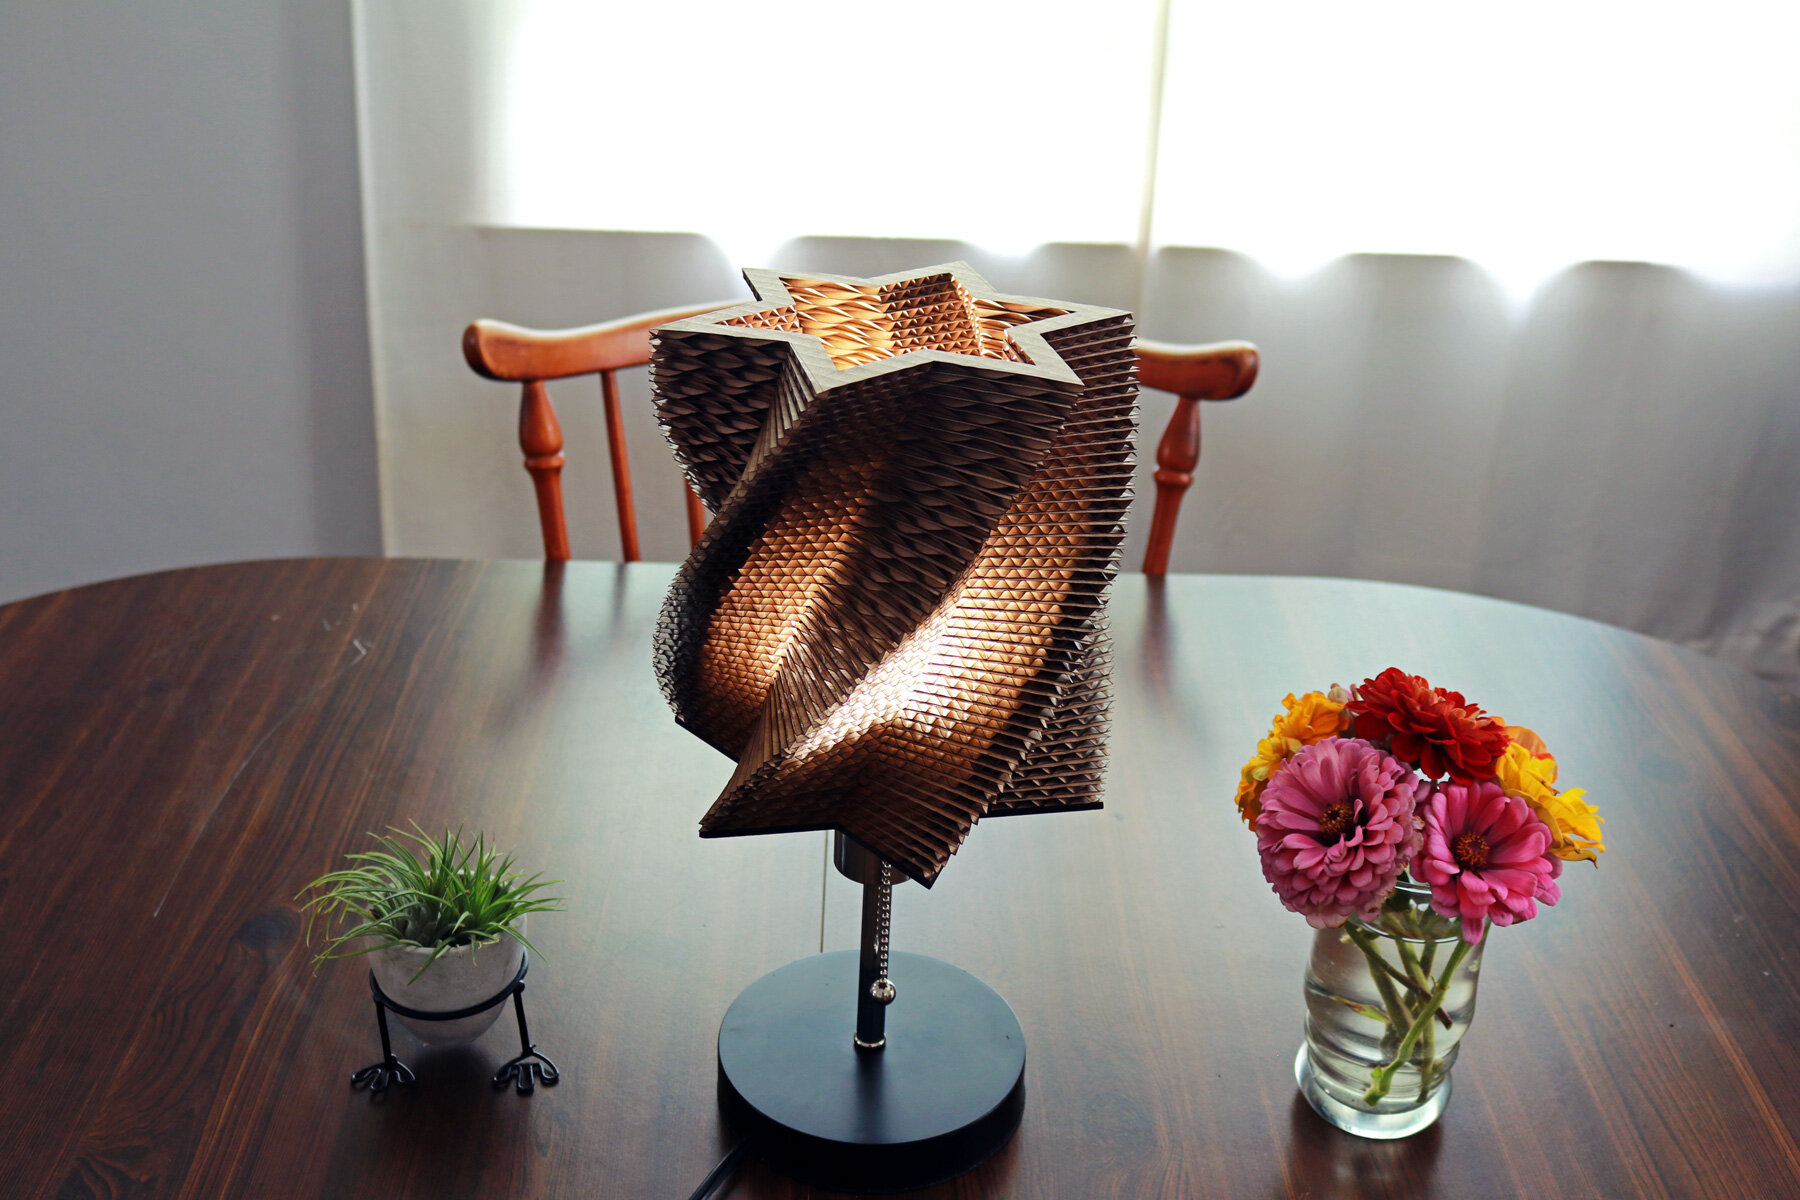
Once the star was designed, I extruded it to match the thickness of one layer of cardboard. Then, I copied it upward and rotated every layer 2 degrees. I repeated this until the final height of the light fixture reached 12 inches.
Once the design of the standard piece was complete, I organized 3 of them on one sheet of cardboard that fits inside of my Glowforge and began laser cutting all of the pieces to achieve the one-foot height. This process took a long time because I had to unload and reload sheets of cardboard into my Glowforge and repeat this process until I had enough pieces to stack and glue together. I also cut the base out of mahogany plywood to give the light fixture rigidity and engraved lines onto every piece of cardboard to assist with rotating each piece 2 degrees.
After the pieces were cut and organized, I arranged every piece so that the engraved lines were facing up and the corrugations on the cardboard were going the same direction. Starting the assembly process with the first piece, I used wood glue to attach the first cardboard layer onto the mahogany wood base. With each subsequent layer, I rotated each cardboard piece and aligned the perimeter with the engraved marks on the previous piece and glued them in place. This achieved an even 2-degree rotation between each layer, which creates a beautiful twisting effect. The assembly process took about 45 minutes complete.