Making a Custom Wood Desk Organizer

Tools & Materials
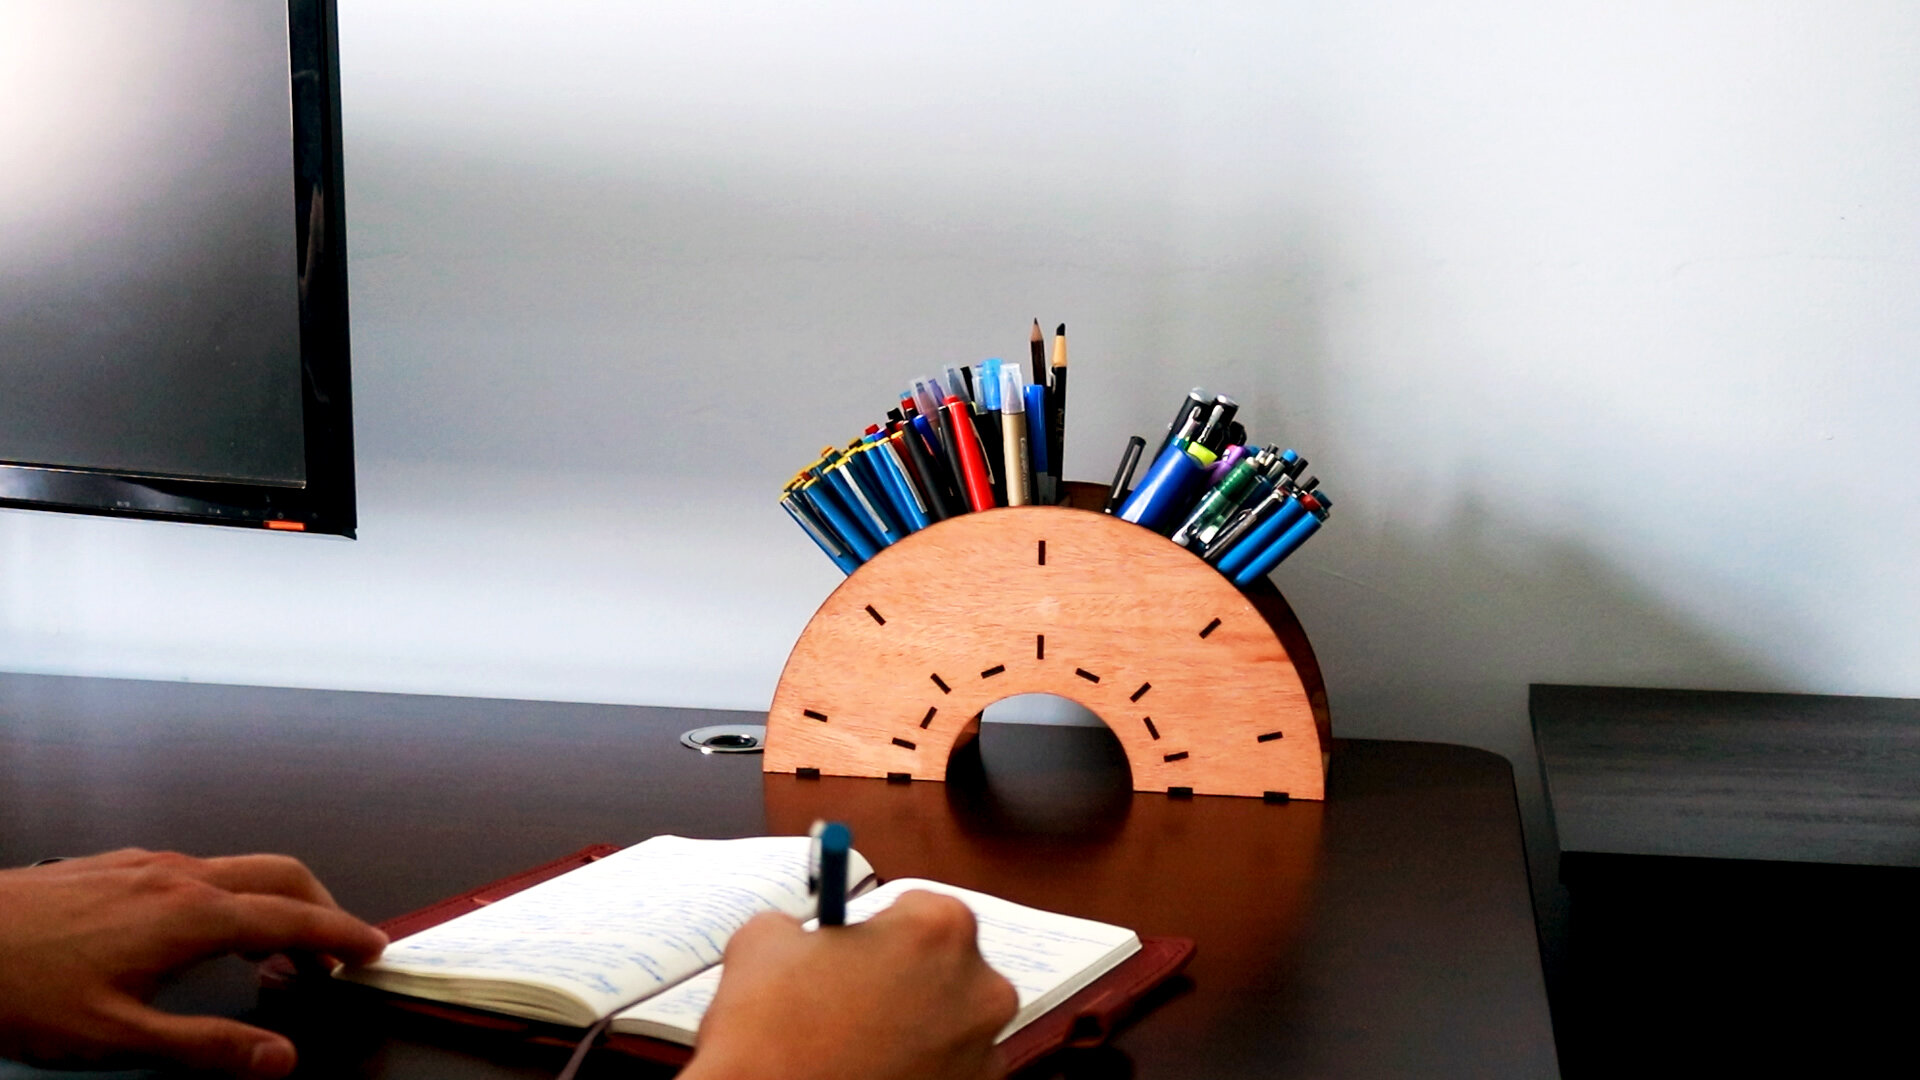
Project Description
How can we design a pen holder to display the pens in an interesting way?
With a new work station setup in my home office, I decided it was time for me to design a desk organizer to hold all of my pens, pencils, erasers, post-its, and other miscellaneous and small desk objects. As an architect, I’m often designing projects on my computer and working with clients over the phone, but usually, there’s a moment in my day where I need to sketch something out to figure out a design solution or to simply jot down a note. More often than not, the pens and paper that I quickly grab to jot down a note eventually get left on my desk and leads to clutter.
For this custom wood desk organizer, it needed to be large enough to hold all of my writing and sketching mediums, which were being held in various coffee mugs and boxes that I found around my house. It also needed to have additional slots that I could put cards, post-its, erasers, and other objects neatly into and out of sight.
As the first iteration of a functional desk organizer, I decided to keep the design as simple as possible and focus on using the pens to create an interesting display. The idea was to use a semi-circular form and allow the color of the pens to mimic the shape of a rainbow.
Process
This wood desk organizer was designed in a software called Rhinoceros where I started with 2 large semi-circles. The idea was to create a desk organizer that would eventually look like a colorful rainbow with all my different pens, markers, and pencils. The next step was to design the interior panels that would hold my pens and pencils at an angle so that they wouldn’t fall in every direction, which is typically what happens when we place a handful of pens and pencils in a cup or box with a flat base.
The panels were designed with tabs at two ends that would slot into rectilinear cutouts on the two semi-circle frames. This would provide structural stability to the overall wood desk organizer while creating platforms for all of the objects I typically have around my desk to be neatly stored away.
When the simple design was complete, I laid out all of the pieces on 2 full size sheets of mahogany plywood that fits within my Glowforge laser cutter. Then, I loaded the plywood into my Glowforge and laser cut every piece. Since there were slight variations in sizes between the pieces, I organized them and kept the same sizes together to help me quickly identify the piece that I needed during the assembly process.
After quickly wiping down the edges of each piece with a damp towel to clean off any excess soot from laser cutting, I applied a clear layer of polyurethane to give the mahogany plywood a nice finish with a semi-gloss appearance. When the polyurethane was dry, I began the assembly process, which was very easy and fast. Using a soft deadblow mallet and some wood glue in all of the joints, I aligned the tabs of the pieces with the slots in the semi-circle frames and gave them a light tap until they were set in place. I repeated this with the remaining pieces.