Making a Custom Engraved Leather Valet Tray

Tools & Materials
Top Grain Vegetable Tan Leather
Project Description
How do we add a unique element to a common product to stand out in a crowded market?
In the past, I used to make leather goods by hand and I sold them through my small business, Mars Leather Company. At the time, I was constantly making new types of products and continuing to elevate my skills through practice. All the products that I made had a minimal aesthetic, which means that they were simple and had no embellishments.
However, I eventually realized that every product I was making by hand took so much time and effort, but ended up looking like every other leather workers’ products. Since my small business was just a side hustle, it didn’t make sense to try and compete with leather workers who had been making leather products for their entire adult lives.
Fast forward to now, I ended up deciding to close Mars Leather Company for other reasons, but as I was exploring this question of making a product unique, I realized where I could’ve made that shift. It was with my experience as a designer, my laser cutter as my tool, and my ability to design a unique graphic to be engraved onto a leather product.
Take this simple leather valet tray as an example. It’s a product that every leather worker sells because it’s simple to make. However, a lot of makers struggle to sell it because manufacturers can make the same exact product for a fraction of the price. What we know in the leather working space is that the quality of our materials and process makes a greater product, but the average consumer could care less.
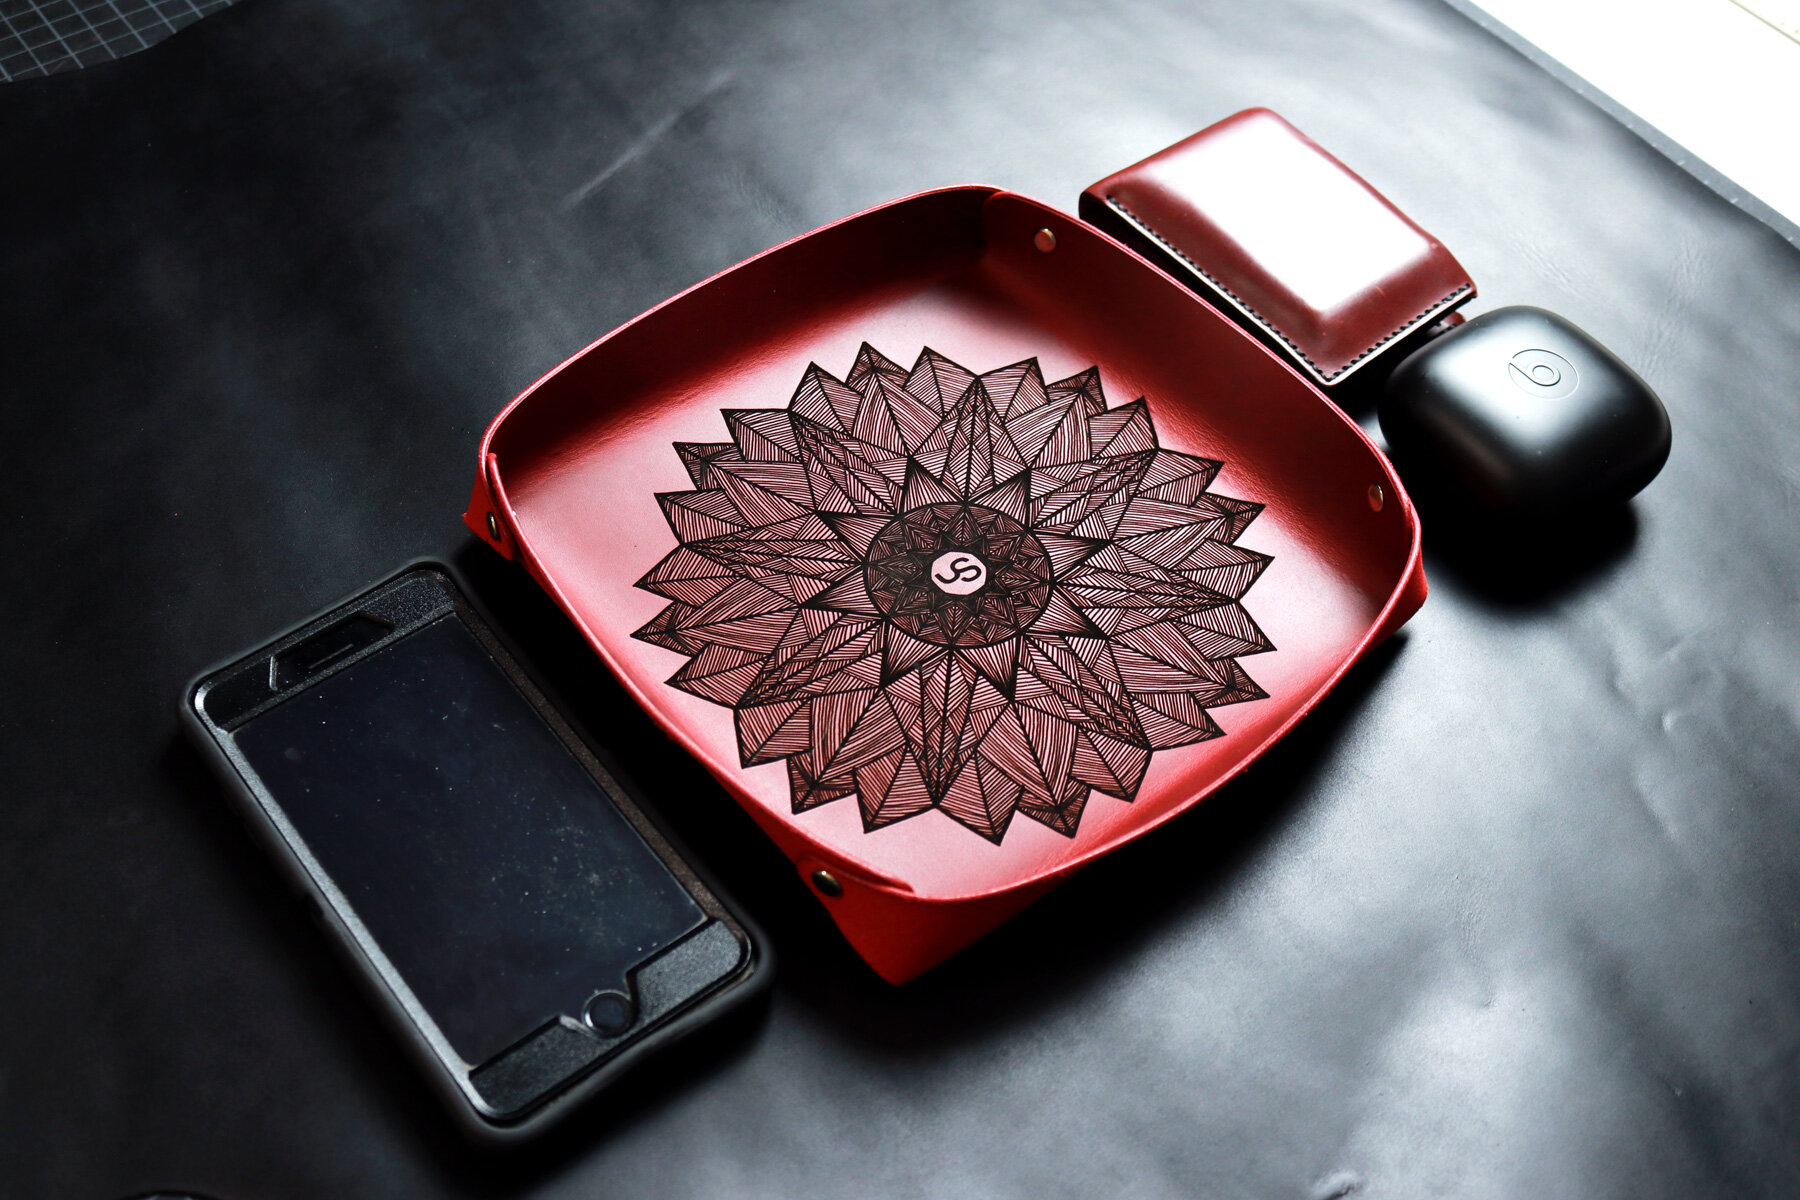
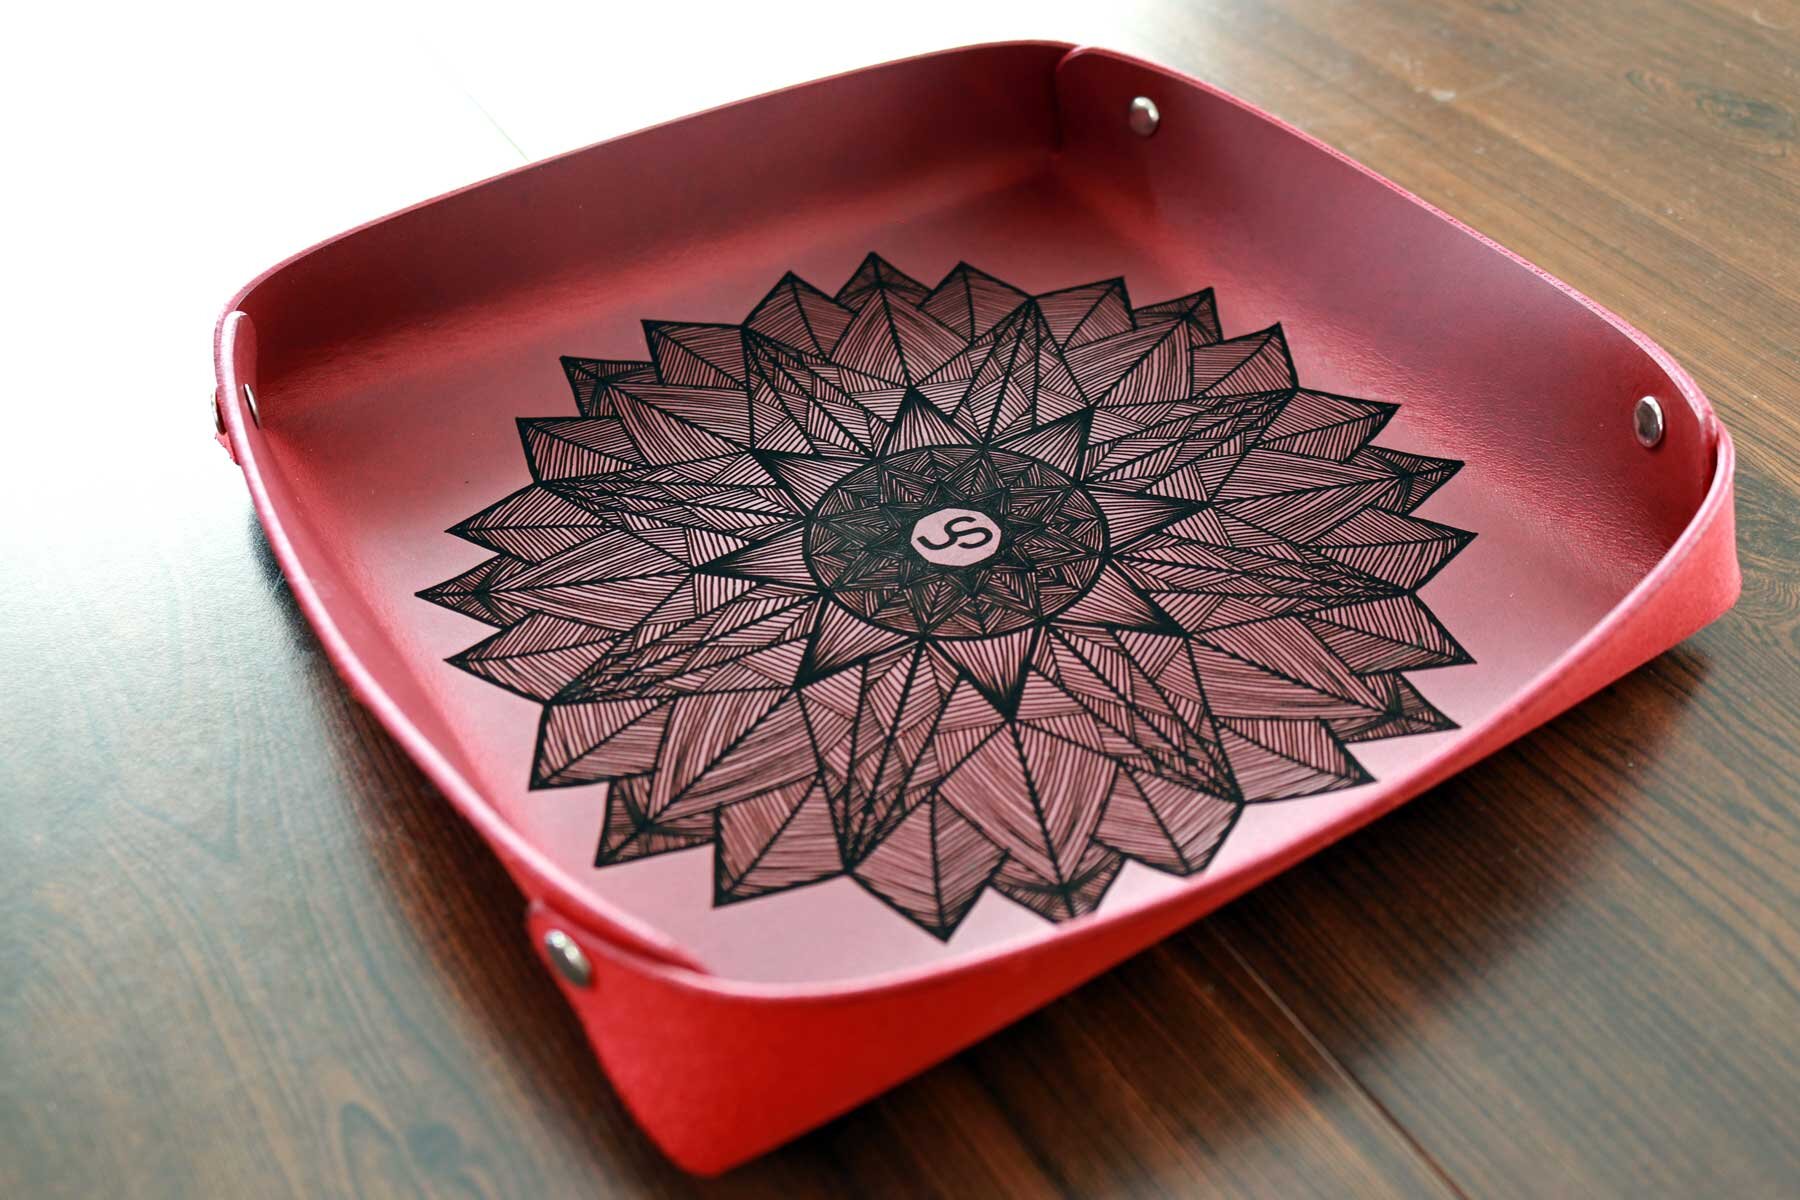
By adding this one extra step of placing the leather valet tray into my laser cutter and engraving a hand drawn mandala, the simple and abundant piece is now a unique one of a kind beautiful product that stands out against all other valet trays.
What I learned from this project is that there are many products in our world that look exactly the same as another one. Even in the handmade industries, everyone is using a template that someone else designed and sold to other makers. If the goal is to be unique and to stand out from the crowd, it requires a change to a standard process. To find that change, we need to think through our set of skills and identify the one thing that relates to what we’re doing and figure out how it can be applied to elevate the product’s design and quality.
To stand out, we need to be different. To be different as a designer and maker, we need to have a process that’s different from other makers. Find what’s true to you, apply it to the process, and be different.
Process
The design of this product’s pattern/template was developed in a 2 dimensional drafting software that I learned to use as an architect. It was based on a simple aesthetic where the corners would be rounded and folded behind one another. The design includes a hole that would be cut out of the thinner corner that folds behind a flap and meets another hole. There, a rivet will be installed to hold the pieces together, which will lift the 4 edges of the leather and turn it into a tray.
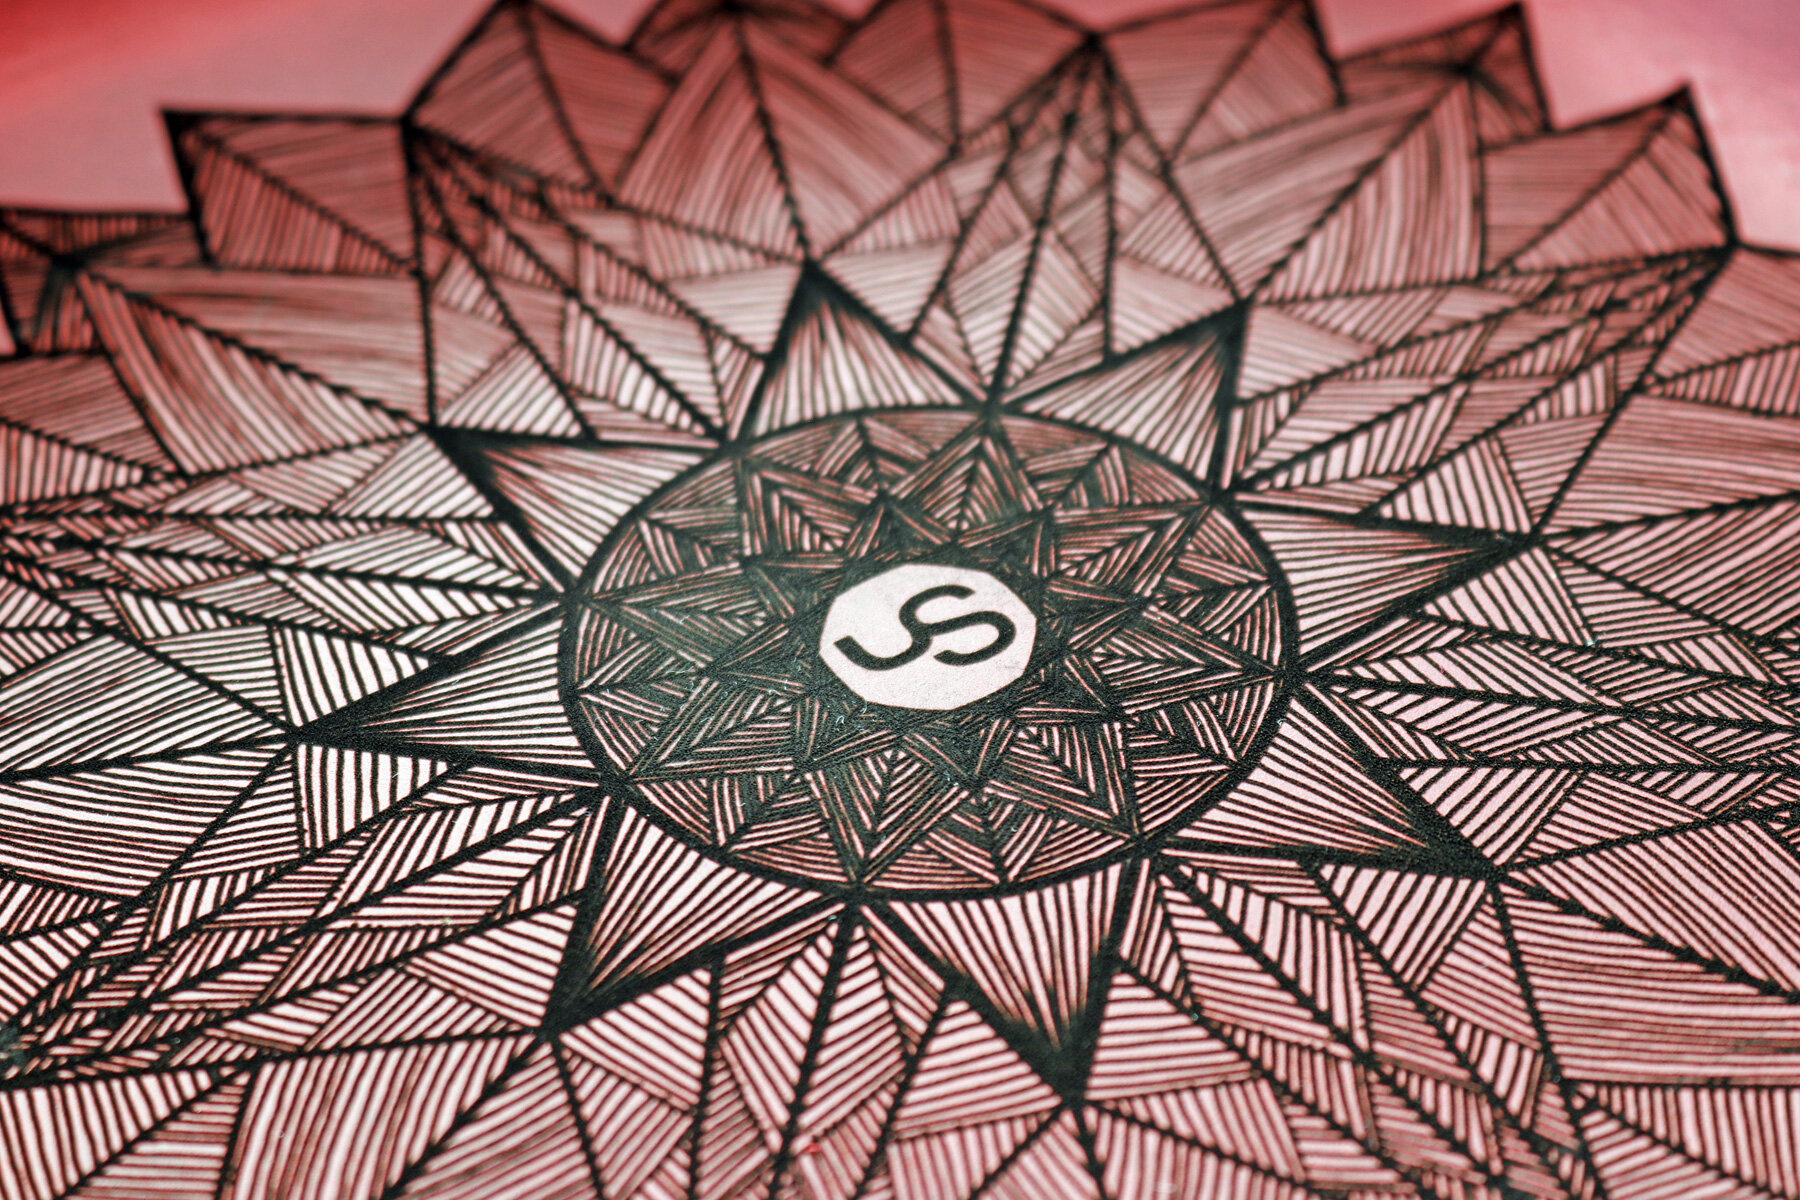
When the design of the pattern was complete, I used my iPad Pro and Apple Pencil to draw a mandala in an app called Mandalas. The idea of this mandala was to leave the center empty so I could put Ung Studio’s logo there. The remainder of the mandala would take on the shape of a large blossomed flower. Each petal of the flower would be filled with intricate layers of line patterns.

Once the design of the pattern was complete, I cut it out of draftboard to use as a guide for cutting. I decided to use a 4.5oz piece of beautiful red leather for this project, which I placed on top of a large cutting mat. Using the template as a guide, I cut the leather with a utility knife at the straight edges and a scalpel at the curved ones.
When the leather was fully cut, I marked the locations of all the holes using my scratch awl and punched a hole through the leather using a rotary hole punch set to the size of my rivet. Then, I beveled the edges, sanded, and burnished them using water followed by Tokonole burnishing agent.
Before I installed the rivets, I input the leather into my Glowforge laser cutter and setup the mandala that I drew in Glowforge’s interface. I made sure that the mandala would fit on the valet tray through the camera’s view of the leather piece in my laser cutter and started the engraving process. Overall, it took about an hour from start to finish to get the mandala engraved.
After the mandala was complete, I cleaned out the soot and brought it over to my work table to install the nickel rivets. I chose nickel for this project because the contrast between the red leather and the shiny metallic finish of the nickel would make it stand out. The trick to installing the rivets was to press the two ends together so that the leg of the rivet was locked in place with the opposite cap. Then, I set it onto the anvil and set the rivet in place with my punch and hammer.