Making a 5 Pocket Minimal Leather Wallet

Tools & Materials
Top Grain Vegetable Tan Leather
5 Pocket Minimal Leather Wallet Course
Project Description
Why did I transition from selling a product to teaching others how to make it?
In 2018, I discovered my passion for transforming leather into a beautiful product all by hand. From designing the product to cutting the leather and hand tooling to saddle stitching, I was constantly working on getting better and more efficient at the craft. At some point, people began noticing my work on Instagram and reaching out to purchase them. I thought, “If I could get paid to do what I enjoy, isn’t it worth it?”
That was the beginning of Mars Leather Company, where I handmade and sold leather goods to my followers. At first, it was an amazing experience. I was constantly creating the same product and it was reaching the hands of my biggest fans. After a few months of doing this, I was completely burned out.
I burned out because I lost sight of the reasons why I pursued the craft of hand making leather products. It turned into a manufacturing business where my body became my machine. That was the moment that I decided to stop pursuing the business side of leatherworking.
A few years later, I started sharing my process of designing and making products and architecture on YouTube. As I was coming up with different product ideas, I realized that there was one thing I really wanted to do with my skills as a leatherworker. It was to keep the profession going by teaching my methods of making simple and minimal leather products.
The first product I decided to teach in an online course is this 5 pocket minimal leather wallet. It’s one of the items that I enjoyed making because it encompassed many of the skills a leatherworker needs to have in order to make any leather product. Although I was shy and afraid in front of a camera pointed right at me, I saw this as an opportunity to continue learning and sharing my love of the craft with others.
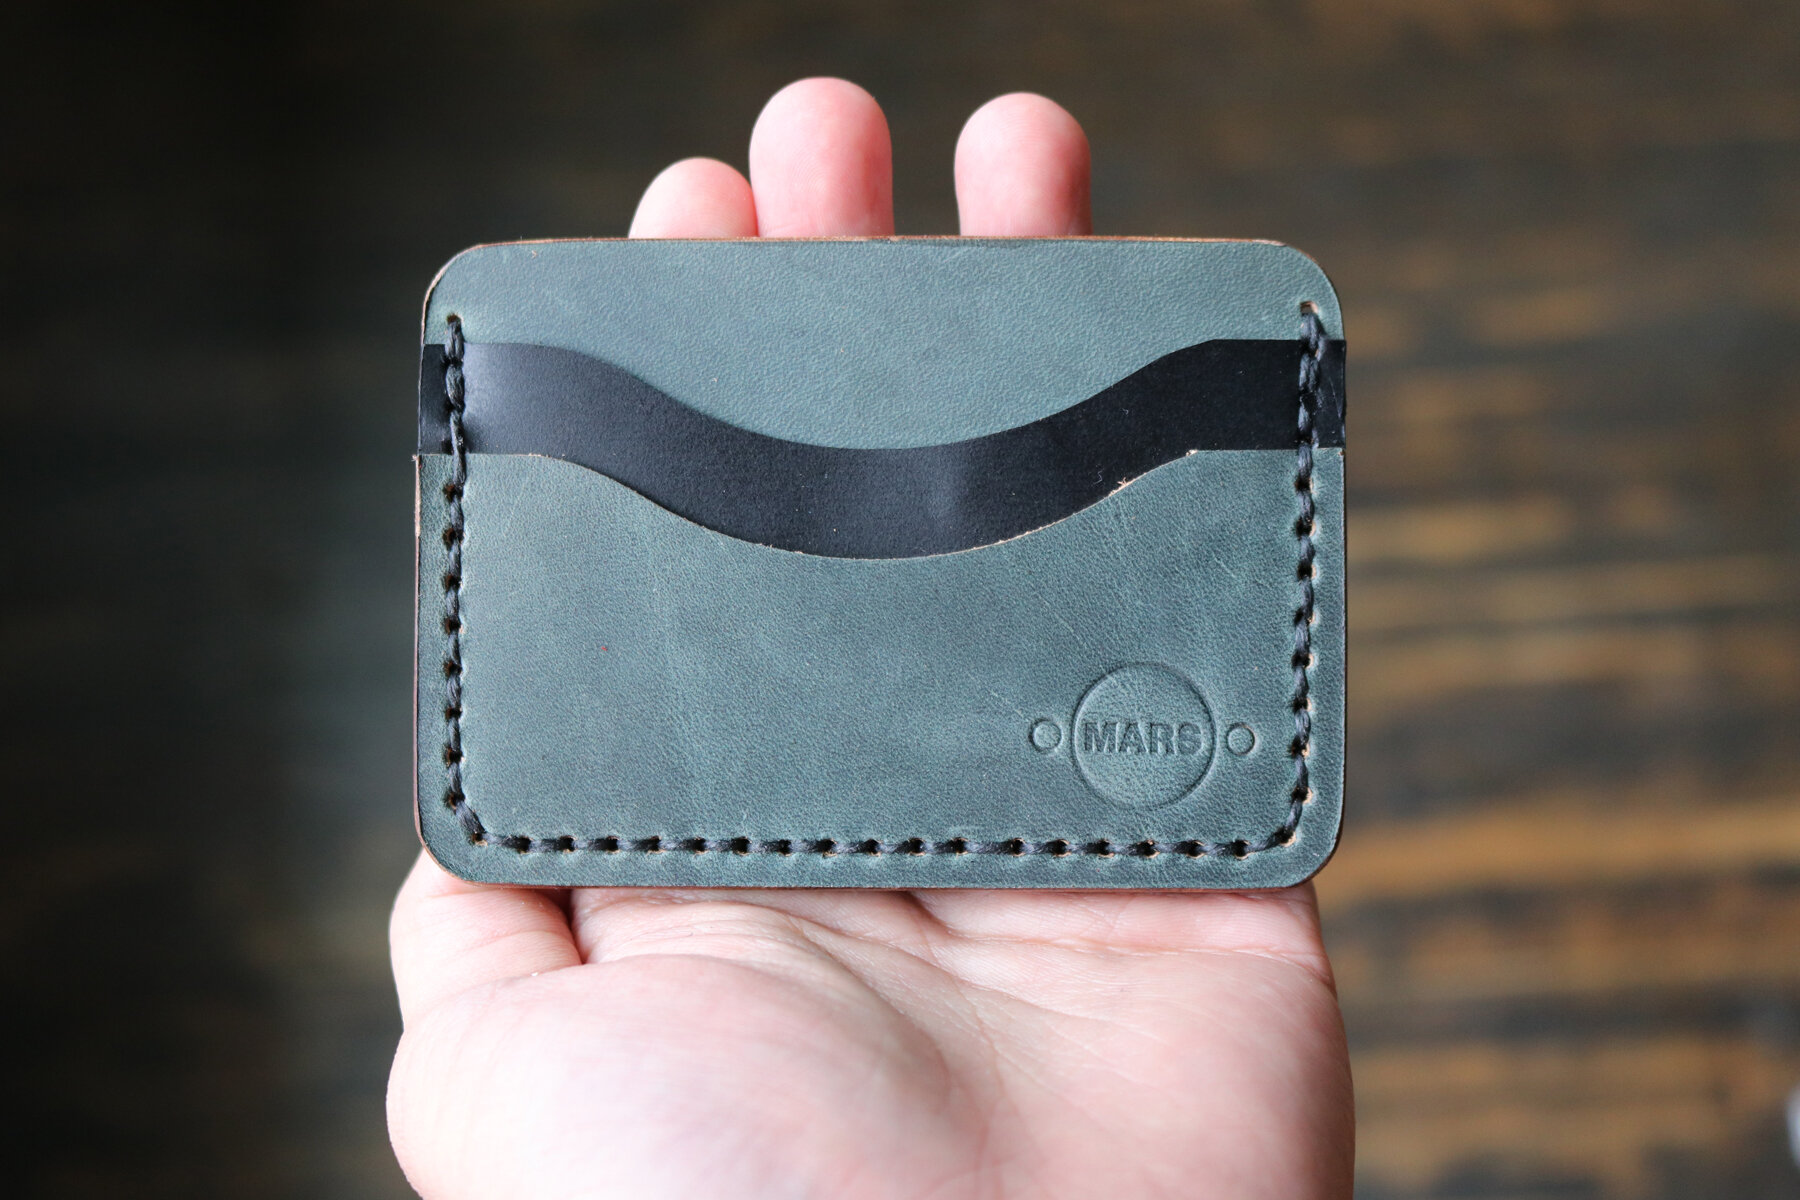
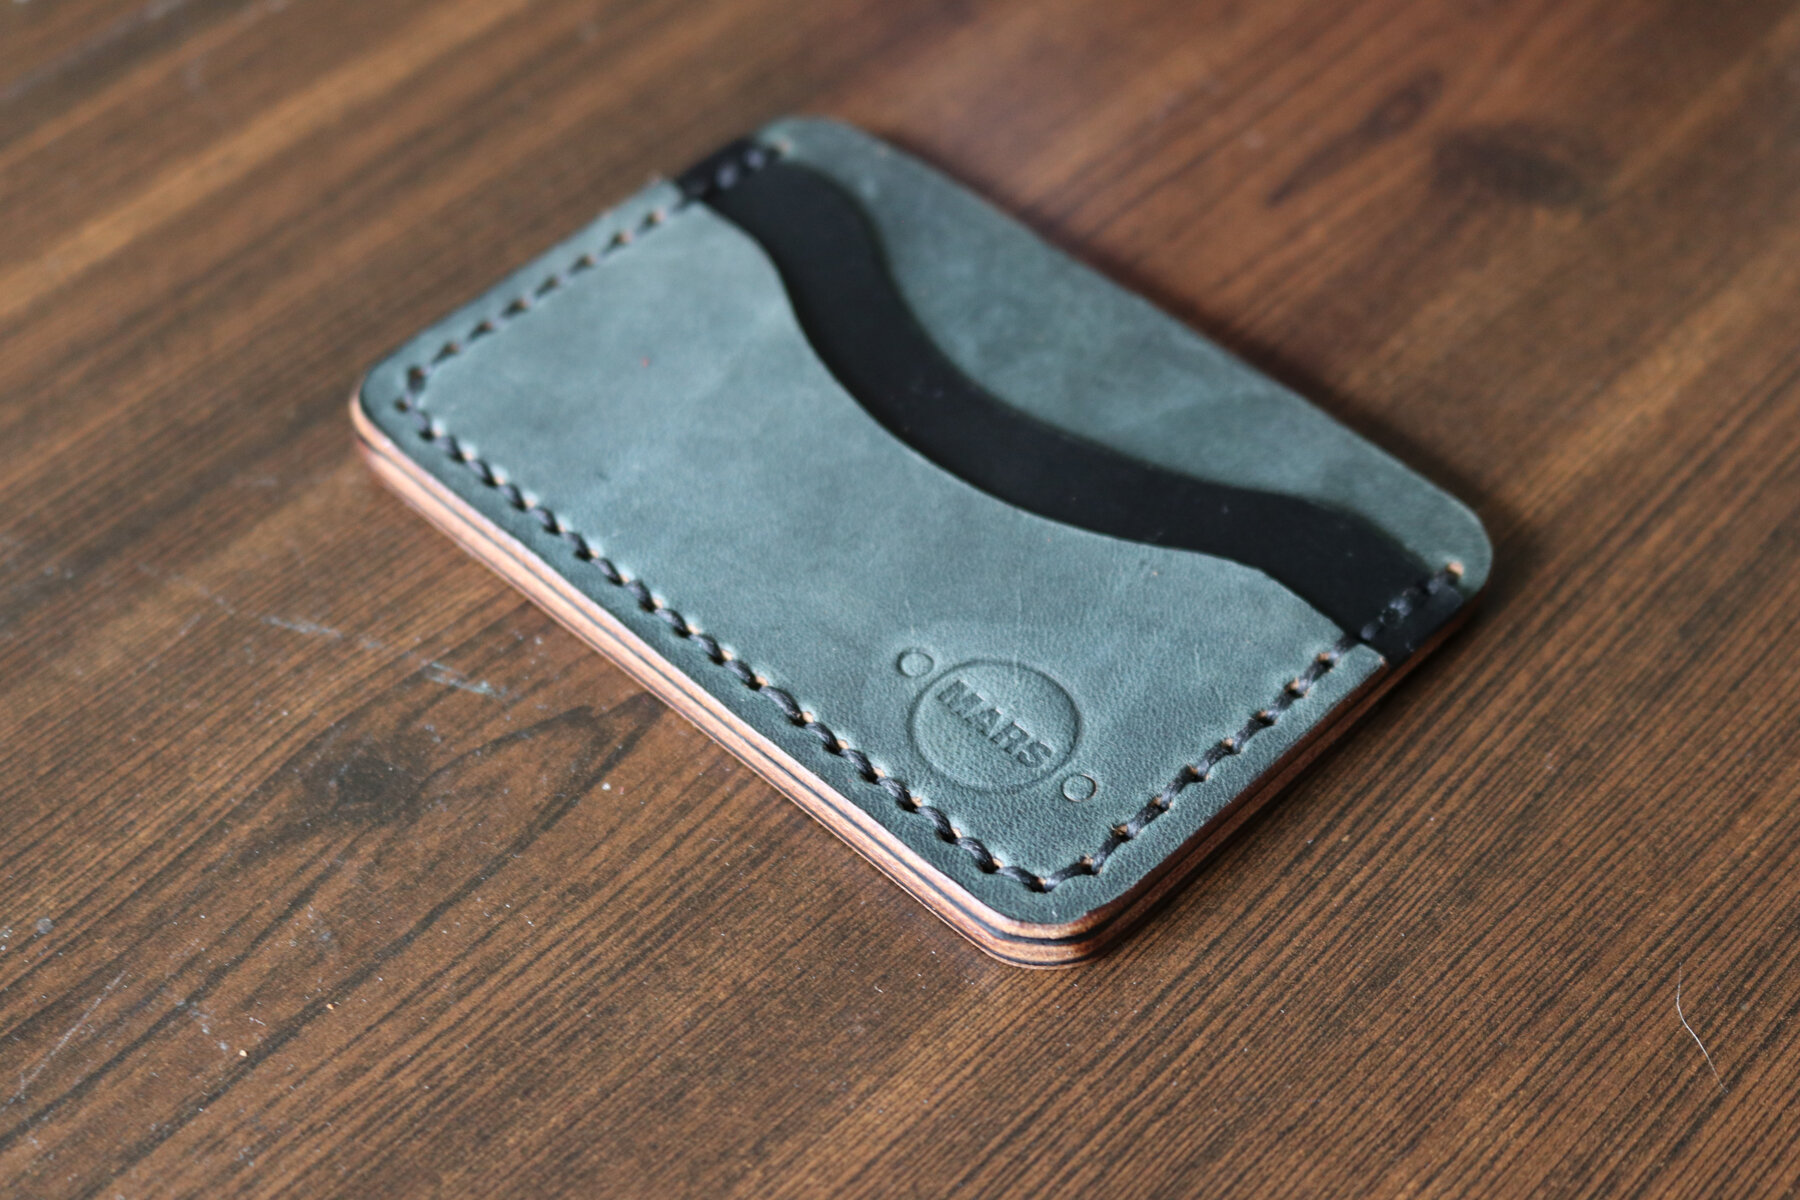
This 5 pocket minimal leather wallet is completely hand cut, hand tooled, hand stitched, and finished. Every aspect of the product is unique because it conforms to the energy that my hands have put into it. Like everything in life, experience comes through practice and is shown in the end products. The beauty of handmade leather products is that no two products will be the same.
Process
For this project, the primary material that I use is leather, which comes in many shapes, sizes, and quality. The highest quality of leather is vegetable tan and the most common high quality leather is chrome tan leather. The big differences between these two types of leather is that vegetable tanned leather is created by tumbling the raw hides with natural ingredients while chrome tan uses chromium to preserve the leather. Both of these finished leather hides are of high quality. The type that you should always avoid as a leatherworker is genuine leather, which is made from the scraps of the flesh side of leather with a faux printed material on top. I won’t get into too much detail here, but if you’re interested, you can learn more about leather and how to make this 5 pocket minimal leather wallet in my course on Skillshare.
For this project, the design was hand sketched to get an idea of how the pockets should be shaped as well as the overall dimensions of the 5 pocket minimal leather wallet. I drew the design at full size on trace paper and figured out the subtle curves for the pockets and stuck with a standard rounded corner.
Once the sketch was complete and I was satisfied with the design, I drew it out in an architecture software so that I could laser cut patterns (aka templates) to help me precisely cut and make the wallets. I work with patterns cut out of either medium density fiber (MDF) boards or recently and from now on, acrylic. These patterns are used to trace each piece onto the leather using a scratch awl or to use as a guide with a knife. If you look closely at the templates, I usually leave the corners at 90 degrees because during my process of assembling the pieces and trimming them, I use a round corner punch tool to get a perfectly rounded corner.
Now the exciting part begins. I start by taking the laser cut patterns that I designed and placing it down onto the piece of 2-3oz leather that I’ll be using to make the 5 pocket minimal leather wallet. In this case, I had a beautiful turquoise colored leather that was roughly 3oz in thickness for the inner most and outer most pockets. The middle pockets on both sides of the wallet was made with a 2.5oz smooth black leather to give the final wallet a two tone finish.
When I place the templates onto the leather hide, I generally cut the leather directly with a knife and use the edges of the template as a guide. There are a handful of projects, like a large tote bag, where I’ll trace every piece onto the leather before cutting it with a ruler as a guide. For small projects like this 5 pocket minimal leather wallet, I align my blade against the edges of the template and cut every piece.
Once all of the pieces are cut, I glue them together using a water based adhesive that goes on white, but dries clear. I love this product because it doesn’t have an odor like contact cement does and it works almost exactly the same. When the glue is applied to the edges of every piece, I align them along one side edge and the bottom edge. Then, I press down and use a roller to evenly apply pressure to hold the pieces tightly together.
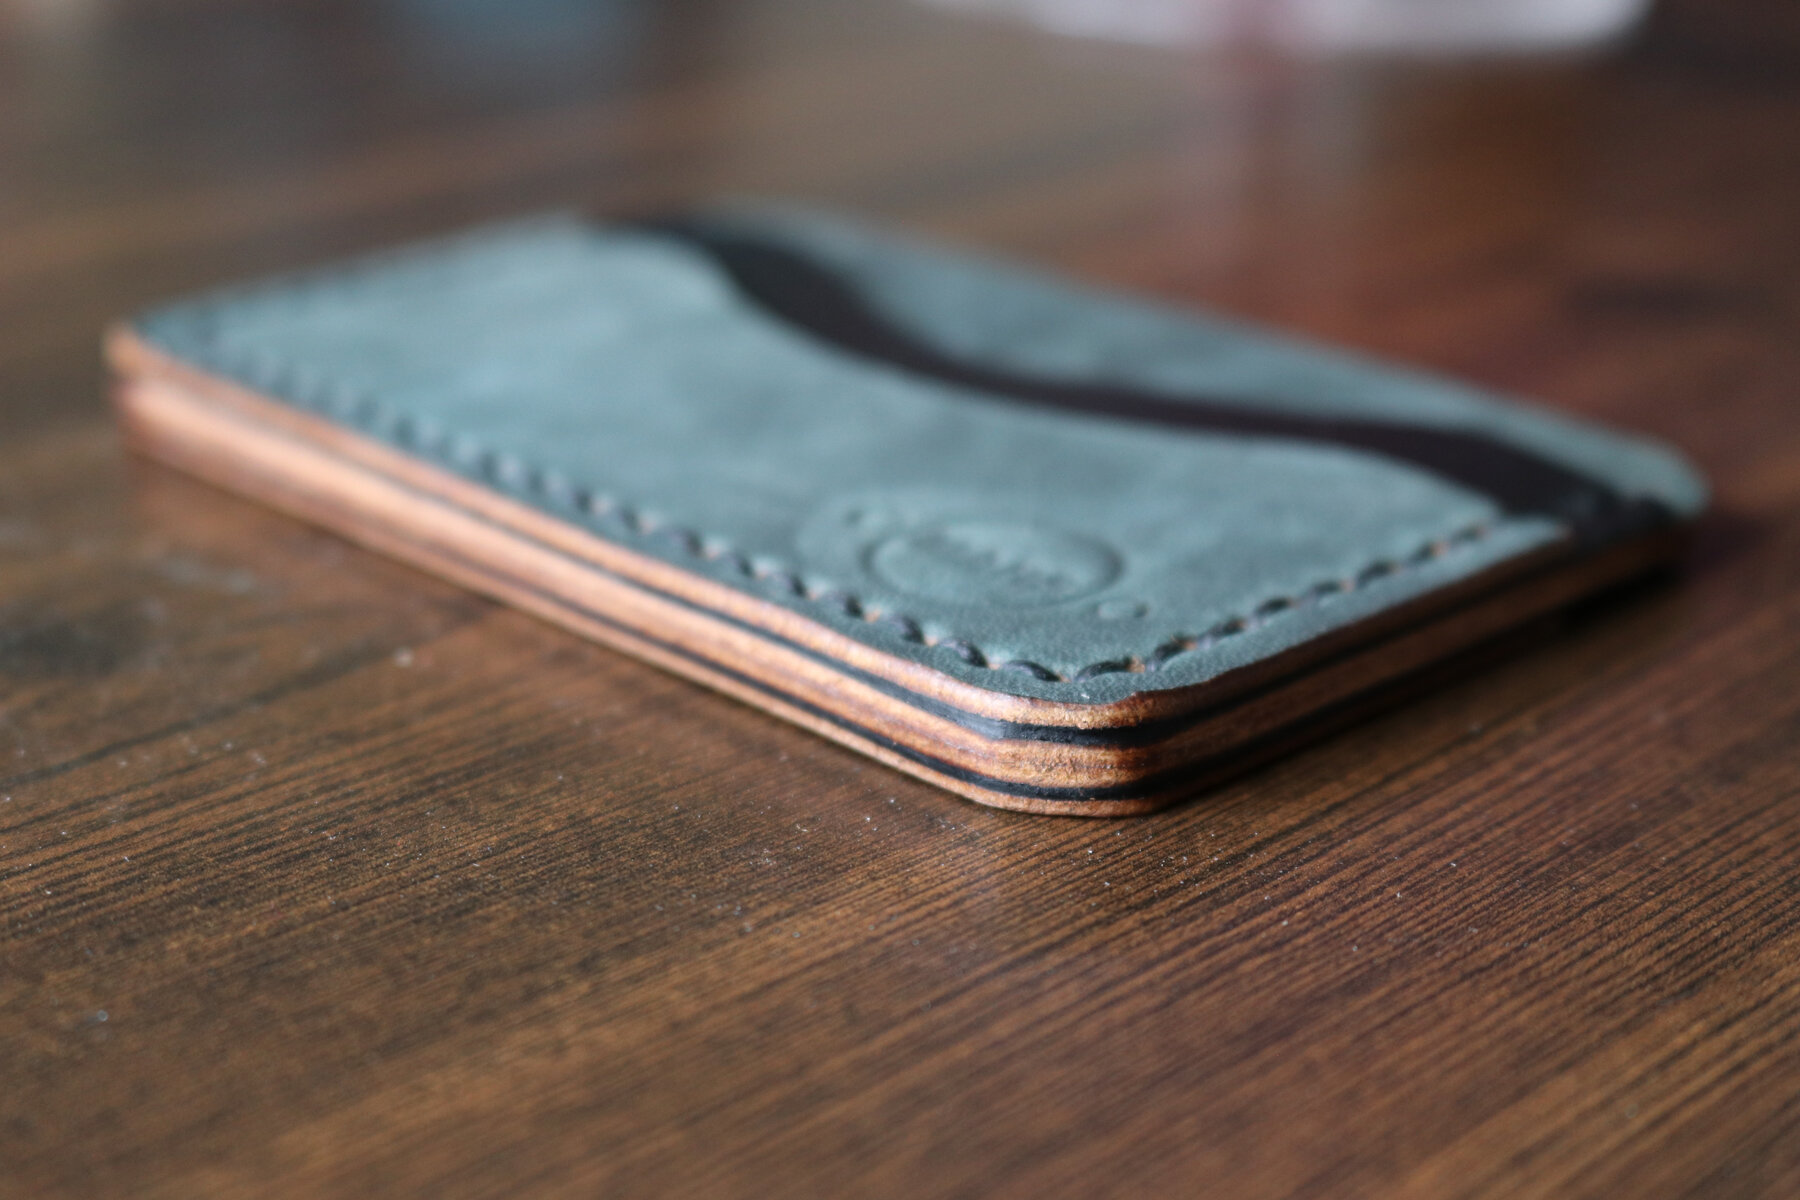
After the glue dries, I take my template and use the edge as a guide to trim every edge and straighten them out with a very sharp knife. Then, I use my corner rounding punch to knock out all 4 corners to give them a beautiful finish. This is where I take a different approach than most leather workers and I move into finishing the edges of the product. I take find grit sand paper and sand down all 4 edges of the 5 pocket minimal leather wallet. Then, I take some water, apply it to the edge and use my edge slicker to begin the burnishing process. When this step is complete, I apply some Tokonole burnishing agent to the edges and slick them until they’re nice and shiny.
Now we enter the fun part of this project where I use my wing divider to draw guides about 3/16 of an inch from the edges of the 5 pocket minimal leather wallet and punch out round holes using a set of custom punches that I purchased from a company called Sinabroks. These hole punching irons are expensive tools. They’re not necessary if you’re just starting to get into leatherworking, so don’t spend your money on them until you’re absolutely certain that you’ll be making leather products for a long time!
When the holes are punched, I begin the saddle stitching process that begins at the first hole on one end and goes all the way around the wallet to the opposite end. I tend to back stitch 3 holes and then I snip off the remainder of the wax thread. Then, I melt down the small ends of the wax thread so it hides in the hole of the wallet and the product is complete!