Making a Wood Funnel Light

Tools & Materials
Table Lamp - Remove the shade that comes with it
Project Description
How can we create a wood lamp with a simple assembly process and indirect lighting?
After designing the circular frame for my wood light projects where vertical panels can be attached with finger joints, it was time to explore a new iteration that would block direct views of the light bulb at the center of the fixture. This was a common message I received from my friends and supporters following my work.
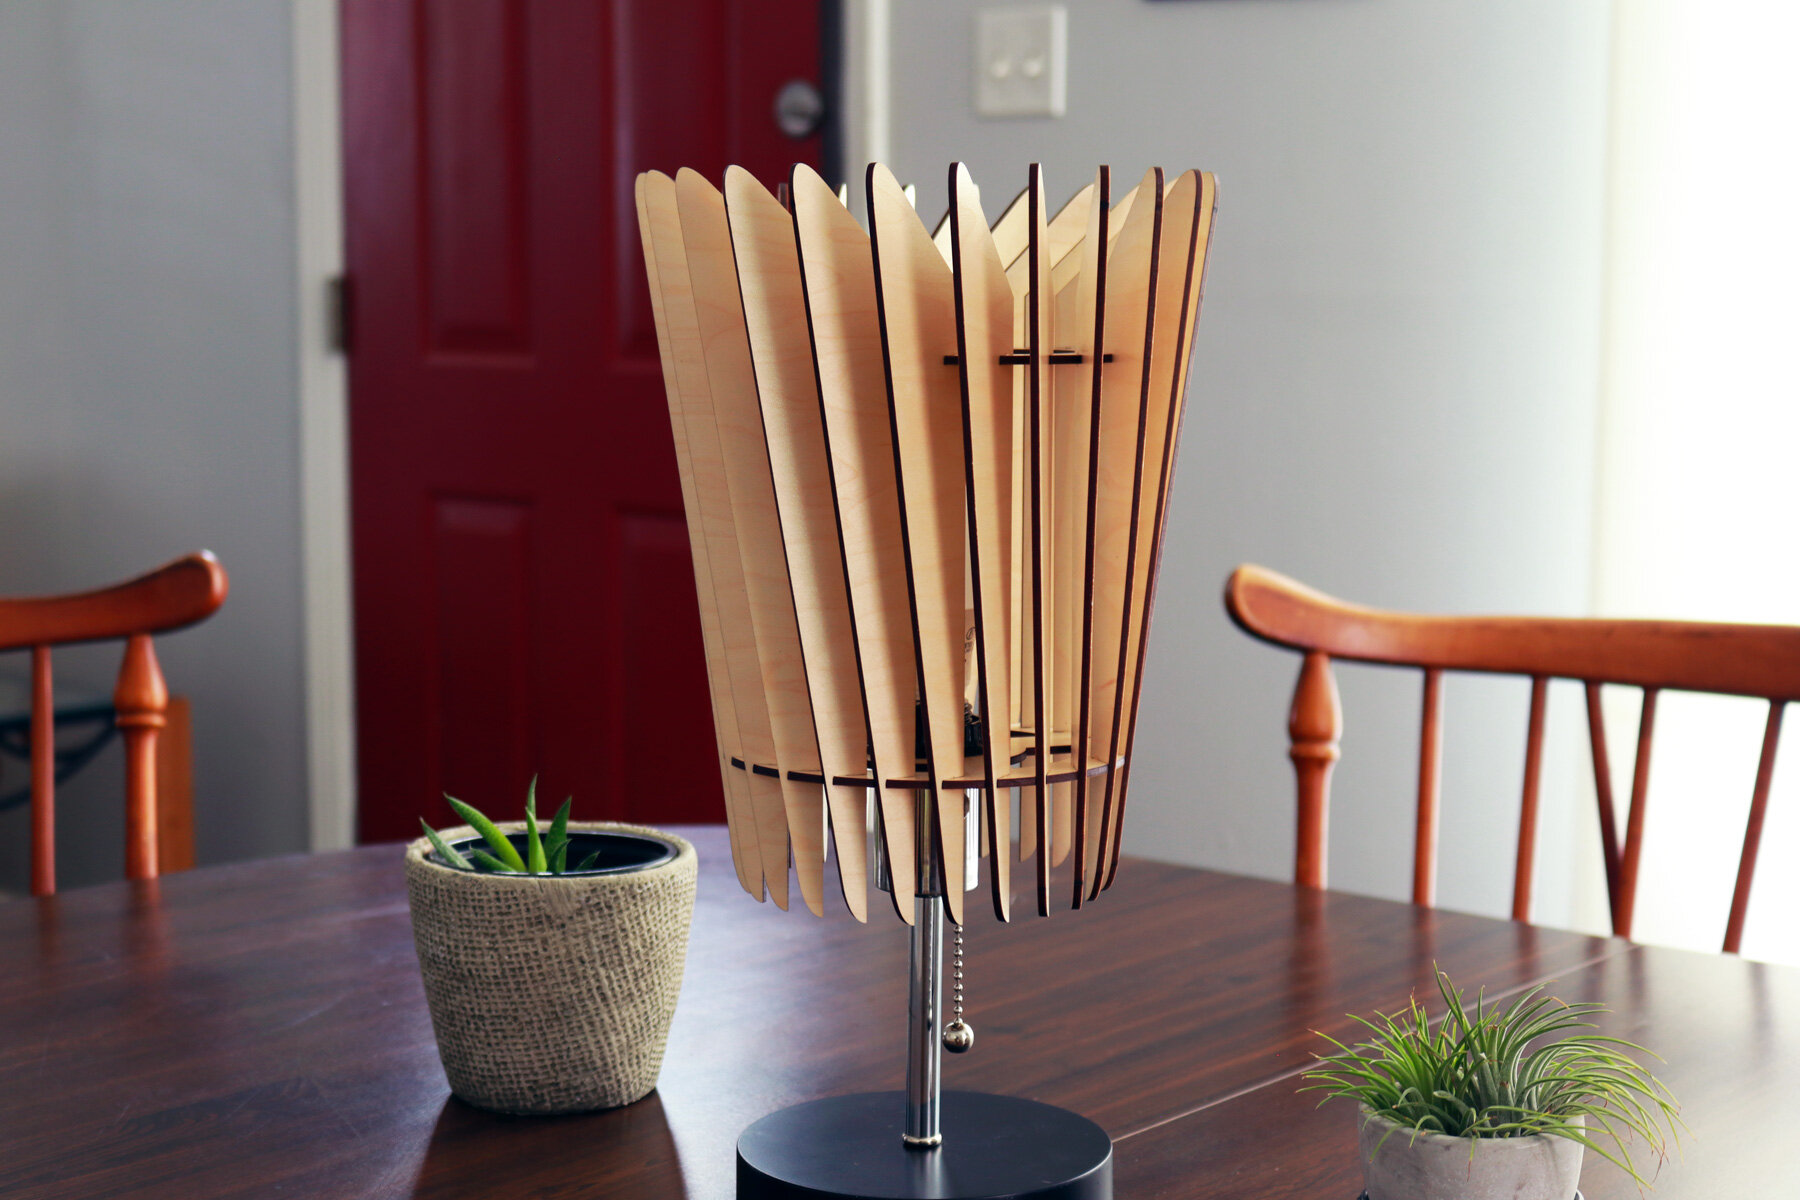
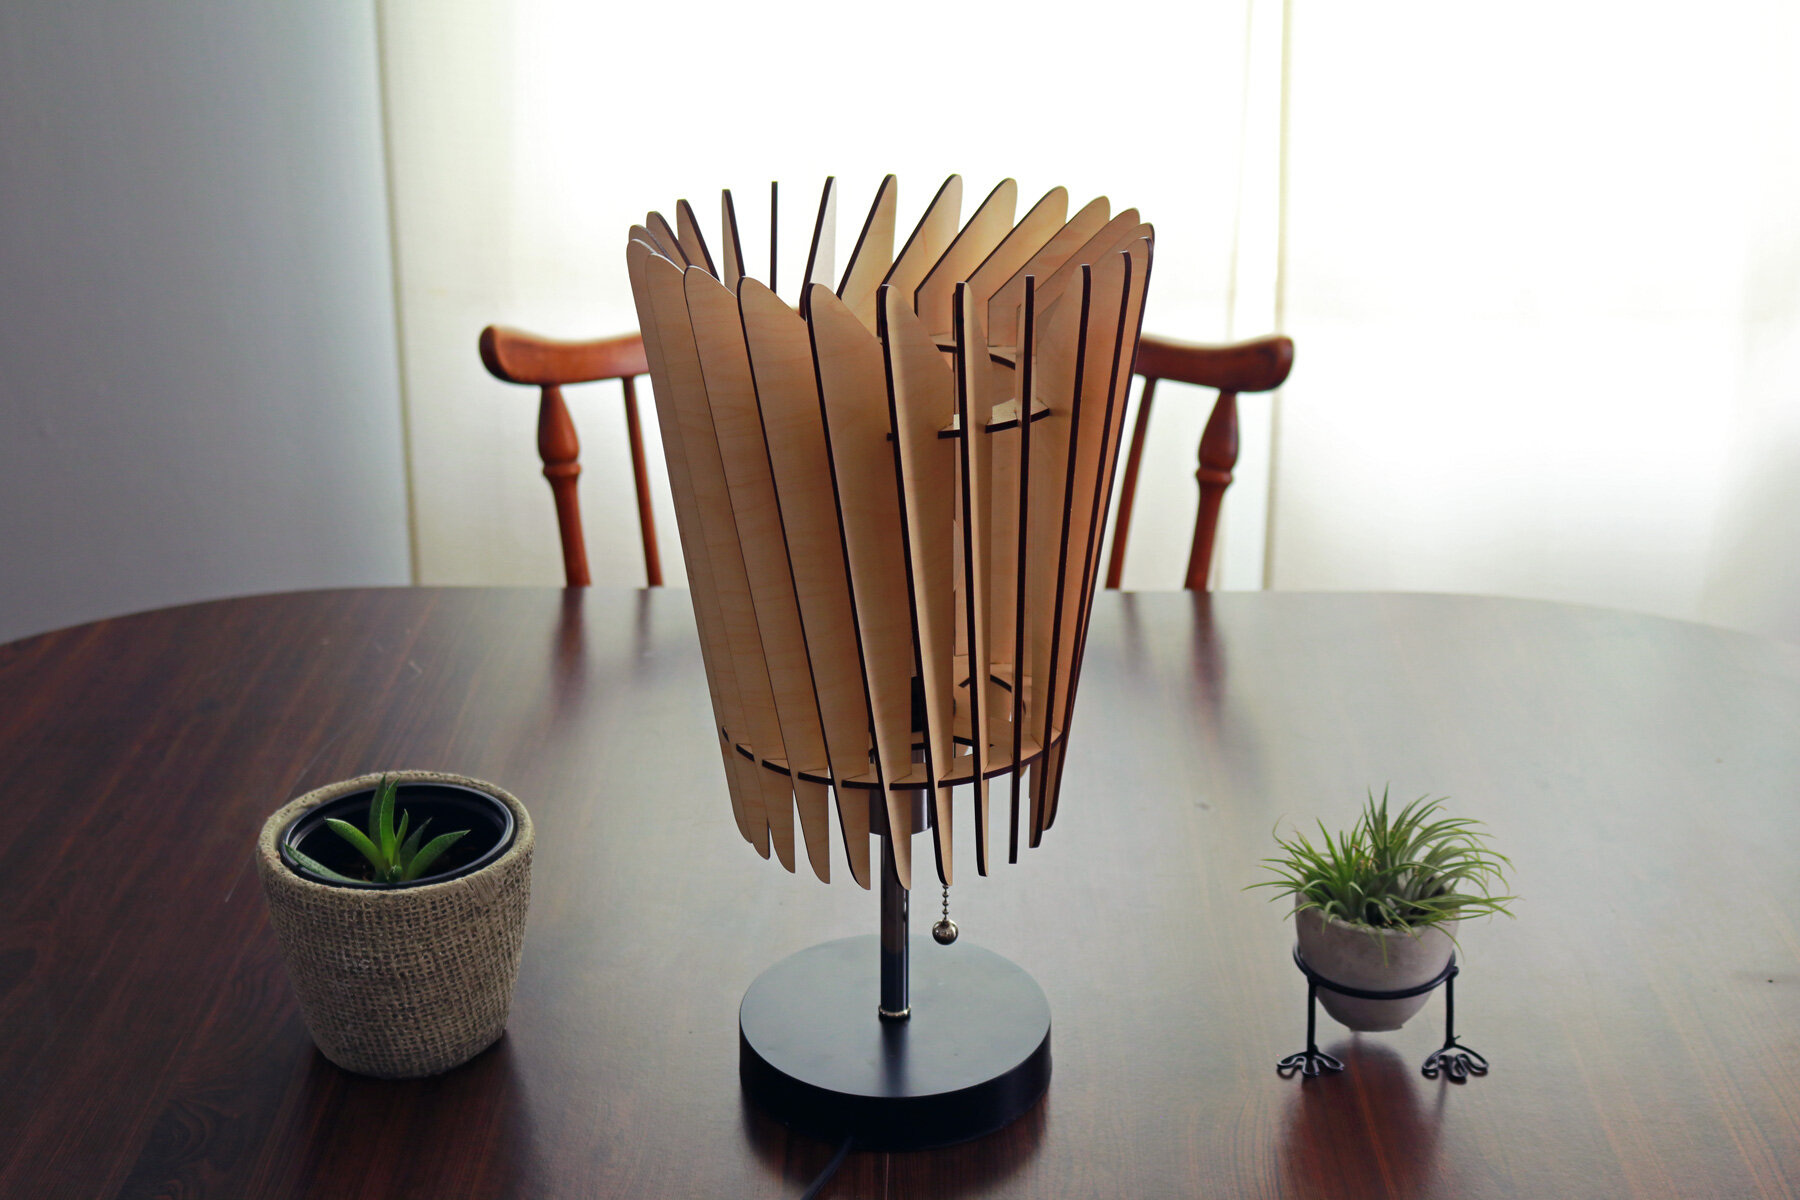
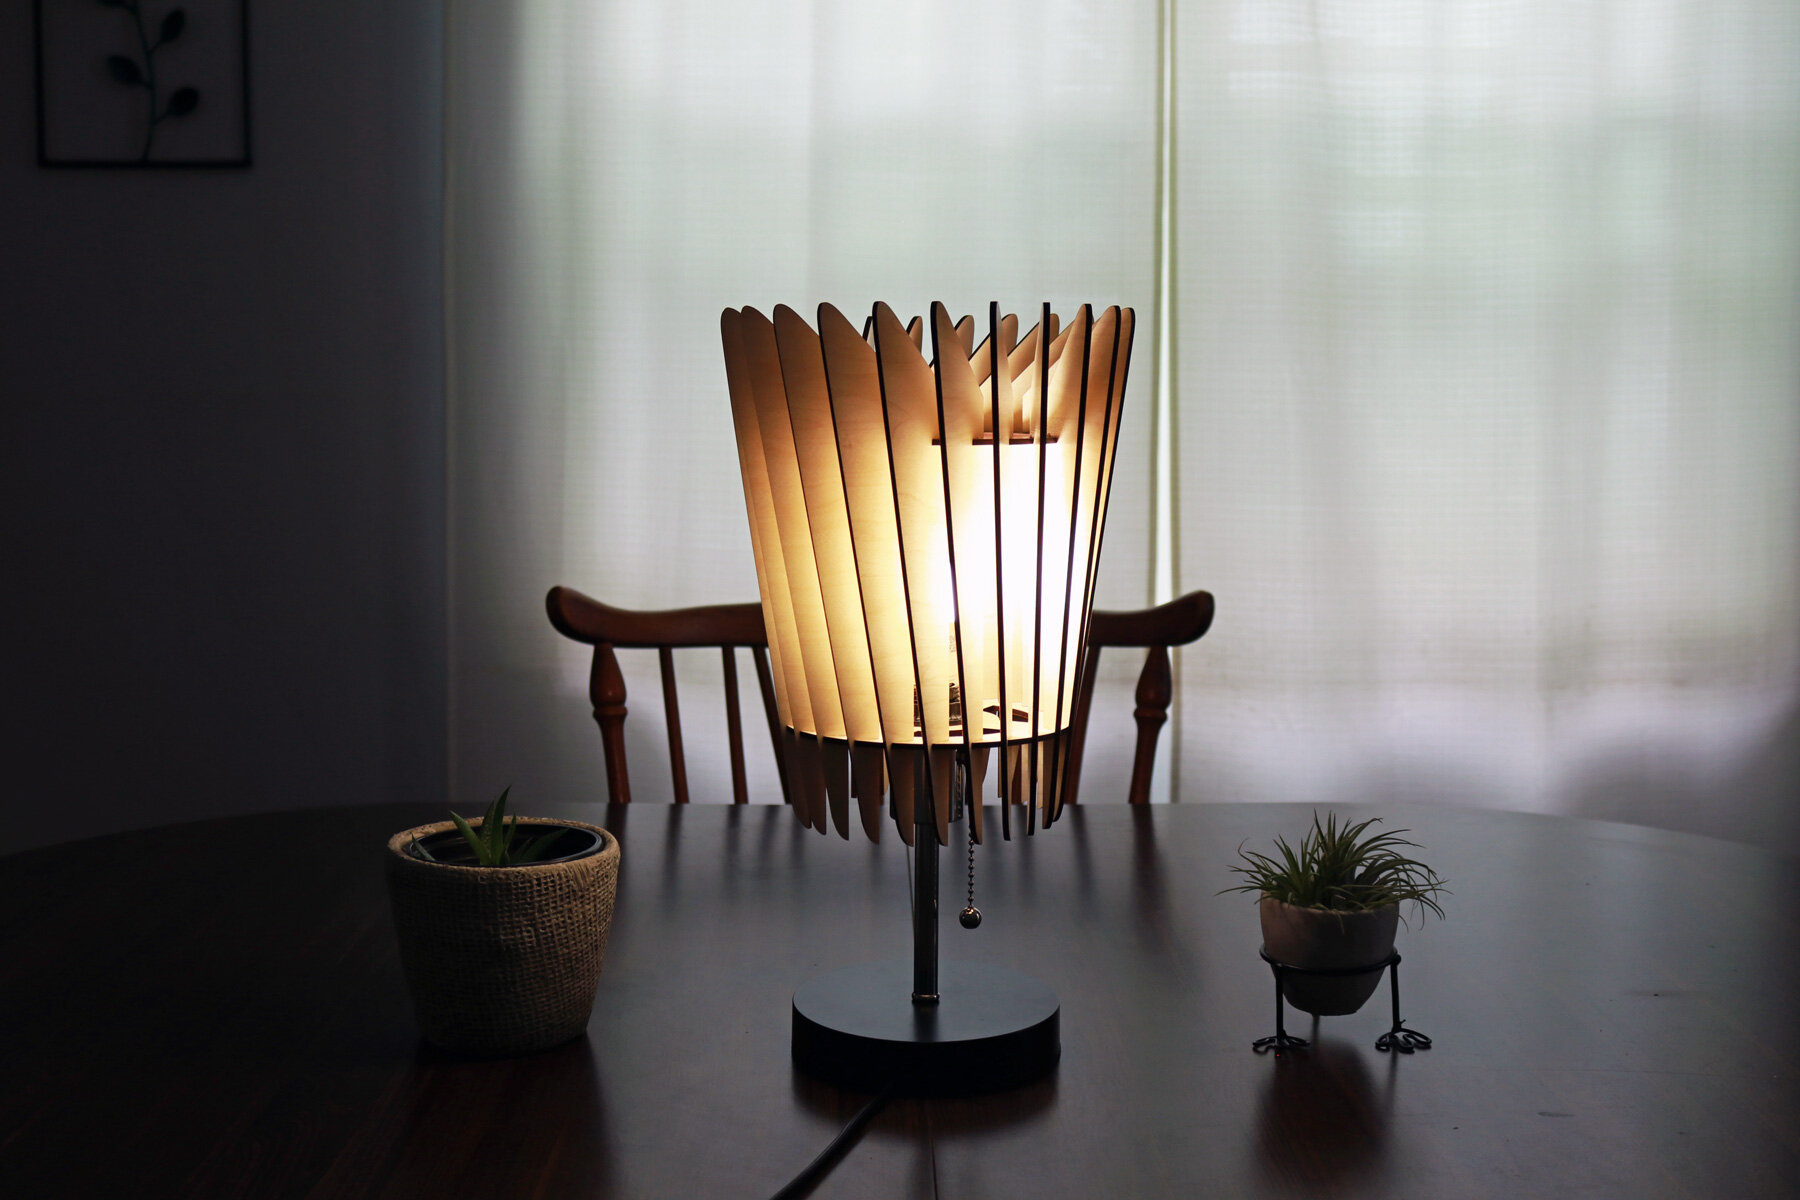
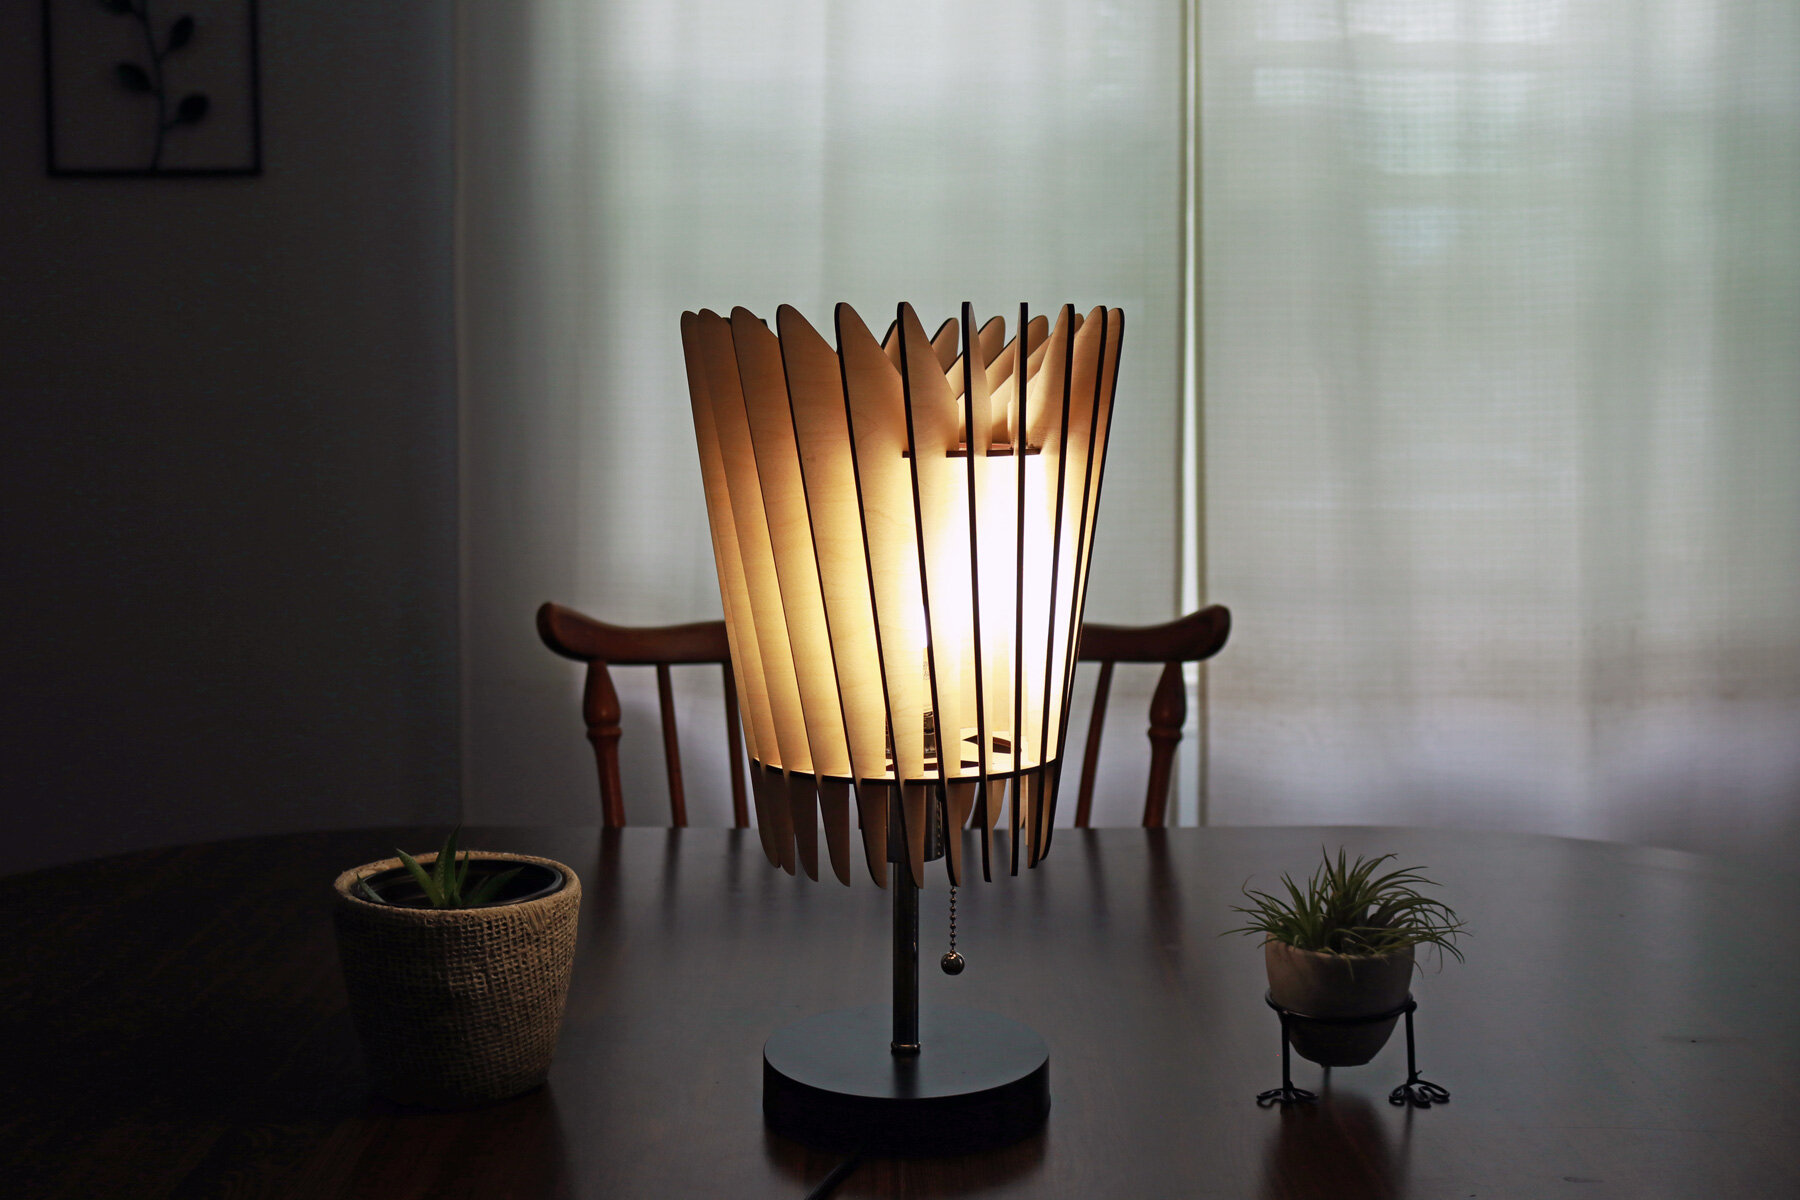
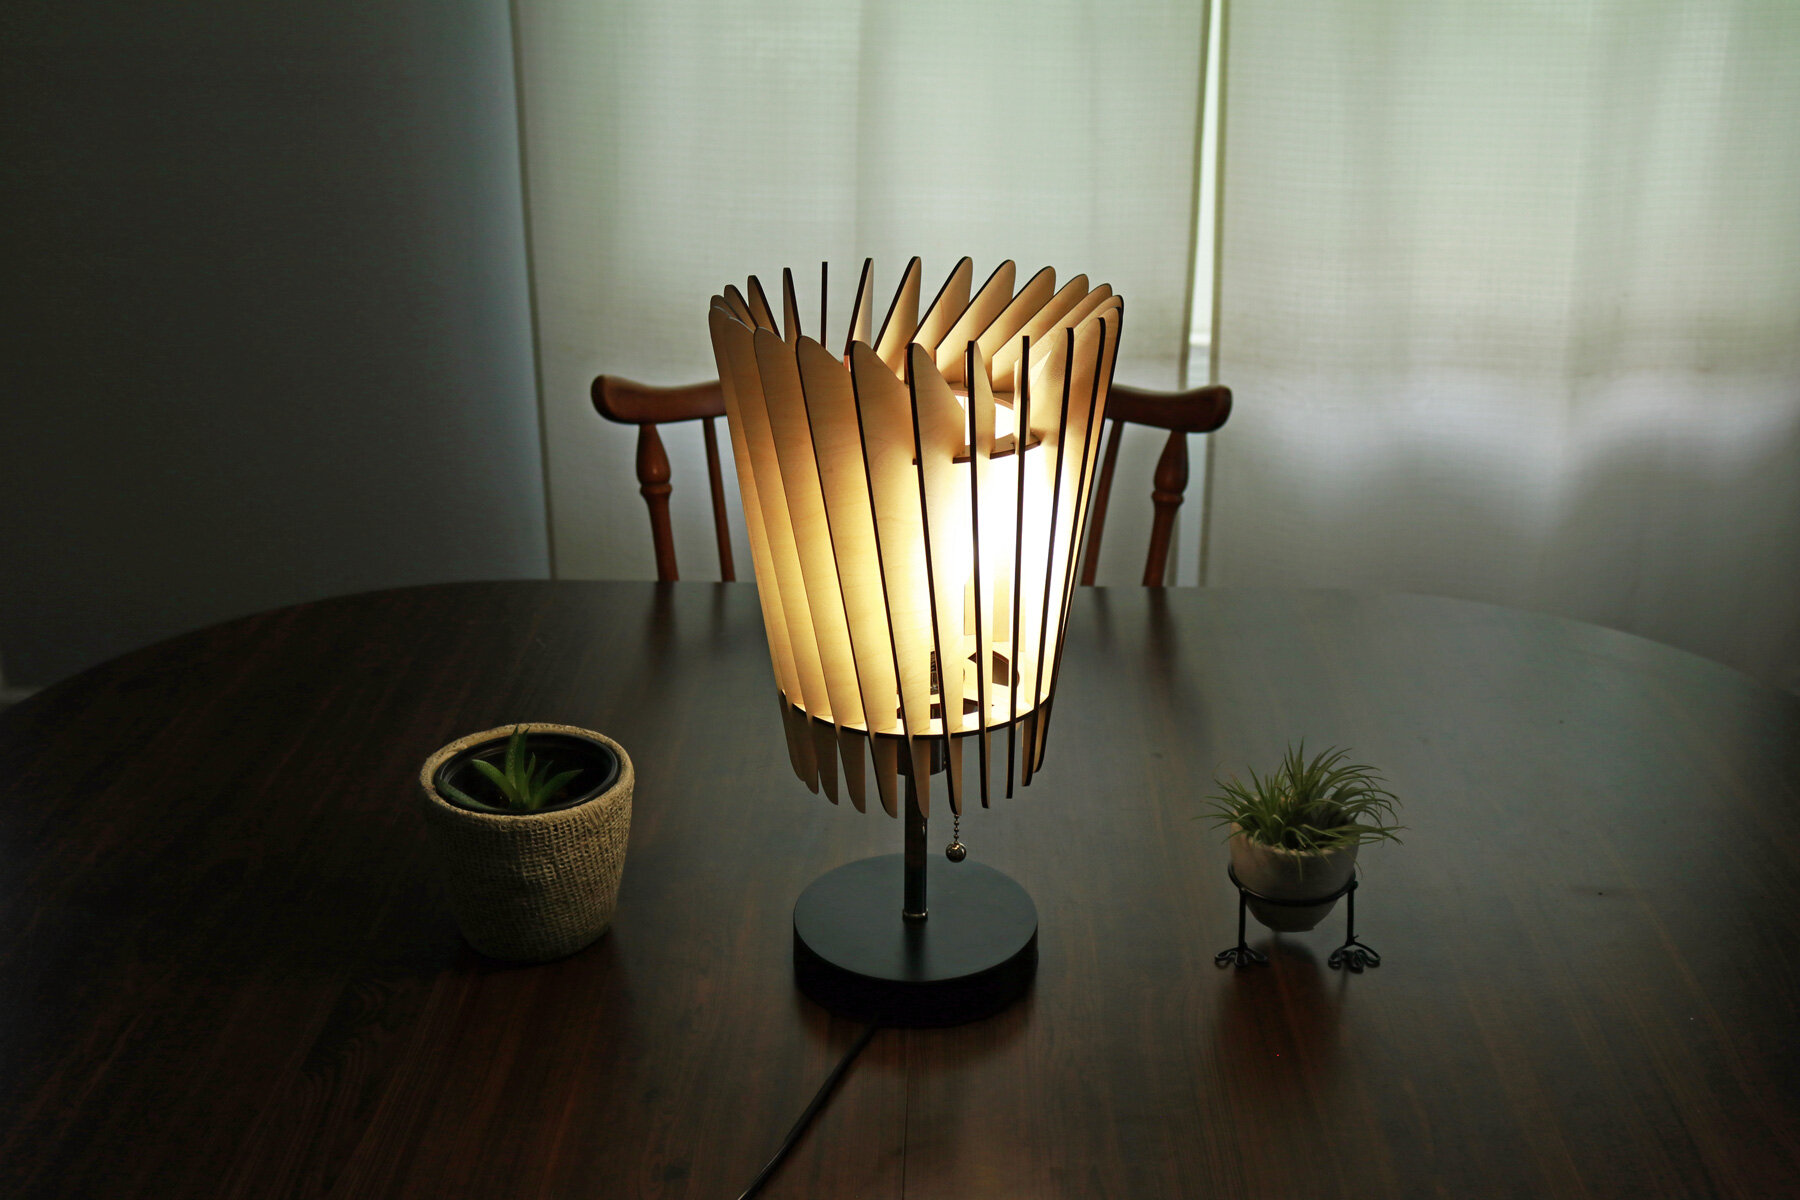
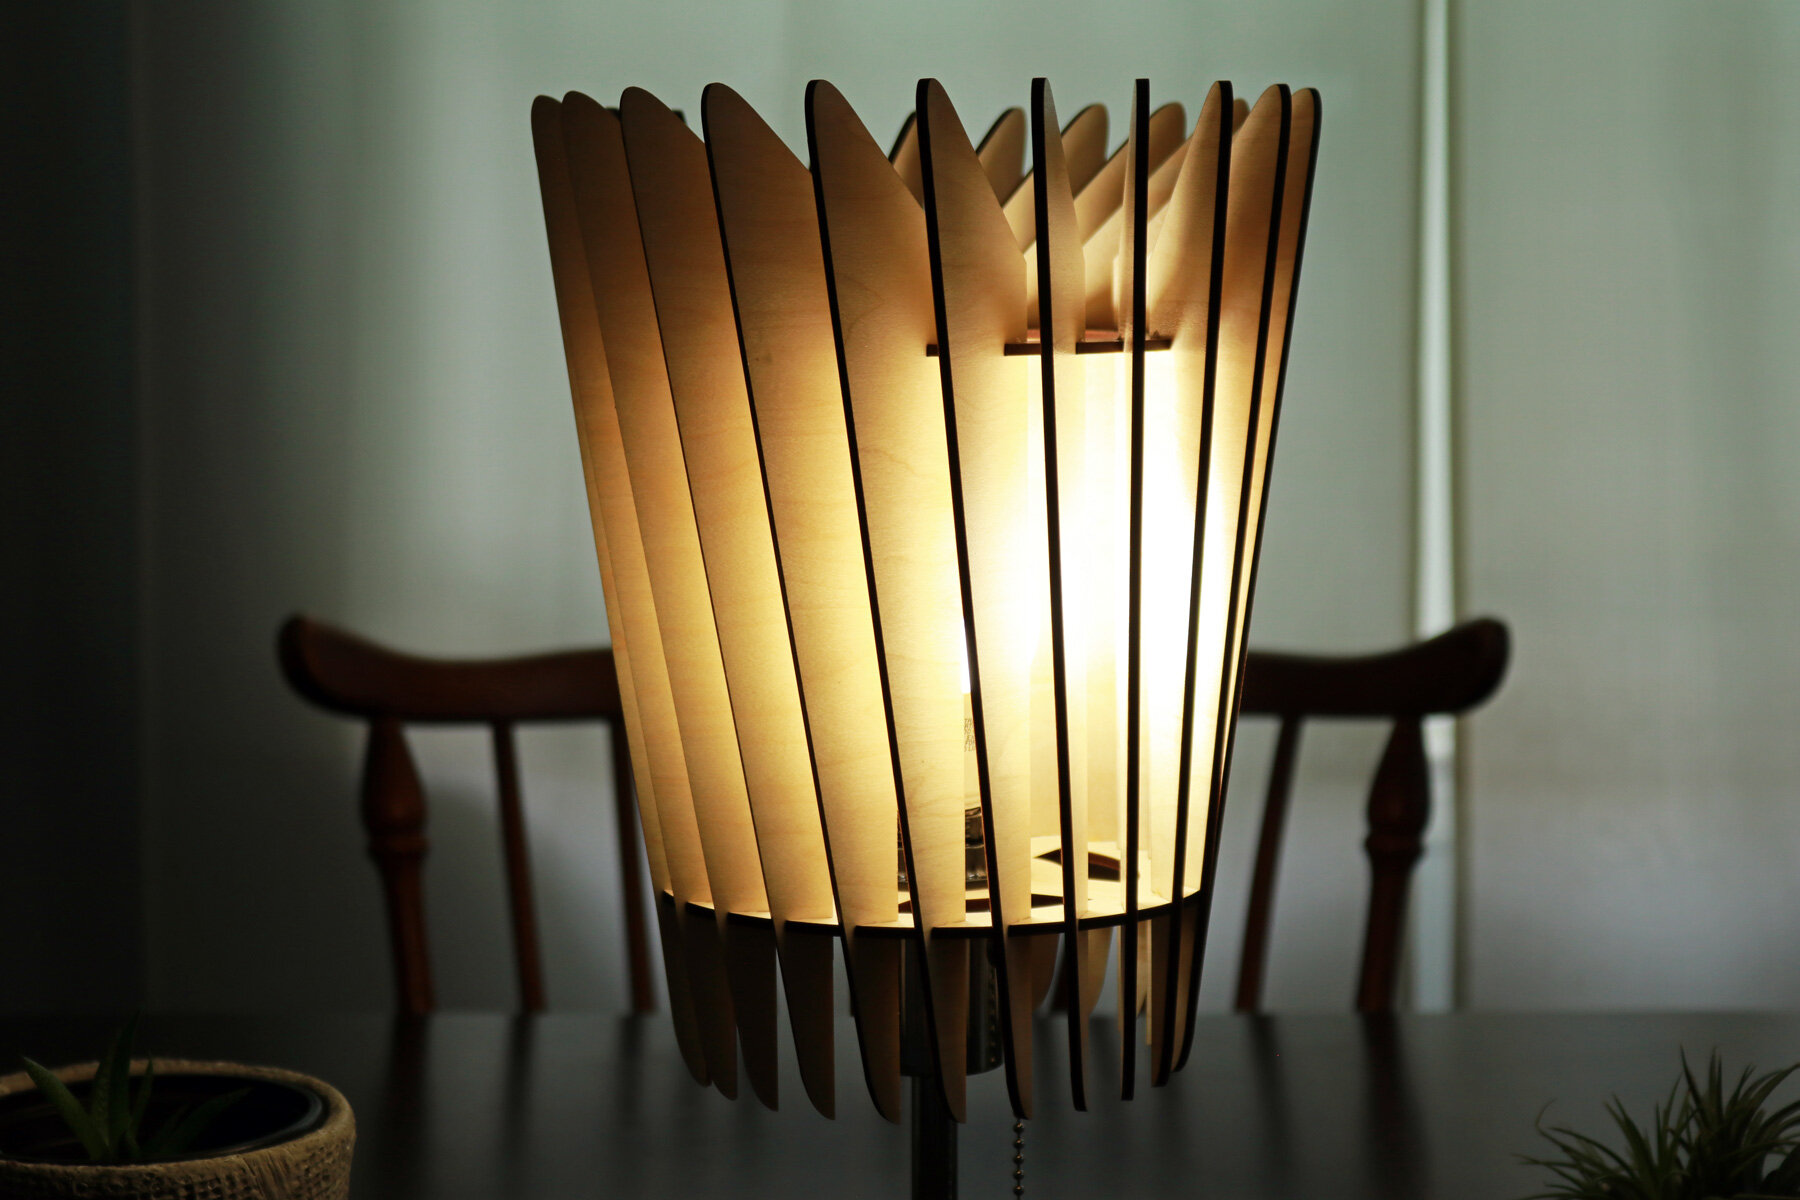
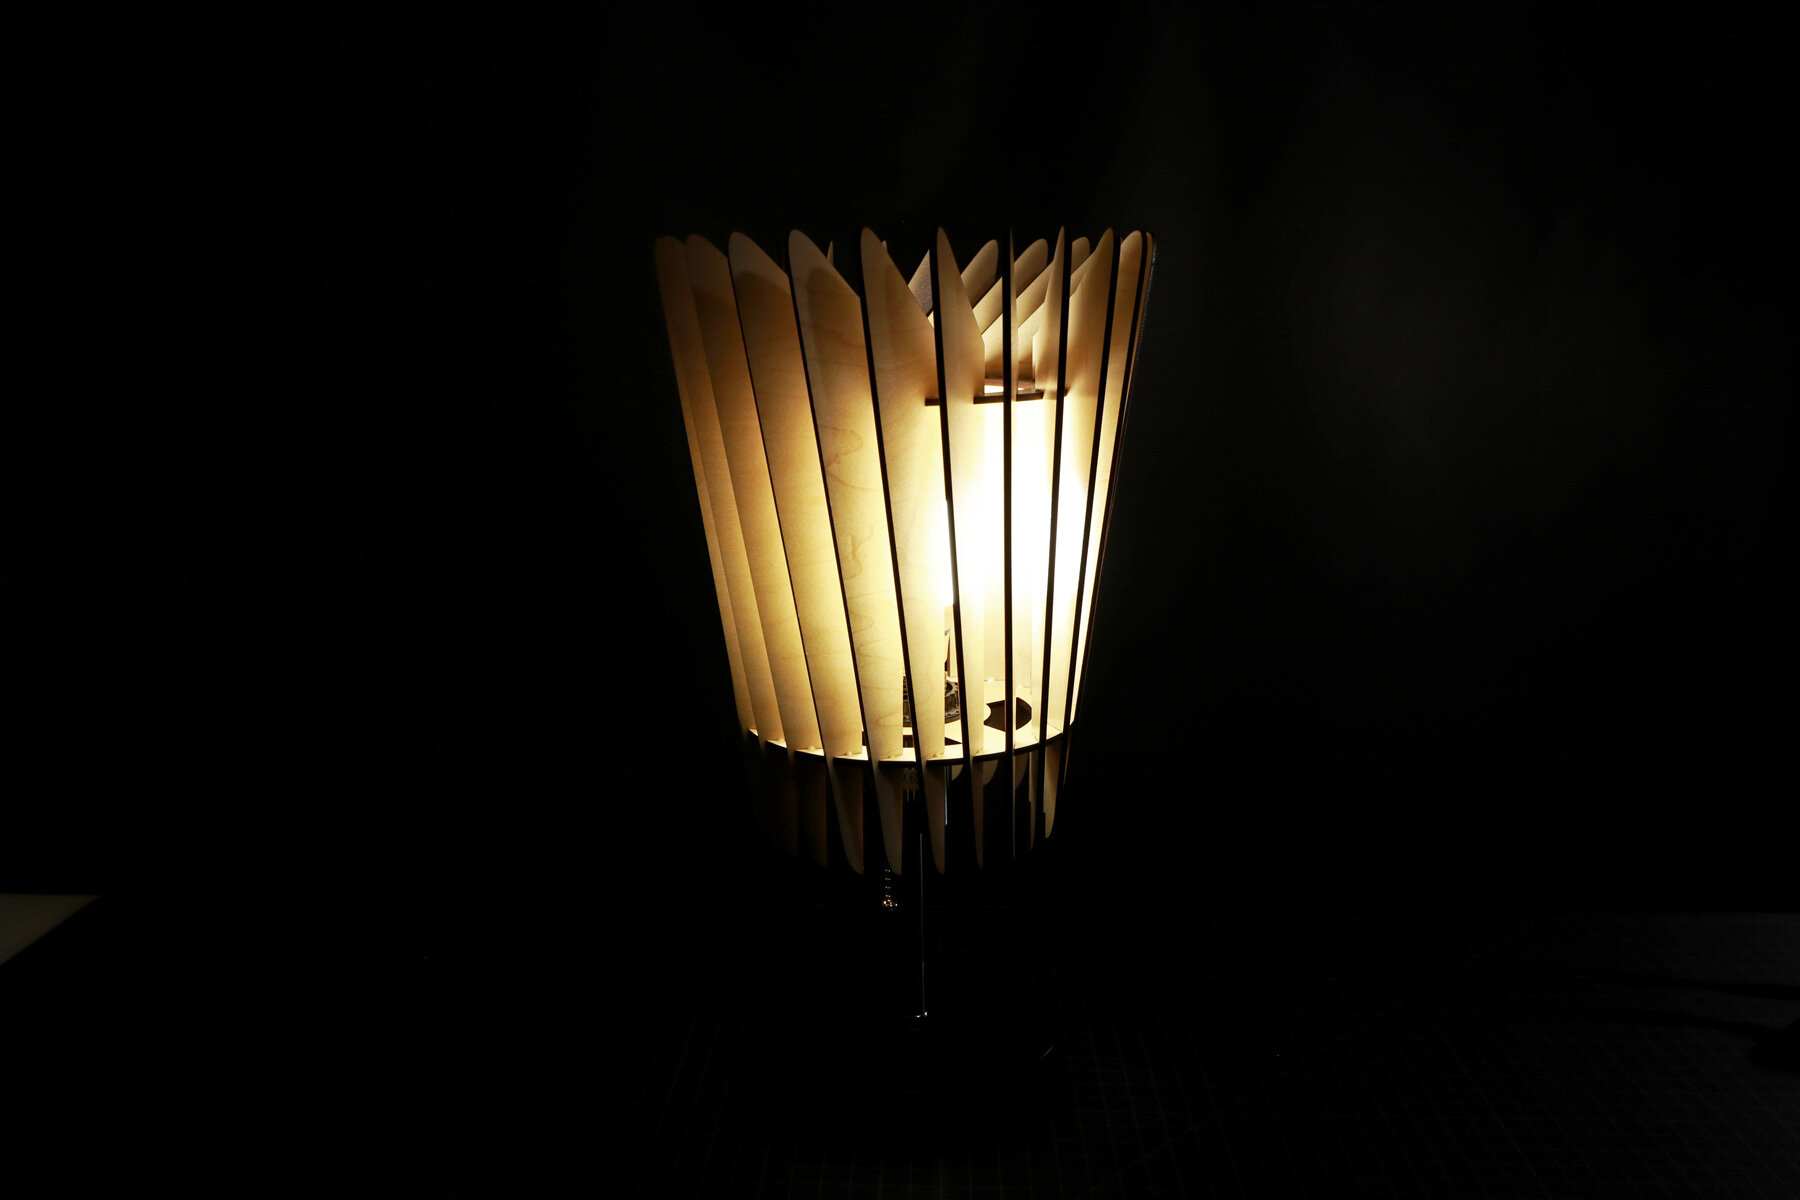
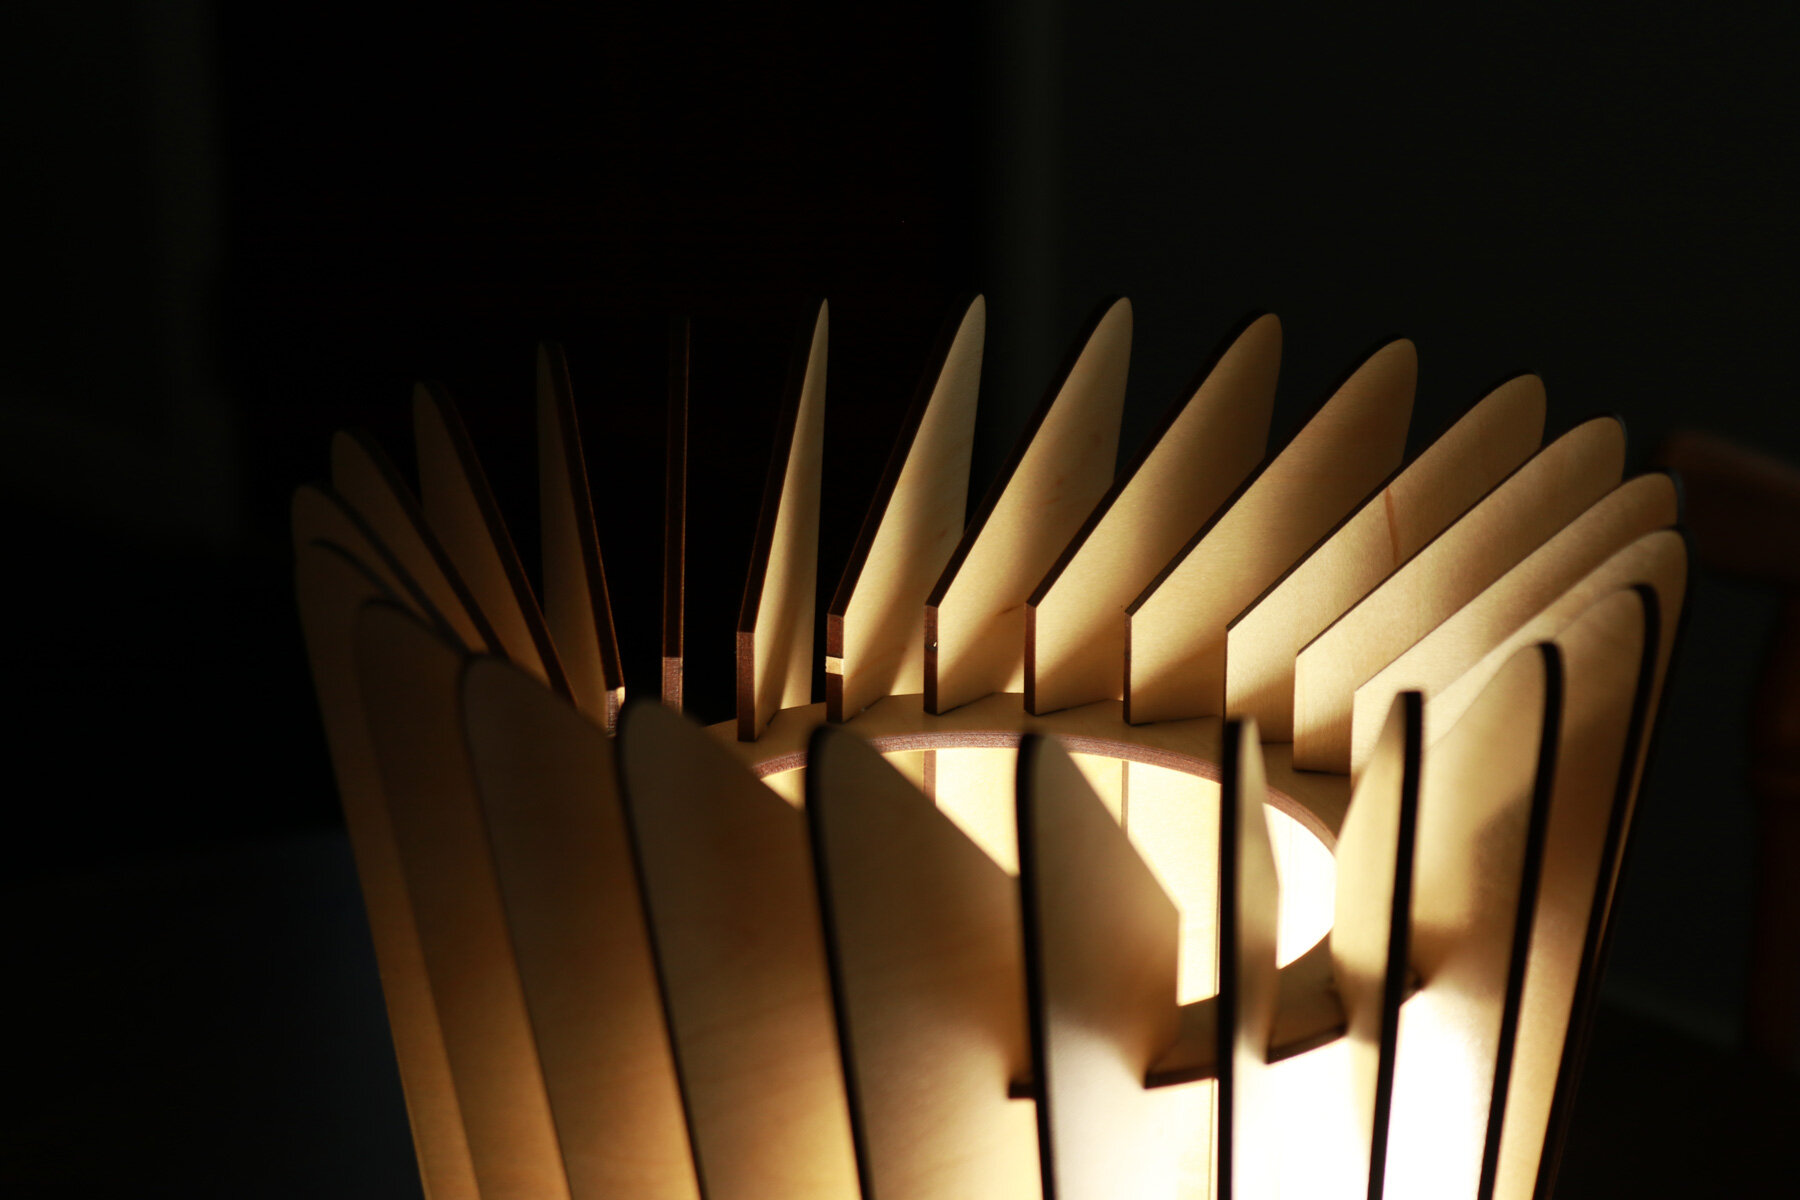
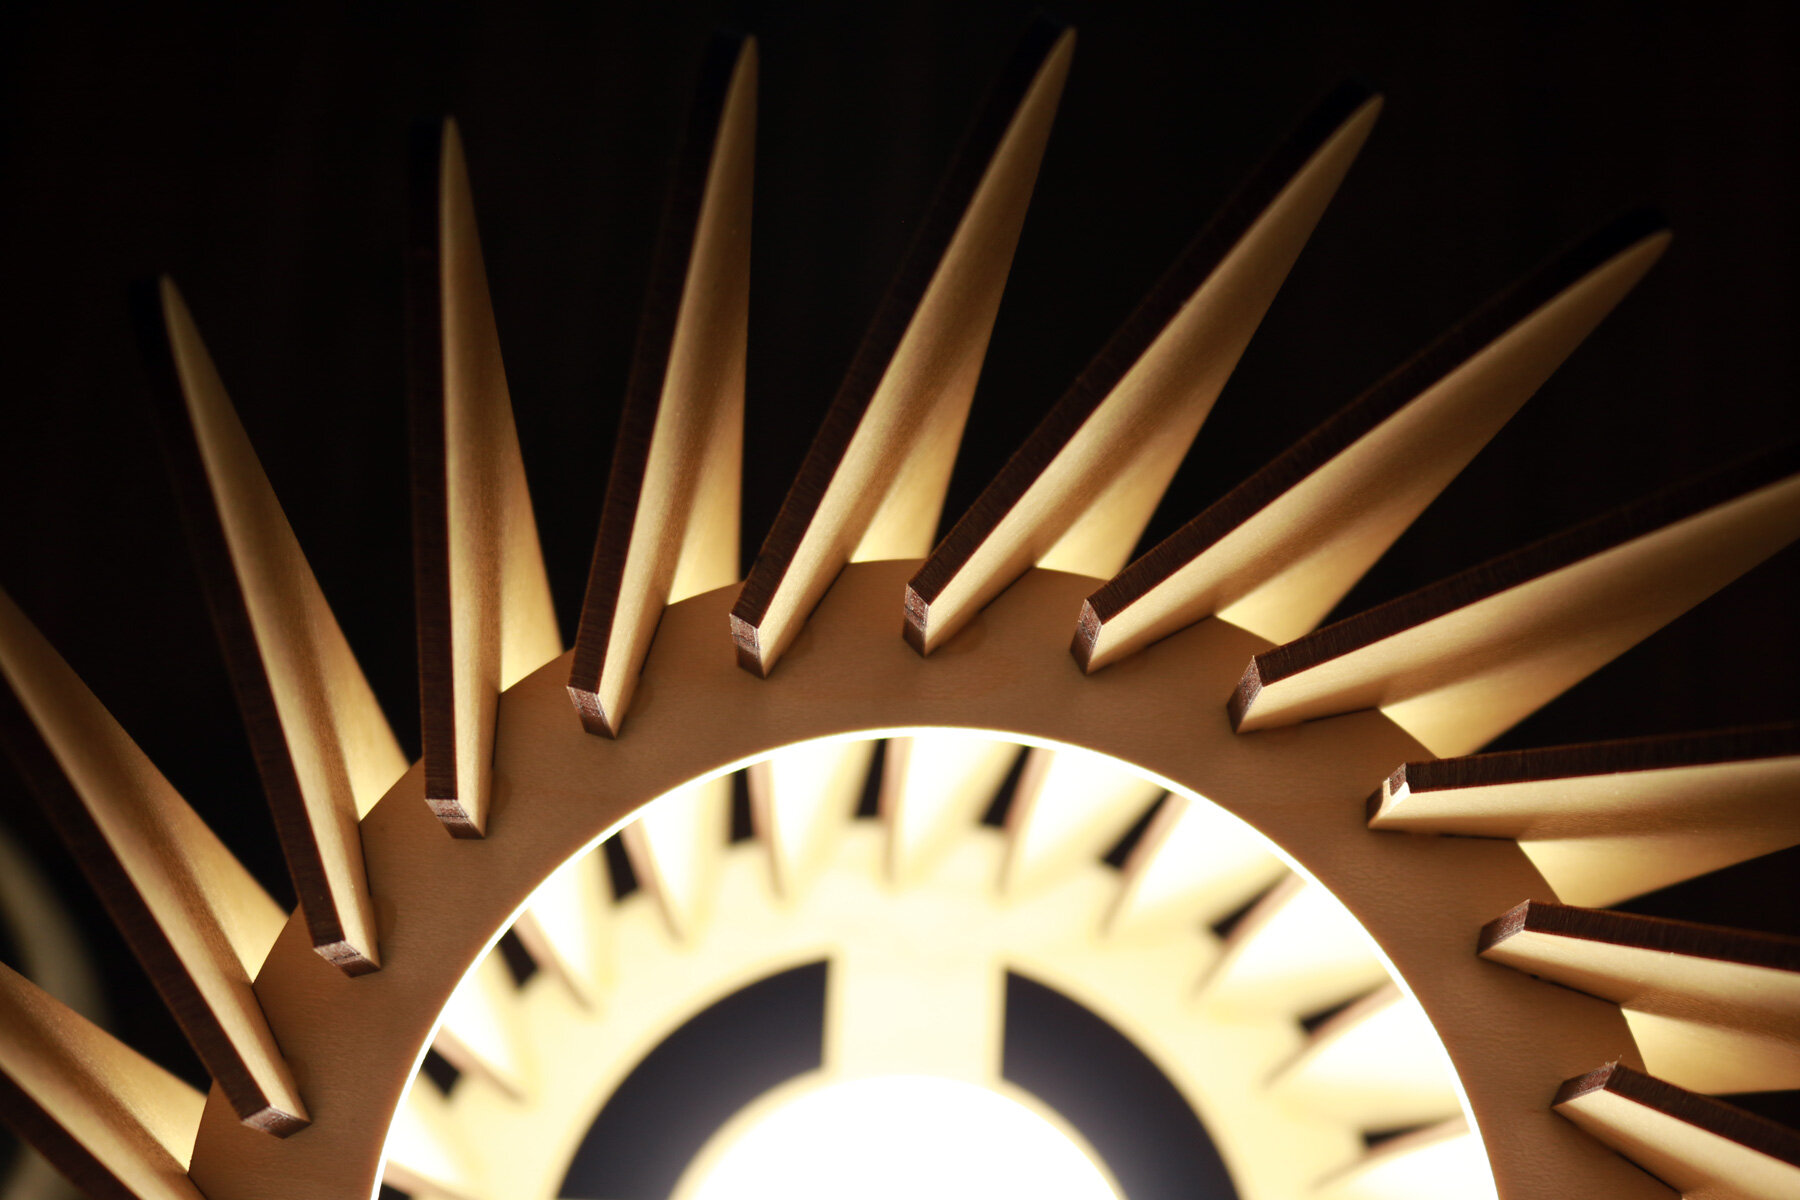
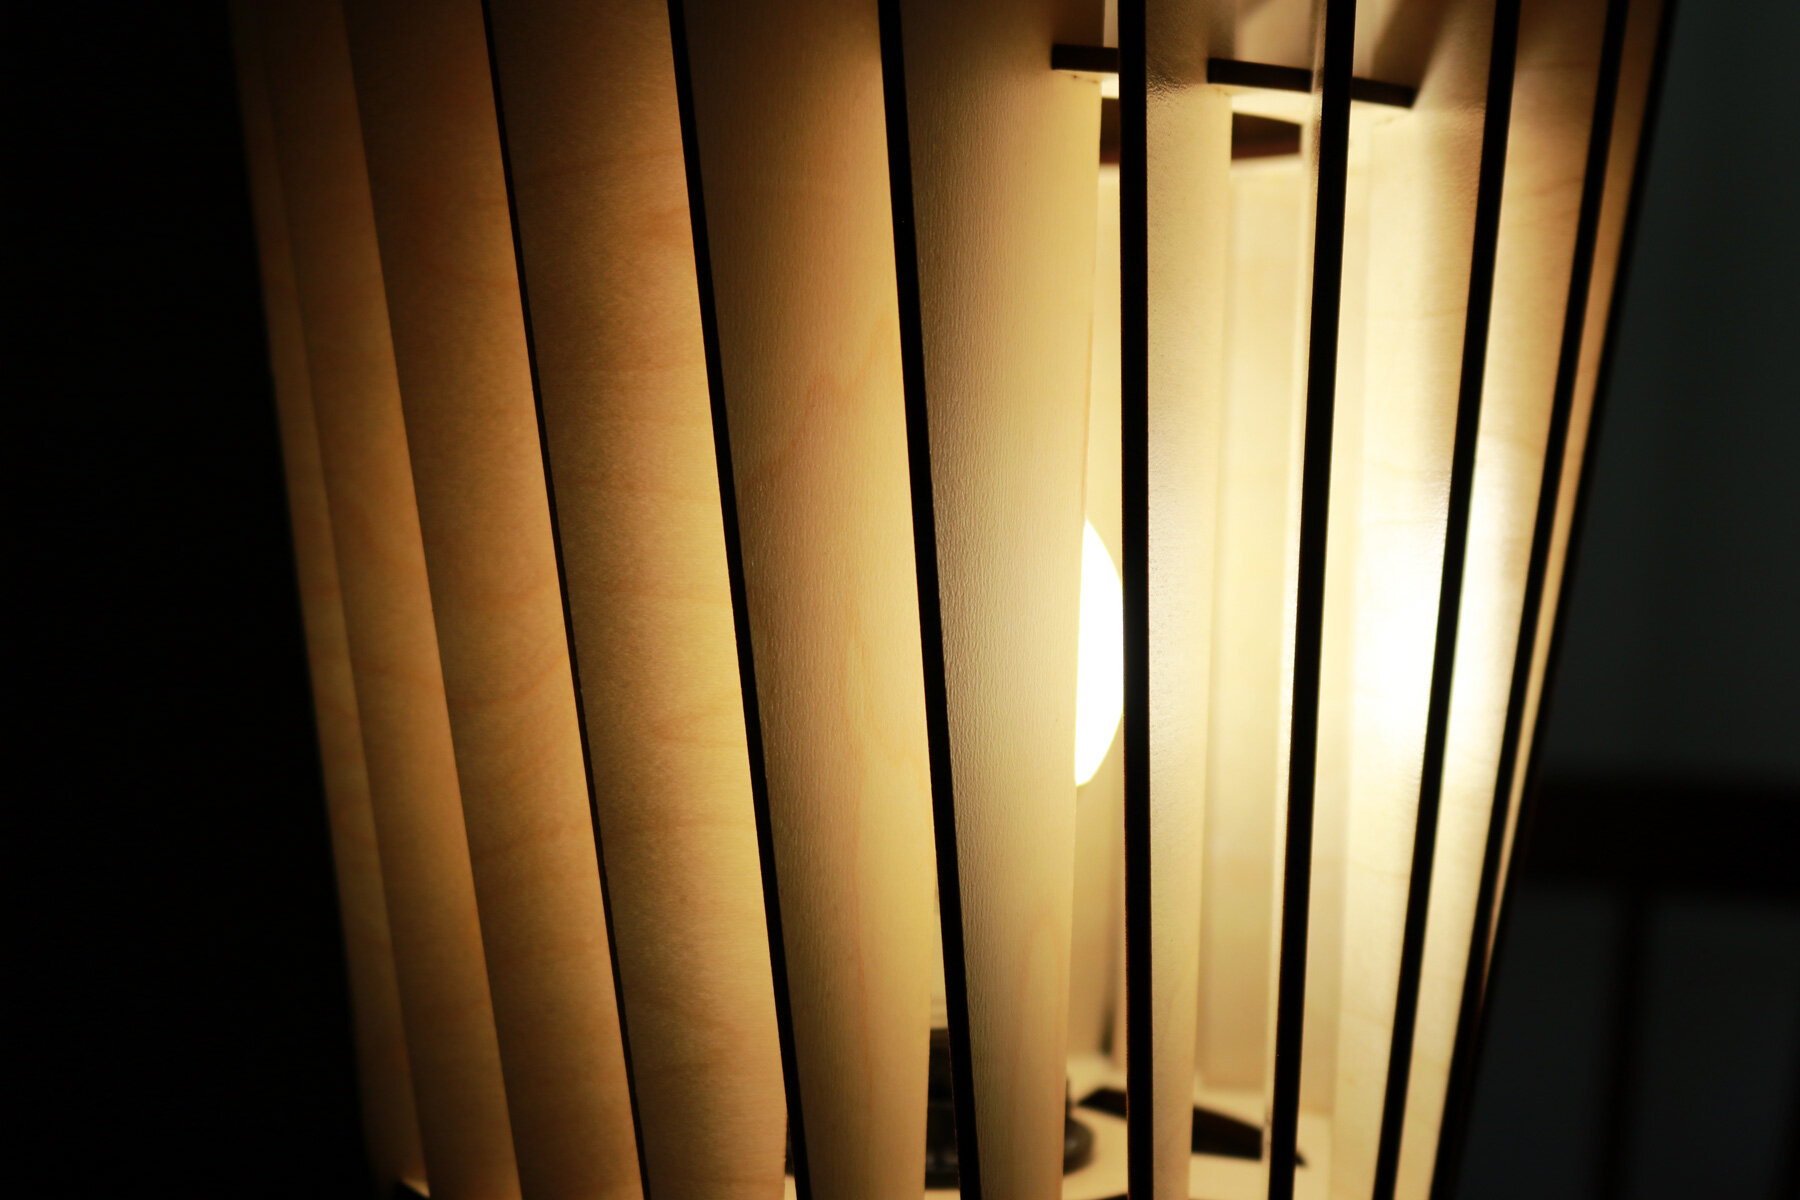
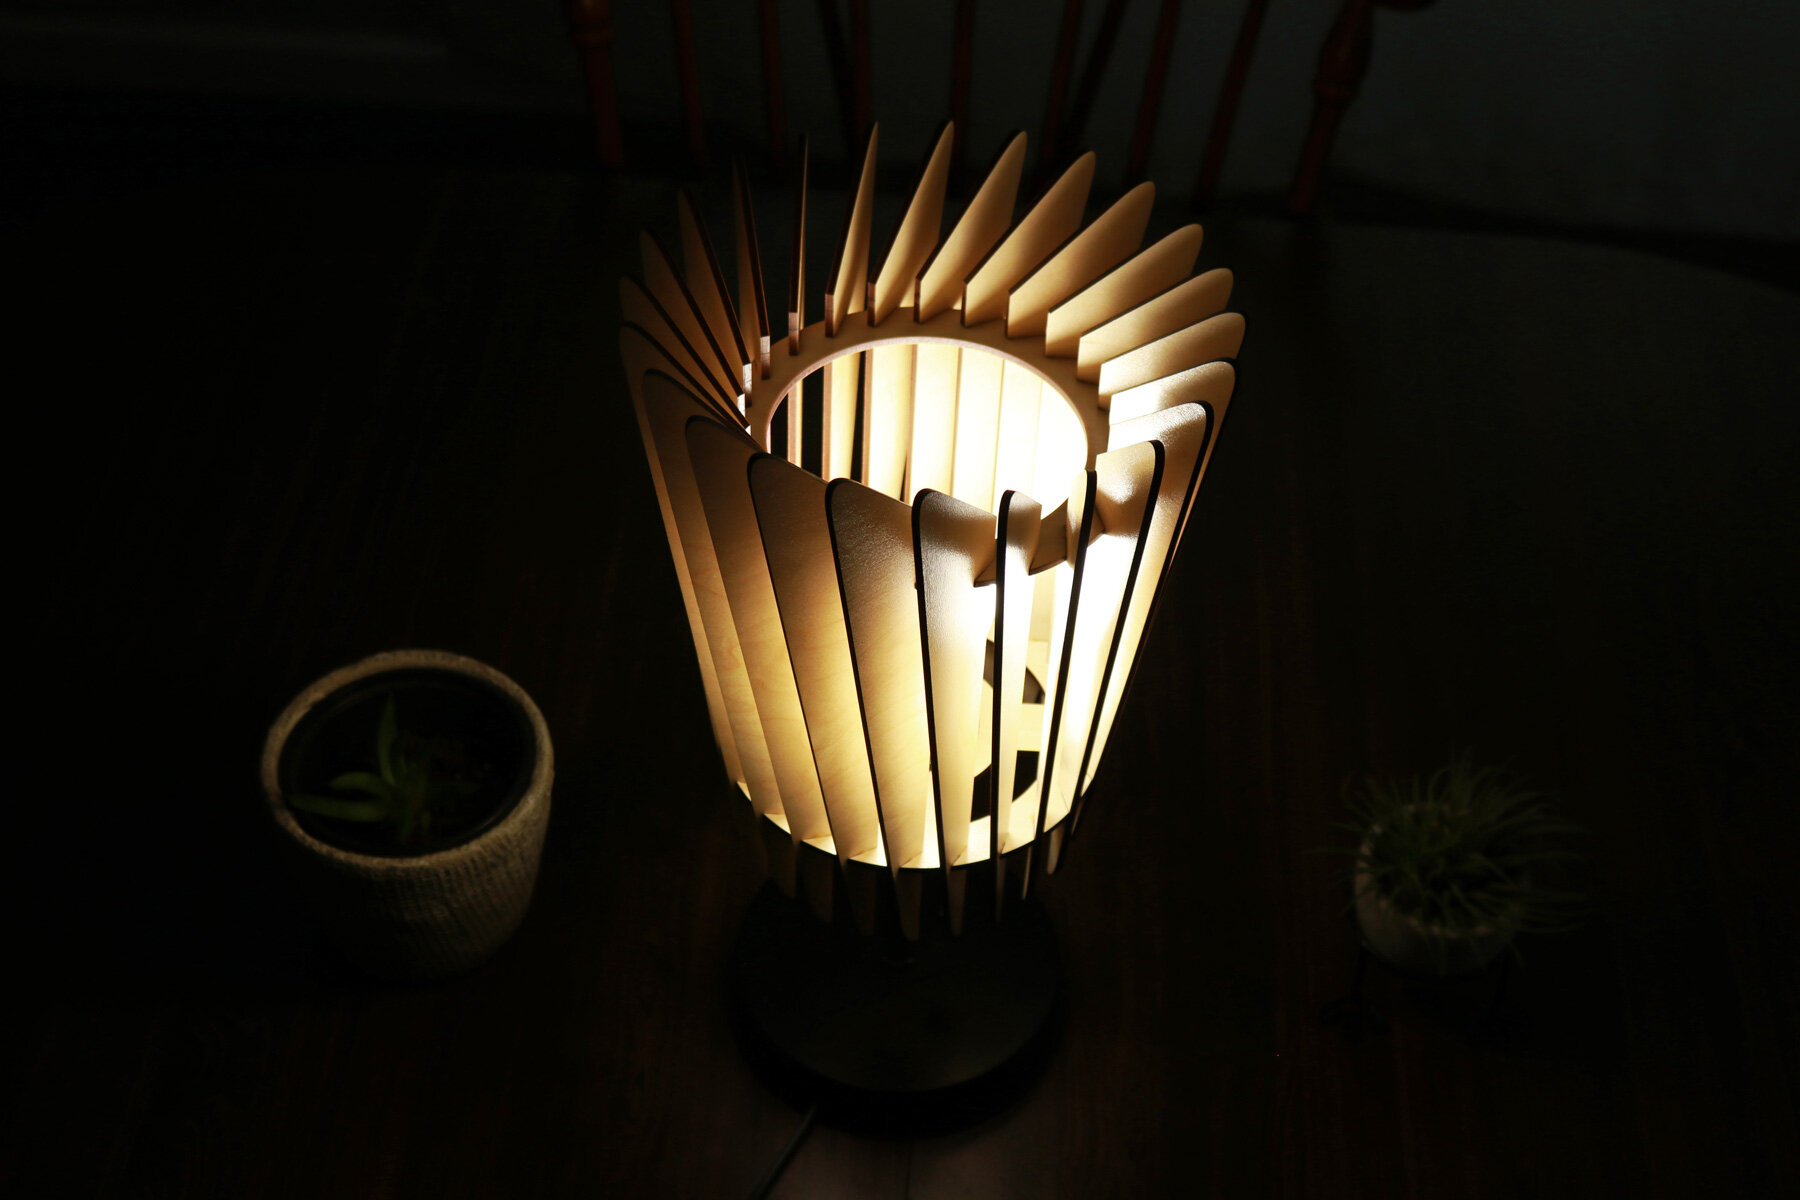
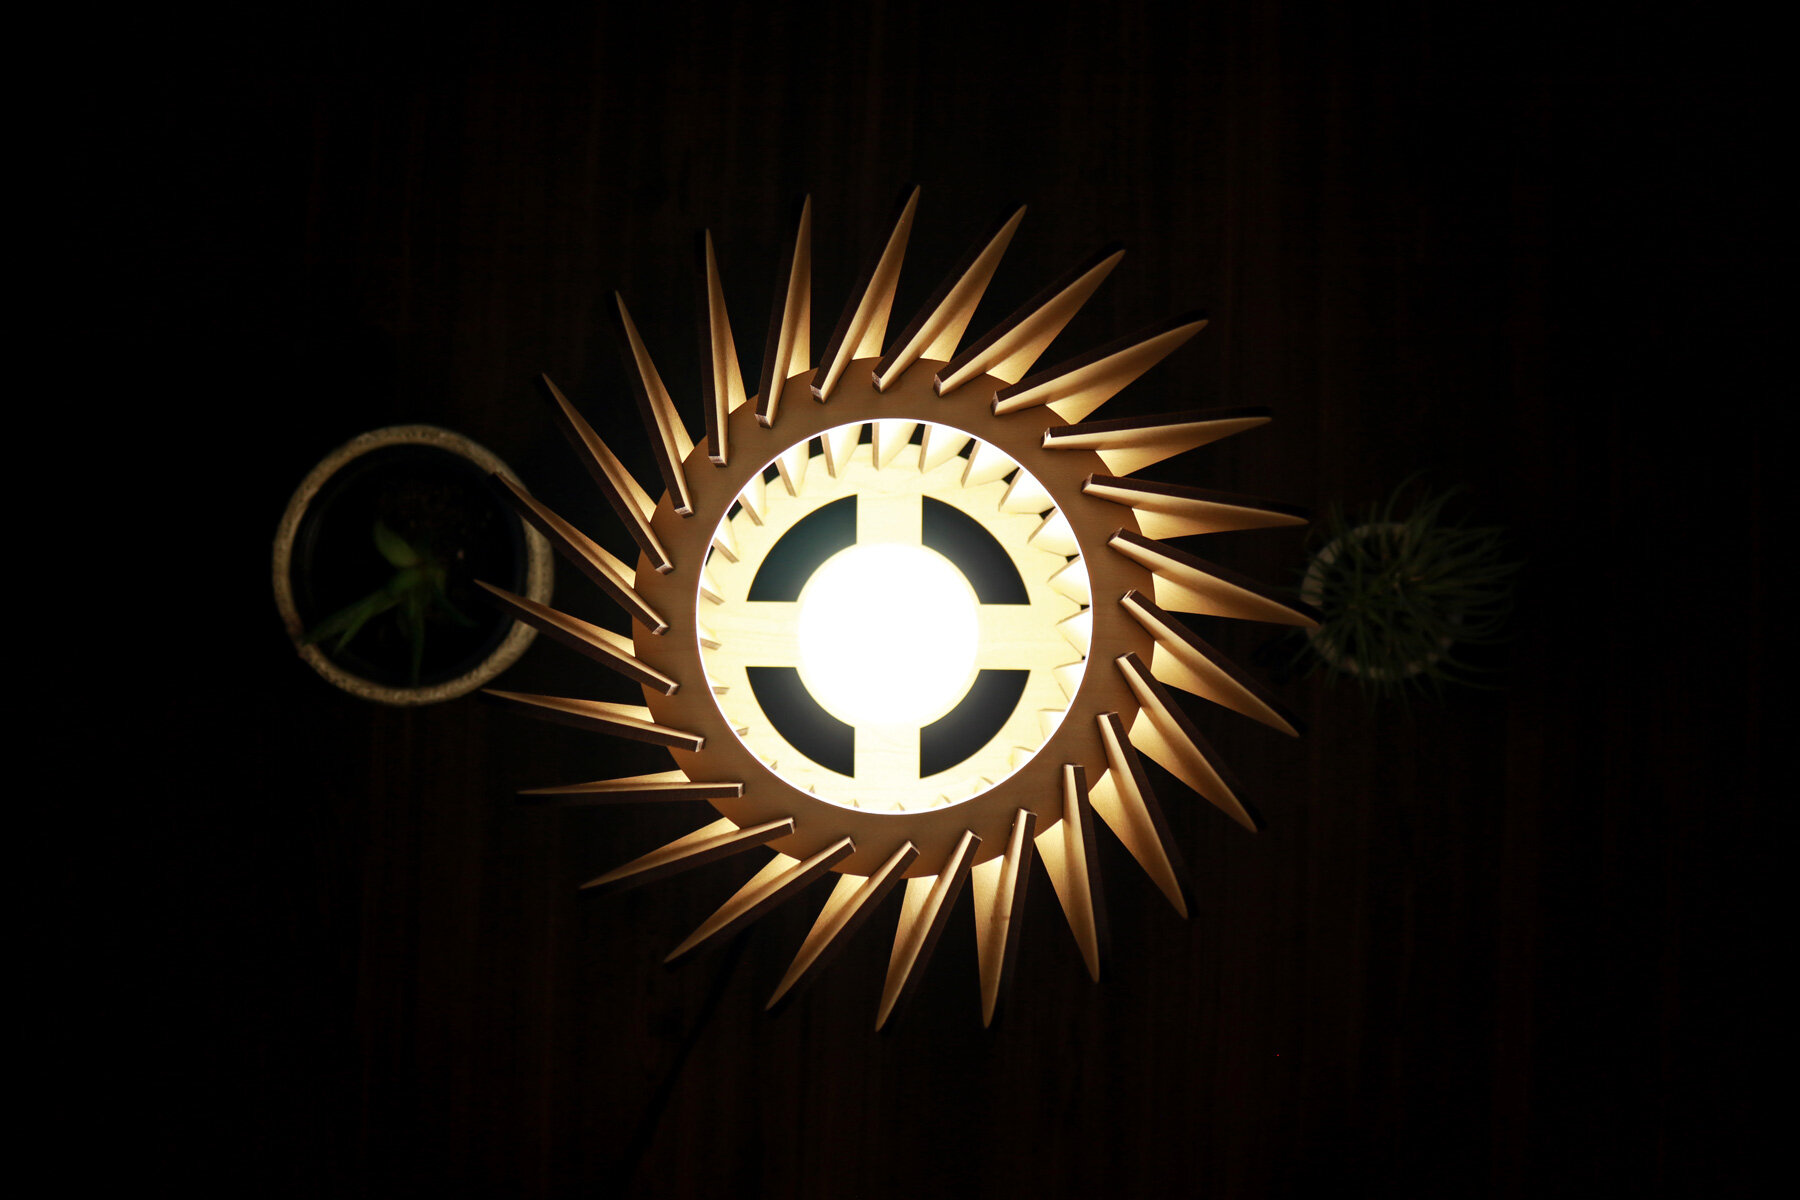
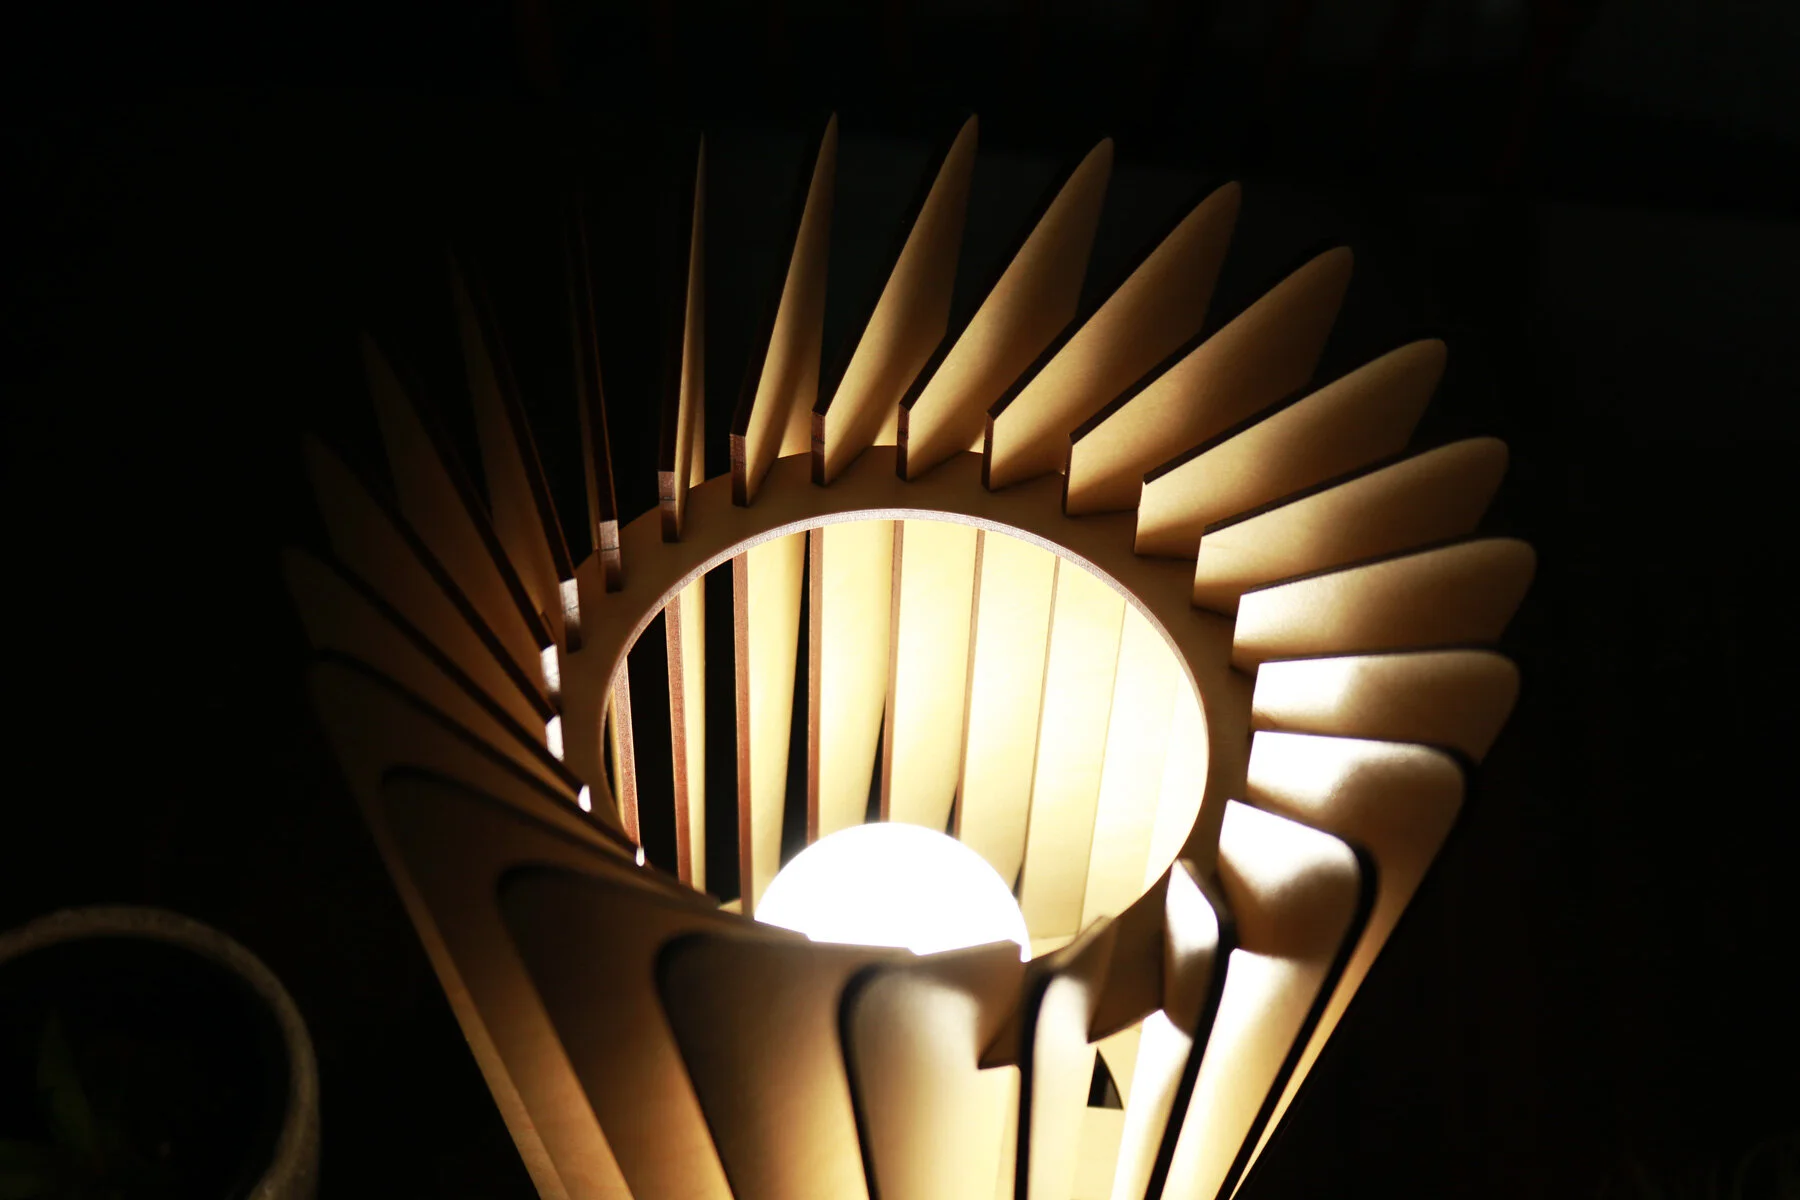
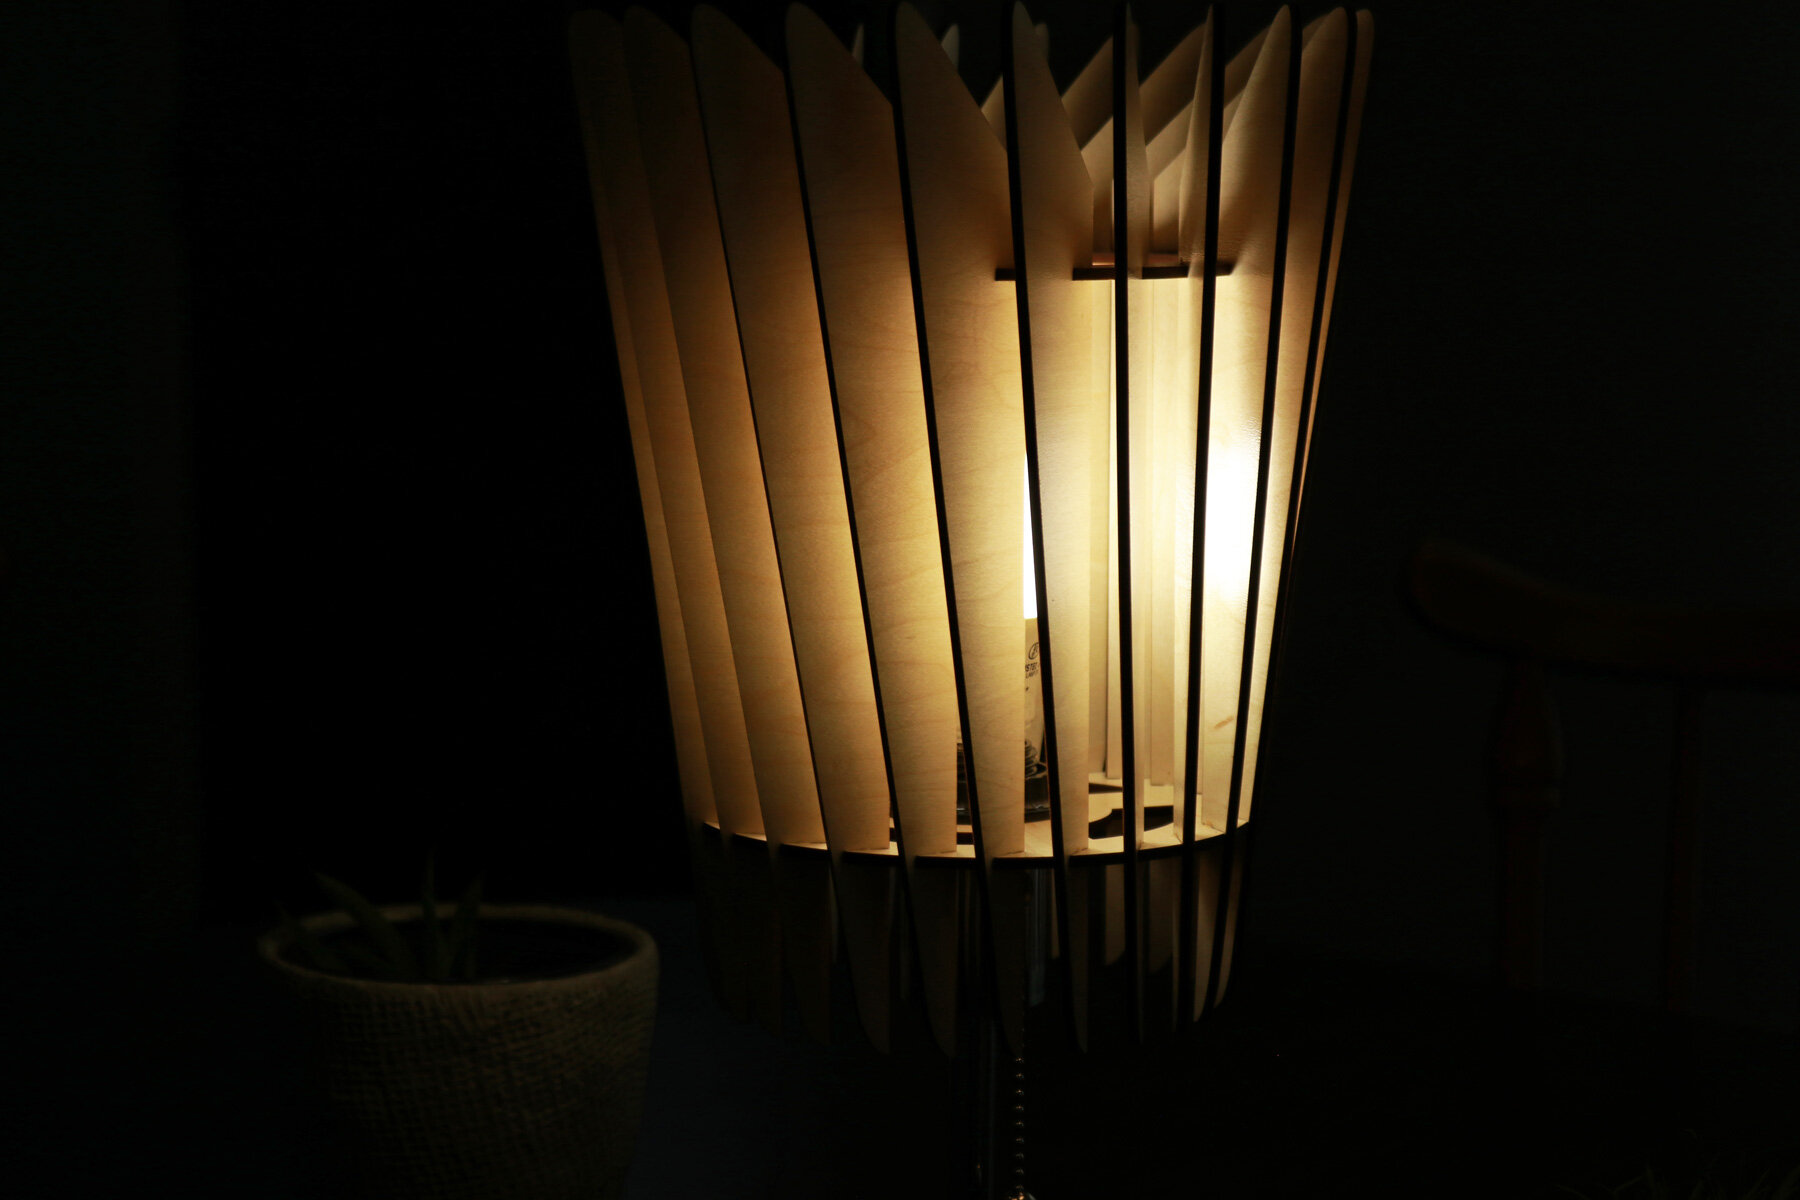
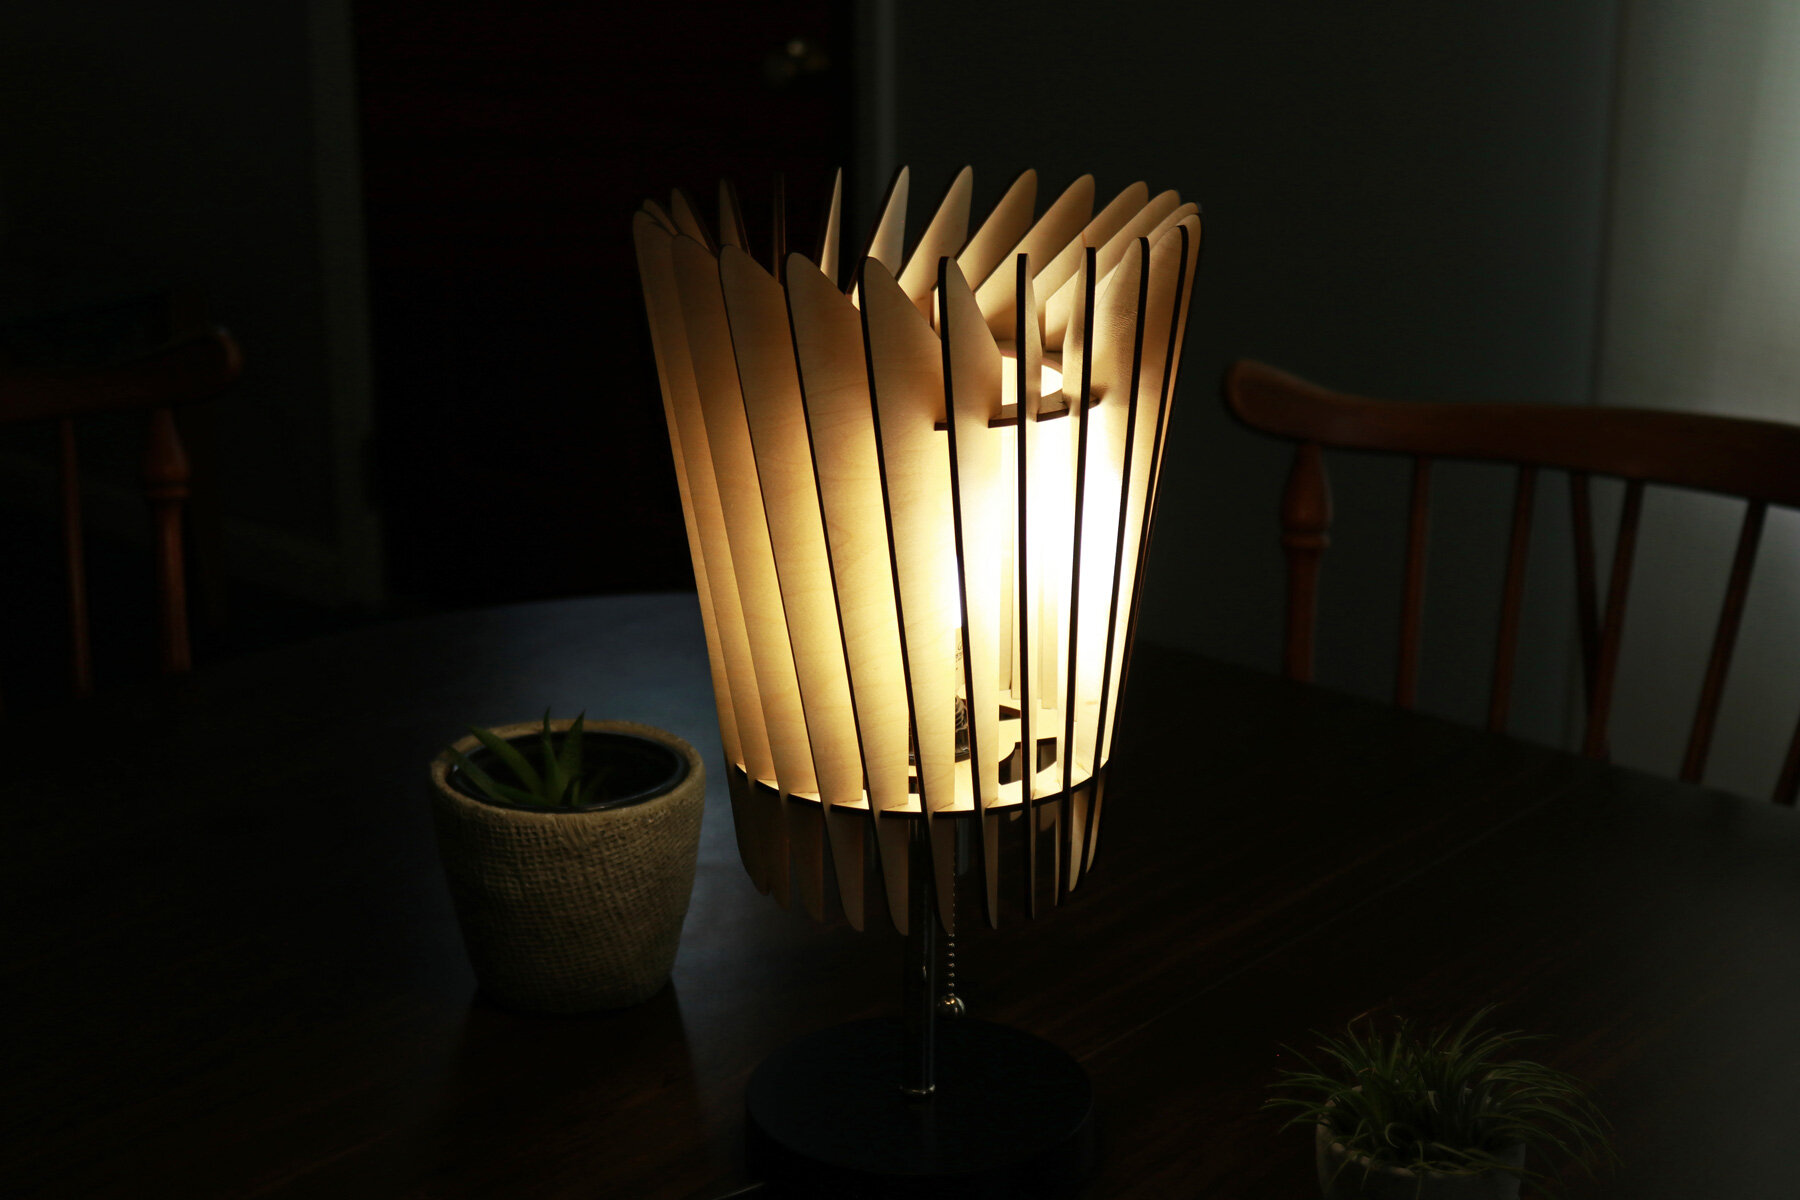
For the wood funnel light, I decided to test the idea of rotating each finger joint on the circular frames, which would also rotate the vertical panels that attach to them. This simple rotation would allow the panels to block direct views of the light bulb at the center and illuminate the space through indirect lighting. As the light bounces off of the surfaces of the wood panels, it would take on the color of the wood and create a warm mood within the space.
Another part of the funnel light’s design was the shape of the vertical panels, which I decided would have a wider top and thin pointed bottom. This panel shape creates a funnel appearance where the opening at the top of the fixture is wide and narrows as it slopes down to the straight edge of the panel.
From this project, I learned that a simple design change of one element that’s repeated multiple times can influence the overall function and aesthetic of the light fixture. It’s valuable to test specific design variables of a project to understand its effects. The most important part of designing prototypes and speculative projects is the learn as much from each one through iterative developments, document the outcome, and apply the knowledge to future ones.
Process
This wood funnel light was designed in a software called Rhinoceros where I started with the two circular frames with finger joints around their perimeters. The circular frames were used in other projects, so it was simple to import them into this one. Then, I rotated every finger joint 15 degrees in the same direction.
Once the frames were modified, I drew the general form of the panels that I had in mind, which was initially symmetrical and evenly curved from the bottom to the top of the piece. This form is used in many similar lamp projects, so I decided to refine the design to come up with a unique shape. The following iterations reduced the width of the piece at the base and increased it towards the top. Ultimately, the piece ended up as an asymmetrical shape that kind of resembles half of a candy corn with a sloped top. When these panels are assembled onto the light fixture, the sloped tops make the lampshade look like it’s funneling towards the light source.
With all of the pieces and frames designed, I efficiently organized them on sheets in Adobe Illustrator to maximize the use of every sheet of maple plywood in my Glowforge laser cutter. This has always been an important part of my process because it reduces the amount of waste that I generate.
After all of the panels and frames were laser cut, I removed the protective masking tape from them and organized the pieces on my work table. Then, I turned the circular frames on their side, applied a small dab of wood glue in a finger joint, inserted the finger joint of one panel, and pushed them together to lock the panels in place. I repeated this with the remainder of the panels until the funnel light was fully assembled.