Making a Wood Stacked Pyramid Light

Tools & Materials
Table Lamp - Remove the shade that comes with it
Project Description
How do we reflect light and create a warm relaxing mood?
One of my goals with my creative projects is to document and share my process of designing and making products and architecture. For the wood stacked pyramid light project, my focus was on showcasing the influence of things that I admire like architecture on the design of my products. A project that has always intrigued me because of its exterior form is the National Museum of African American History and Culture designed by Adjaye Associates.
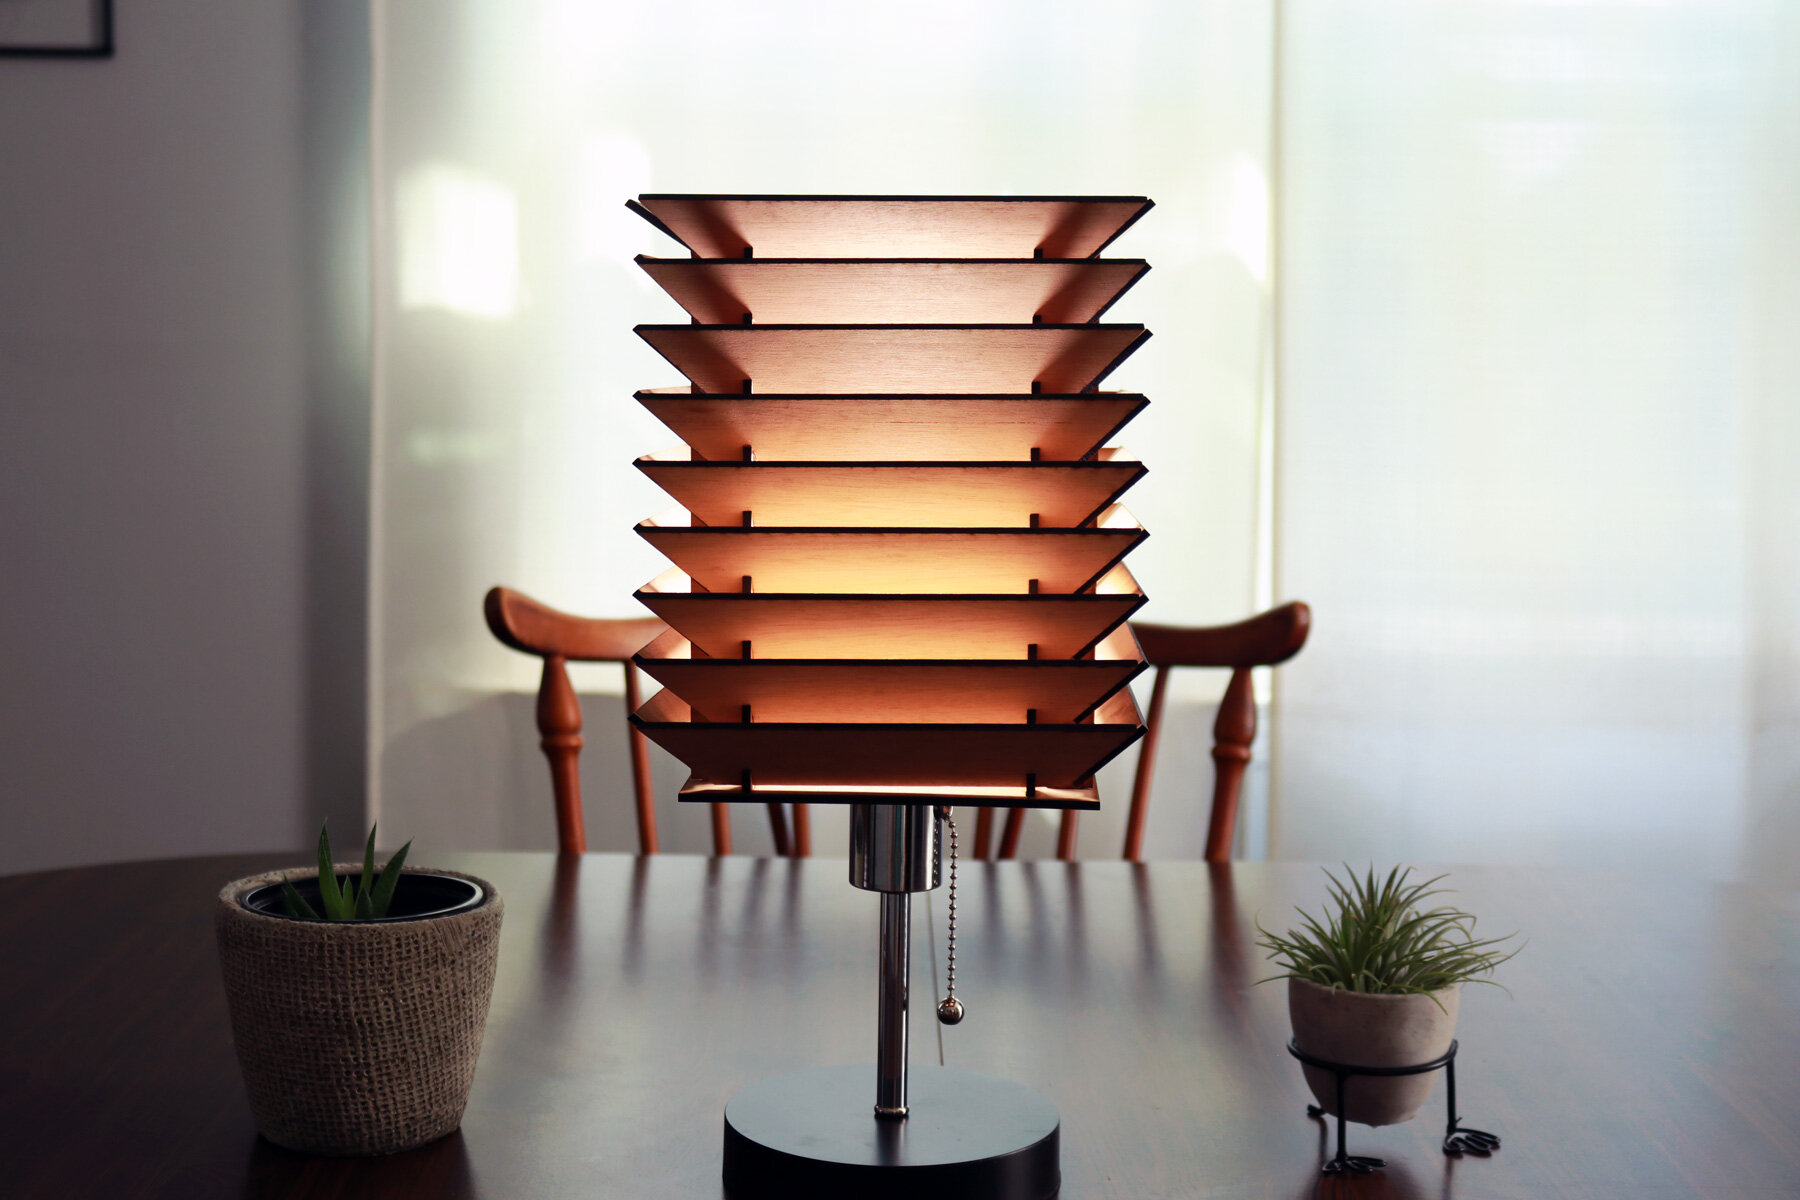
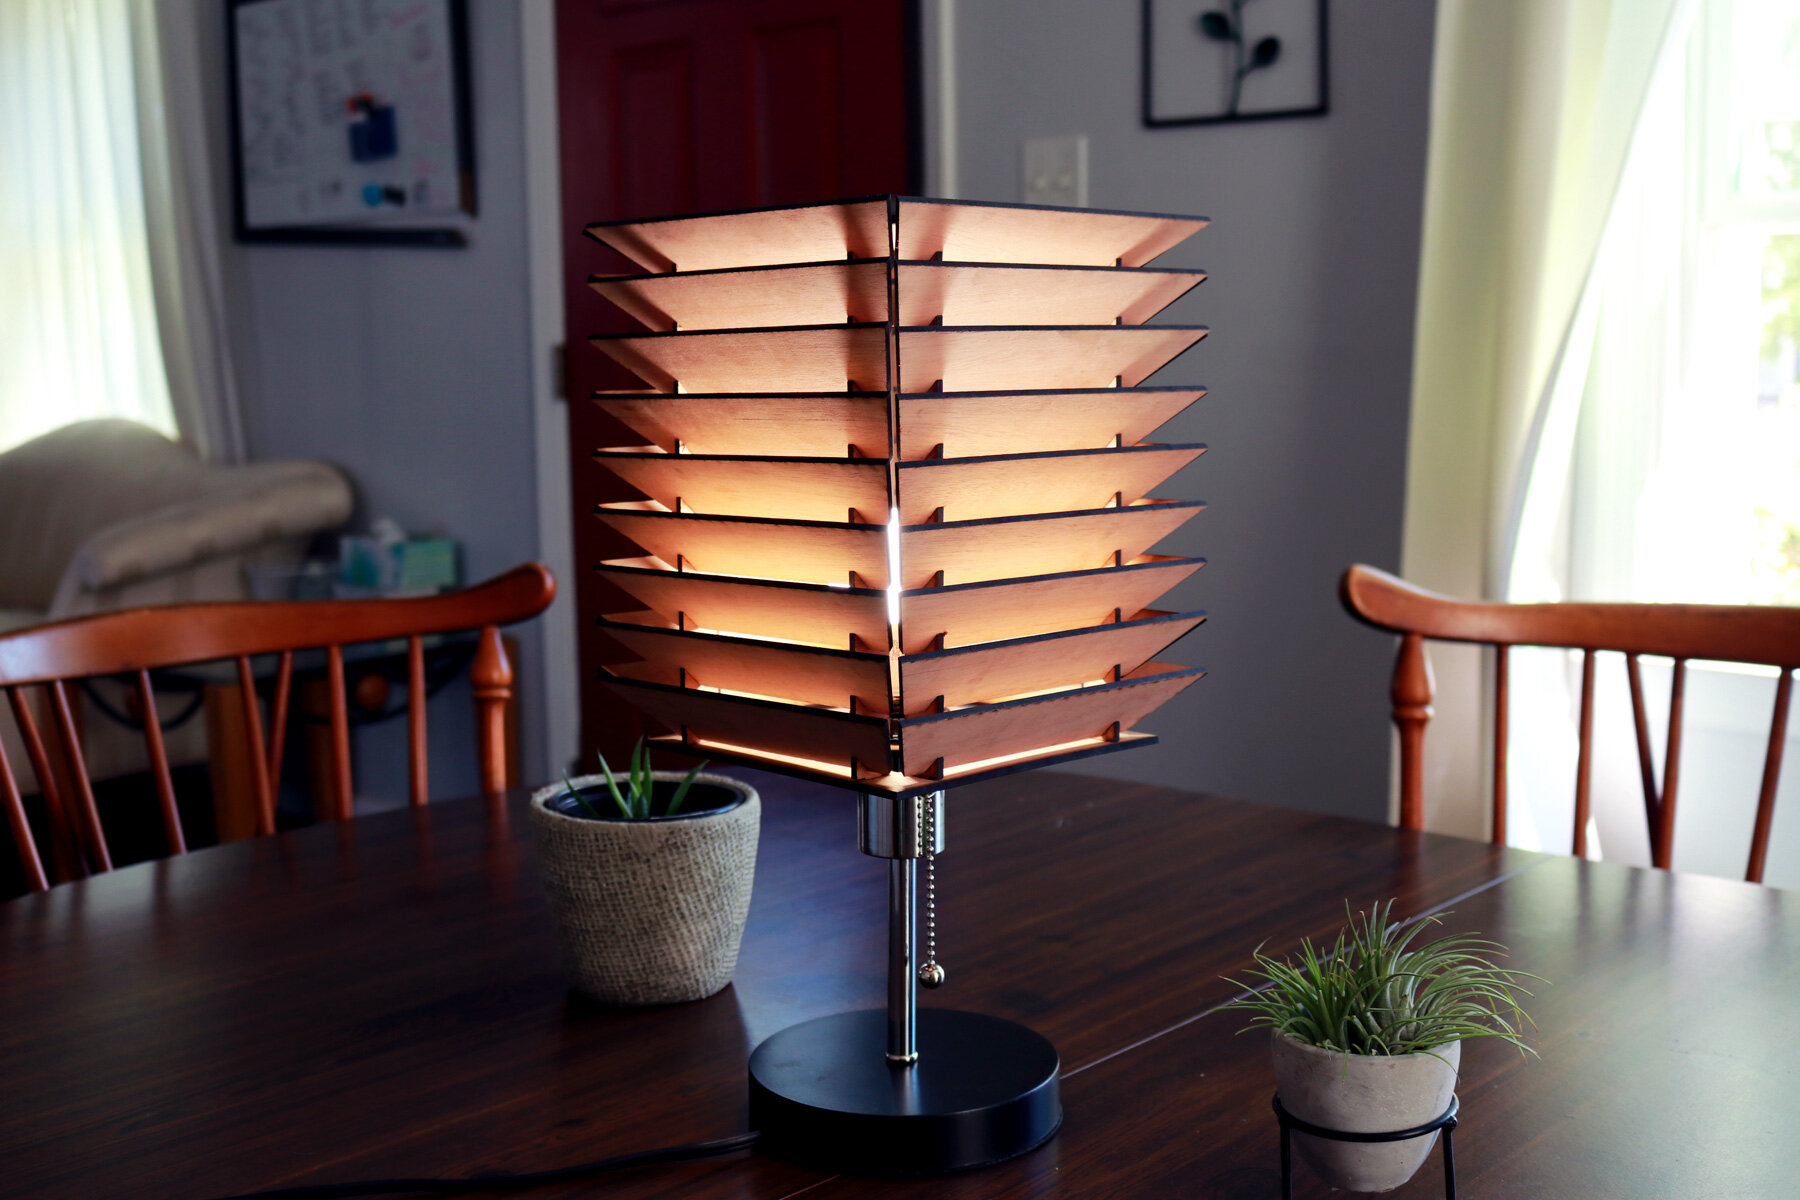
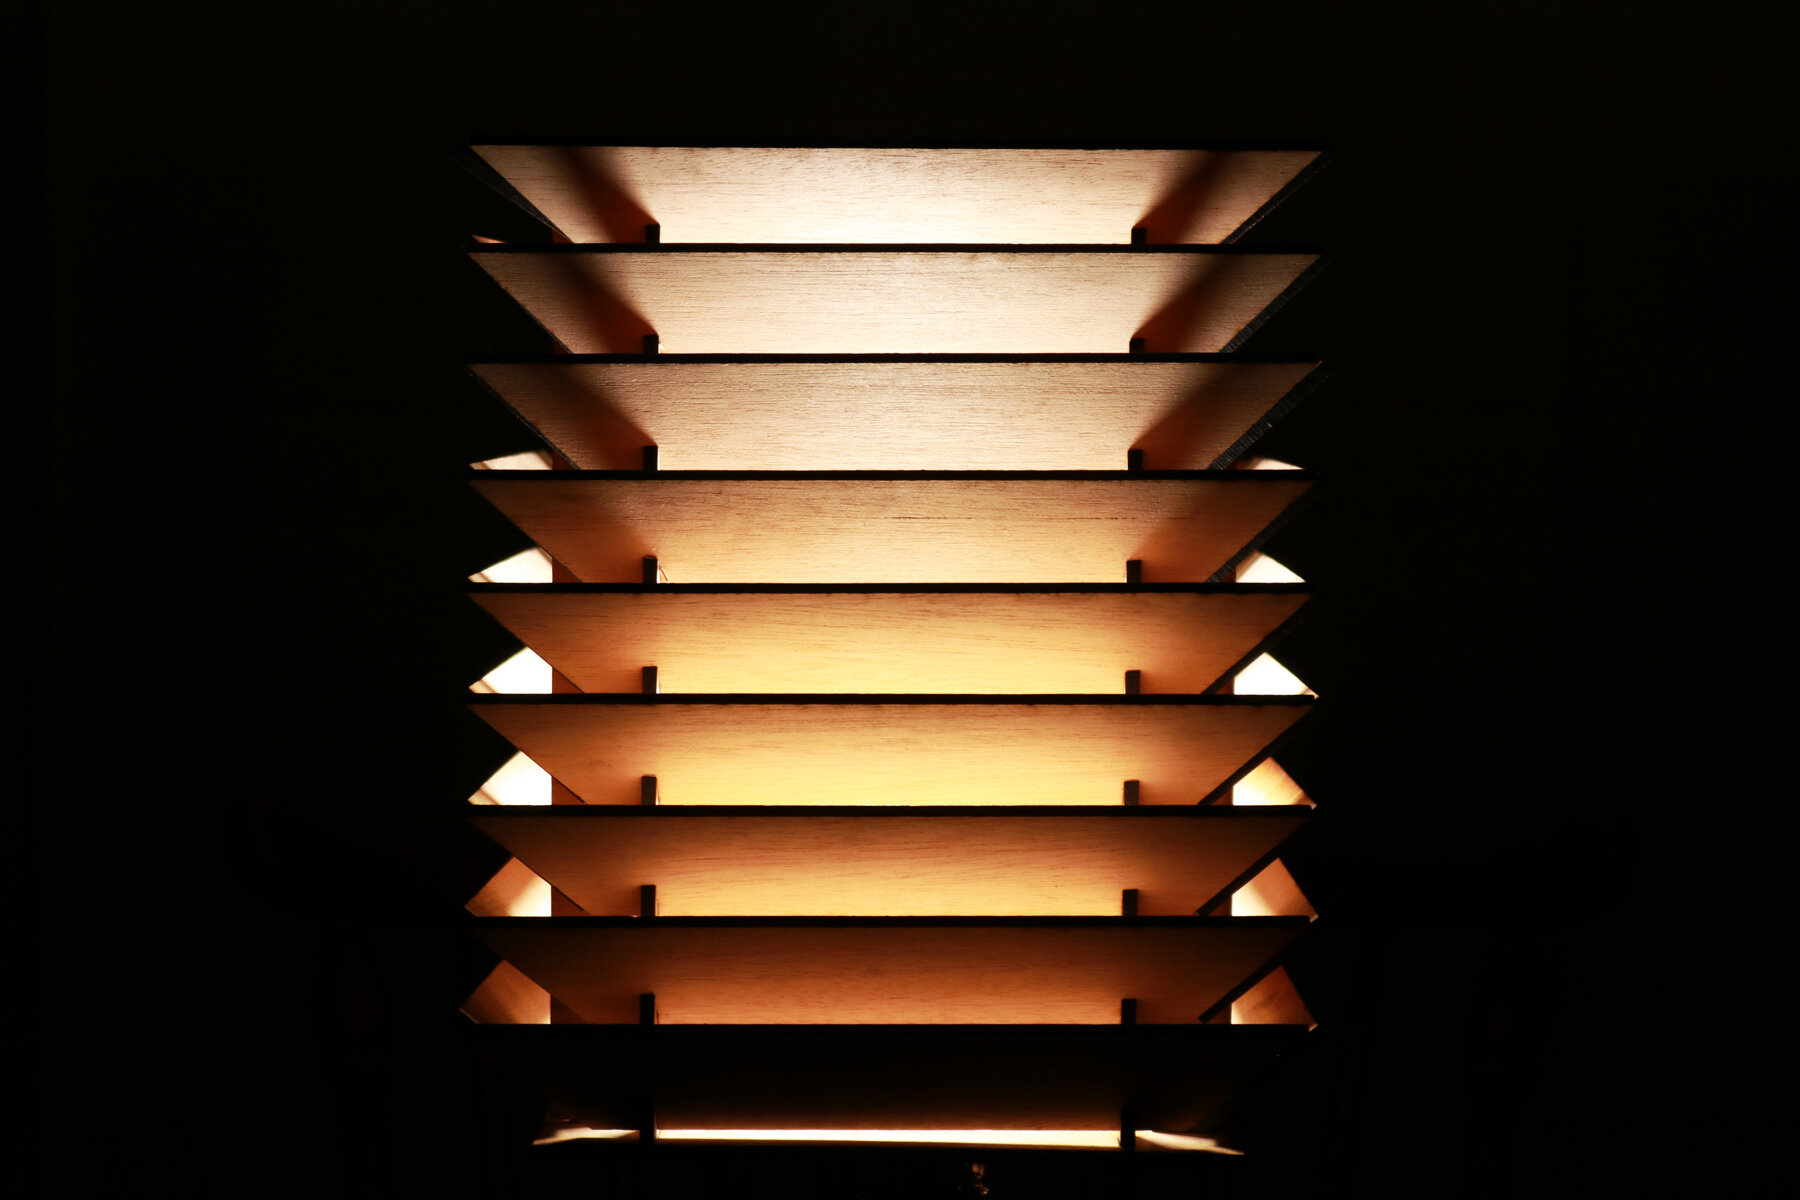
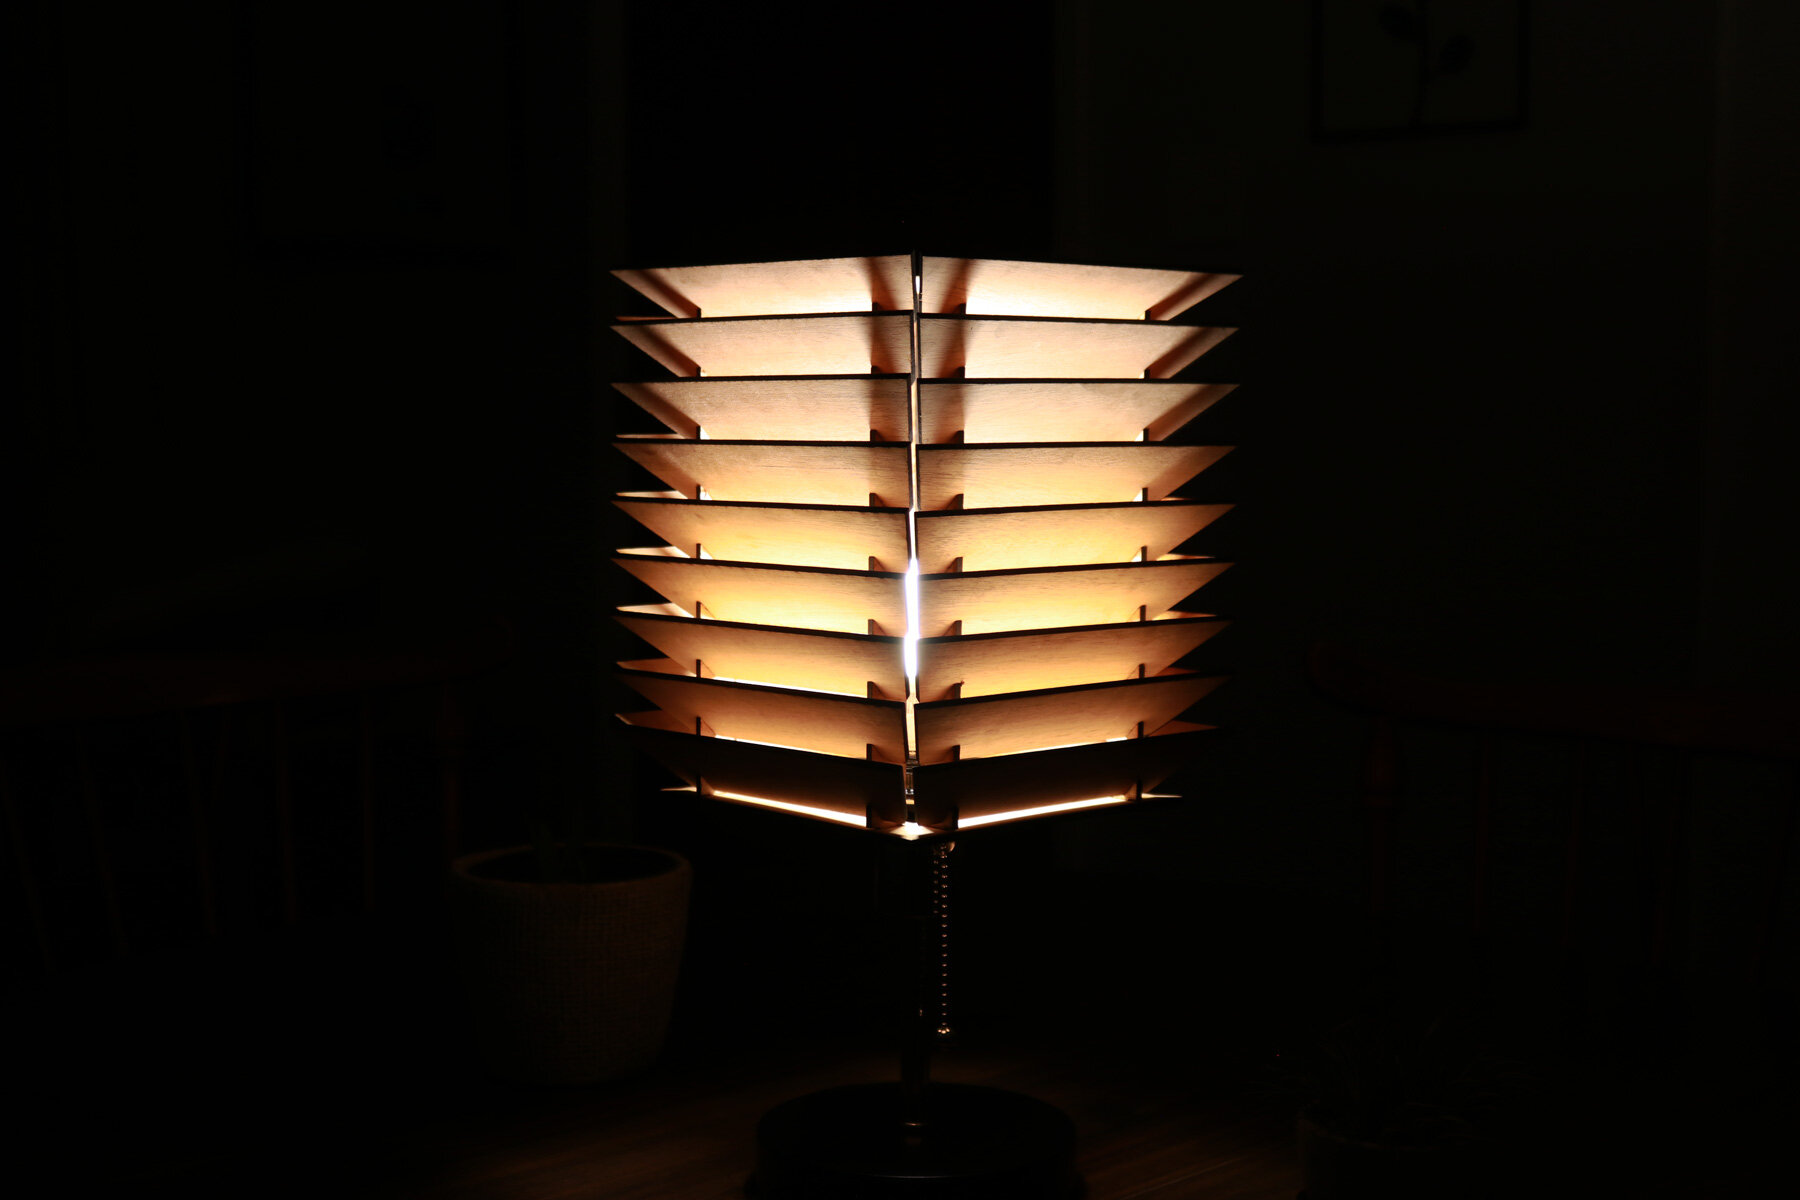
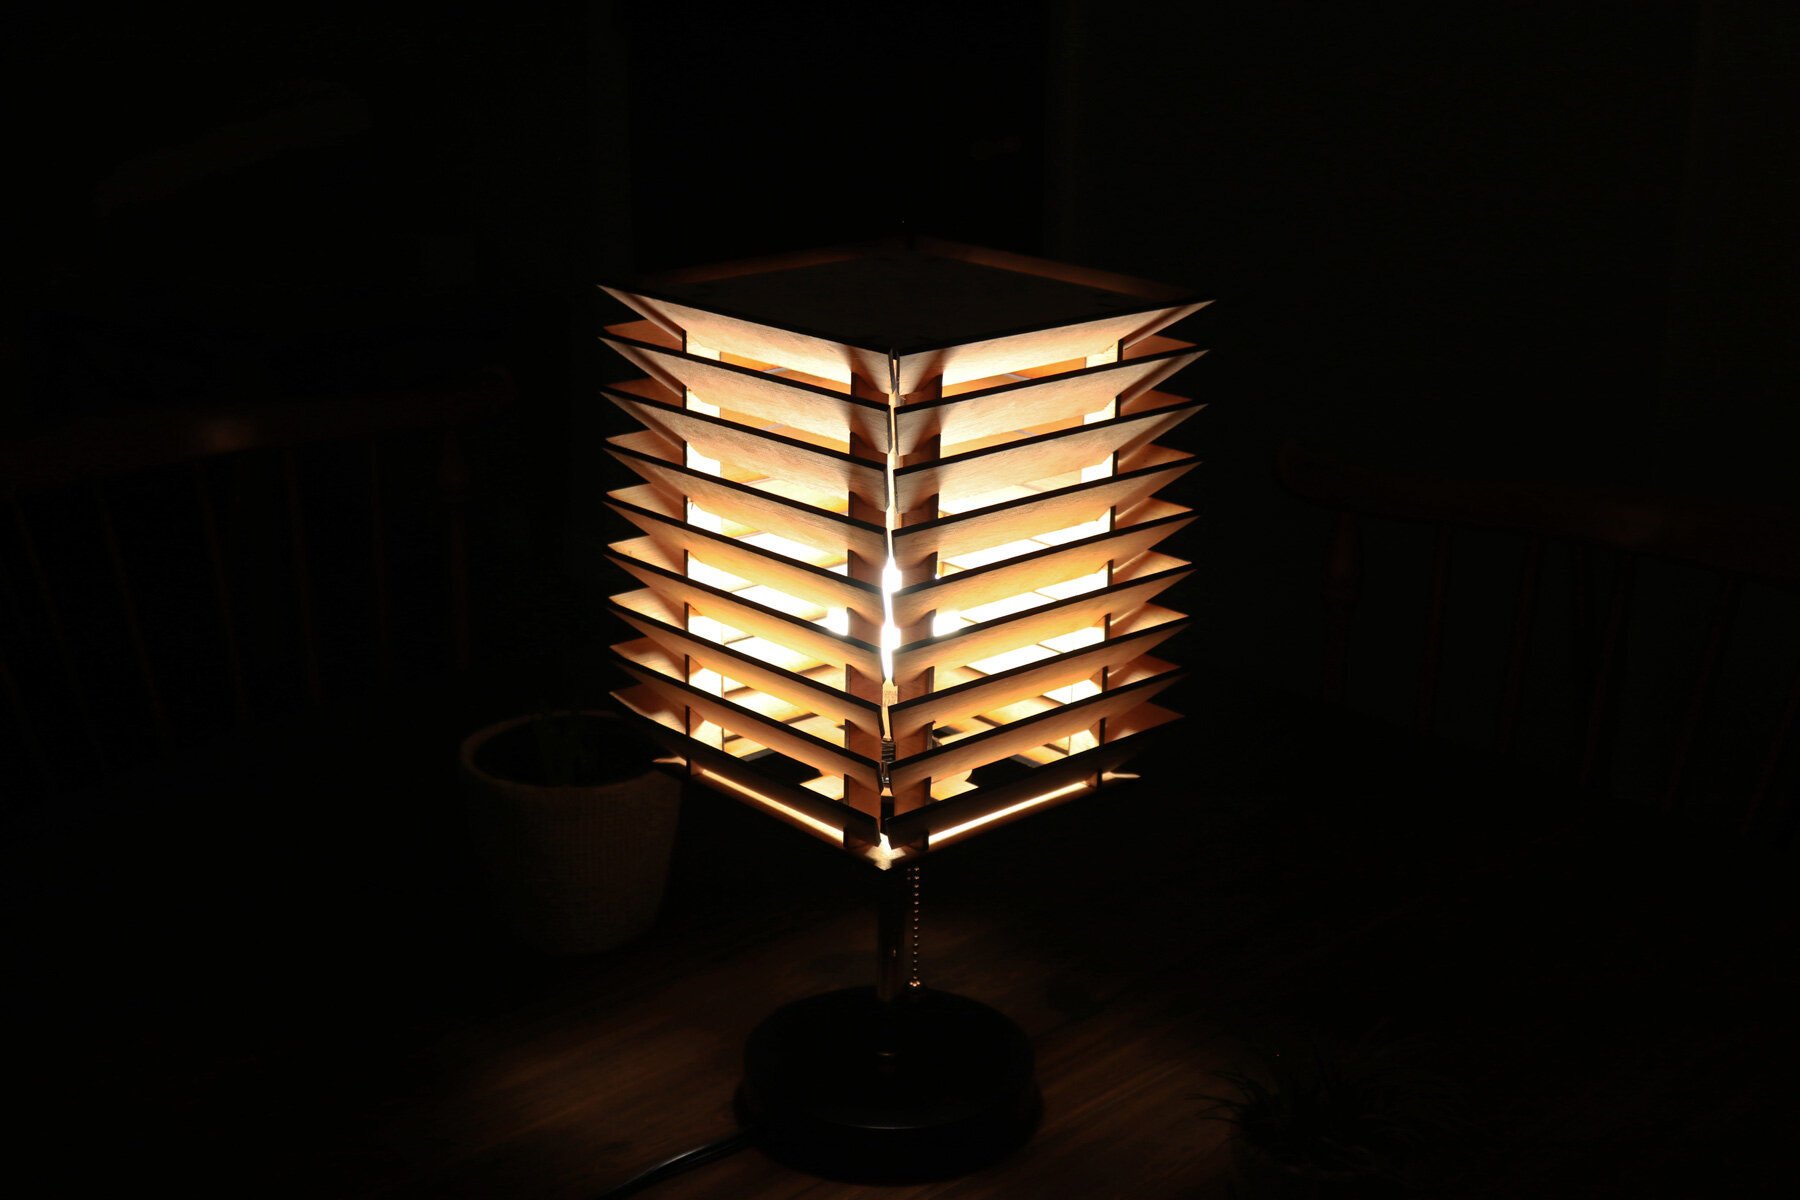
The exterior of the building is a series of inverted pyramids that stack into one another to mimic the inspiration for its exterior form; a crown. Using that design feature as the concept for the wood stacked pyramid light, I developed a series of inverted pyramids that would reflect the warm colored light from a source at the center towards the ceiling of the space. It would produce a warm glow from the indirect light entering the space and set a relaxing mood.
Referring to projects that I admire and building on the specific elements within my own designs has been a great way to continue exploring design styles that I wouldn’t have considered before. Finding precedents that align with our ideas of design and turning them into case studies is one of the best ways that I’ve found to improve my design skills and work towards finding my own style.
Process
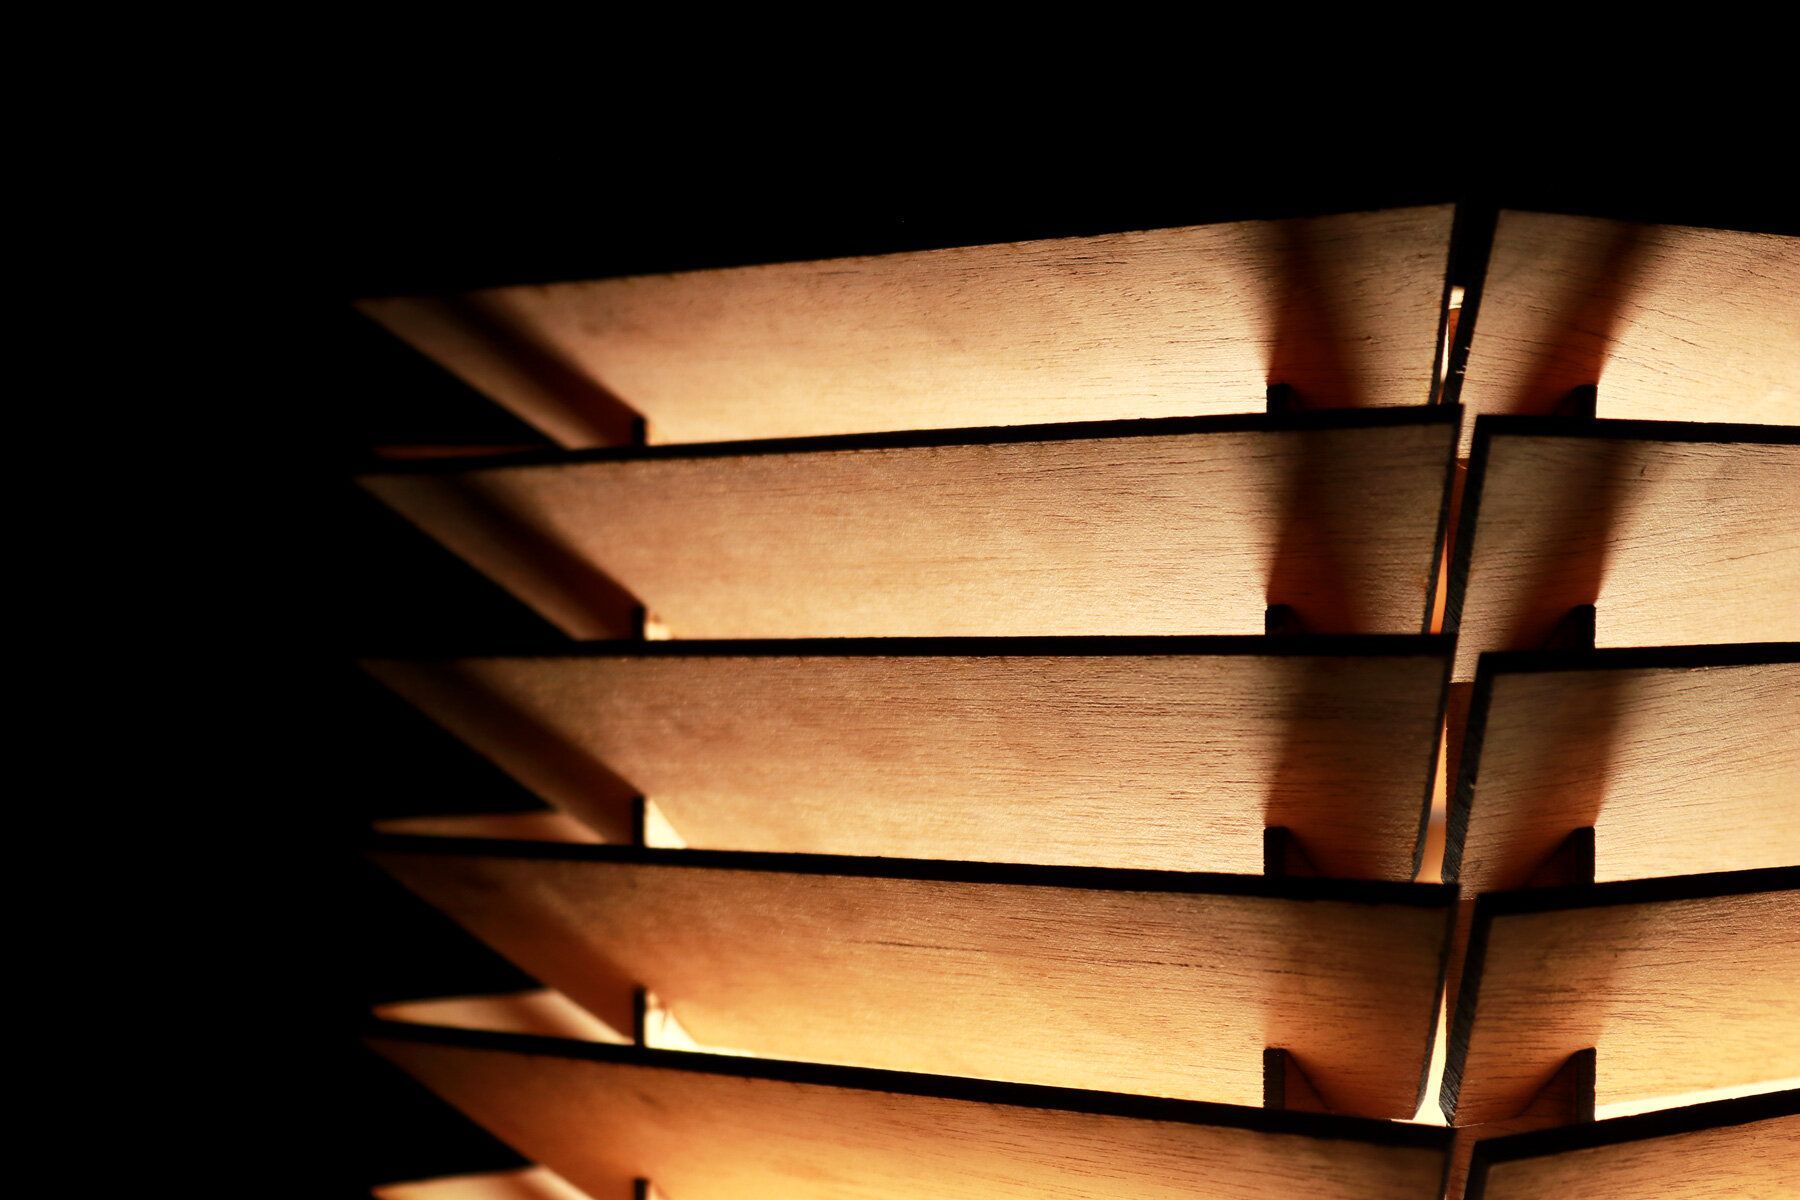
This project was designed in a software called Rhinoceros where I started by modeling the square base and top of the light. The square base has a circle cut out at the center where the extended socket of the table lamp base will be inserted and clamped into place with the nut. Several voids were cut out around the base piece to allow some of the light to pass through.
Around the perimeter of the base, there are 2 rectilinear cutouts at the corners of the piece for the vertical posts that will be inserted into the joint and glued in place. These vertical posts have finger joints cut out of them at a 45-degree angle spaced at regular intervals. These finger joints will lock into the finger joints of the trapezoidal exterior pieces and lock them into place. If the pieces are not friction fit together, I’ll add a dab of wood glue to hold them in place. The very top piece of the light fixture is a solid sheet of mahogany plywood with the same rectilinear cutouts as the base at the corners to holds the top of the vertical pieces in place.
After the design of the stacked pyramid light was complete, I efficiently organized them on full sheets of mahogany plywood that was cut down to fit in my Glowforge laser cutter. I loaded the plywood into the laser cutter and started cutting every piece. This process didn’t take long because there weren’t any special markings or engravings on the pieces. This wasn’t necessary because there weren’t many differences between the pieces.
Once the pieces were cut, I brought the pieces over to my work table and started the assembly process by inserting the finger joints of the trapezoidal shaped pieces into the finger joints of the vertical posts and locking them into place. This process required very light taps from a deadblow mallet to hit the pieces into the place and get them to be friction fit.
With all of the trapezoidal pieces finger jointed onto the vertical posts, I aligned the pieces over the rectilinear cutouts and realized that in my 3D model of the light, I didn’t fully overlap the finger joints of the trapezoidal pieces with the vertical posts, which would’ve shifted the location of the rectilinear cutouts on the square base and top. I quickly modified the 3D model, exported the pieces, cut them, and returned to the process.
To finish the assembly, I took one full panel, aligned the vertical posts with the rectilinear cutouts on the base, and tapped them into place with my deadblow hammer. This didn’t take much effort and each of the pieces were friction fit. I repeated this step with the remaining 3 panels. Lastly, I installed the light on the table lamp base, clamped it in place with the nut on the extended socket, and installed the light bulb. Then, I took the top piece that caps off the stacked pyramid light, aligned the vertical posts with the rectilinear cutouts, and lightly tapped them together with my deadblow hammer.